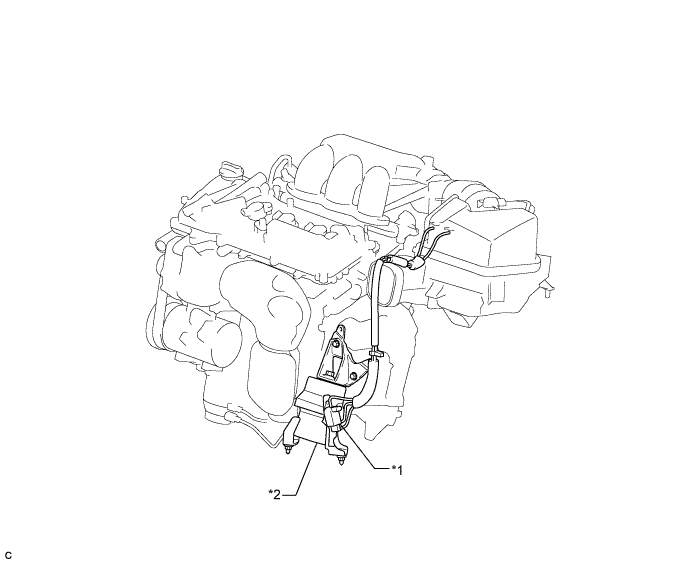
| *1 | Duty Vacuum Switching Valve (for Active Control Engine Mount) | *2 | Front Engine Mounting Insulator Assembly |
SFI SYSTEM > Active Control Engine Mount System |
| *1 | Duty Vacuum Switching Valve (for Active Control Engine Mount) | *2 | Front Engine Mounting Insulator Assembly |
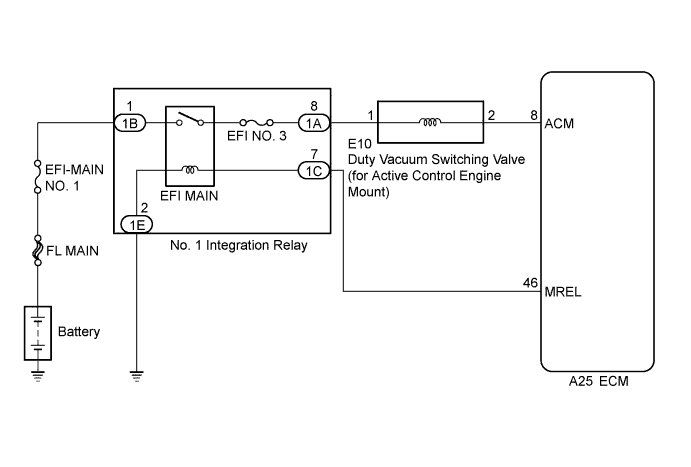
| 1.CHECK VACUUM HOSES |
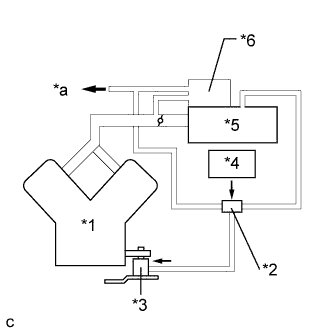 |
Check the air and vacuum hoses for looseness, disconnection and blockage.
| *1 | Engine |
| *2 | Duty Vacuum Switching Valve (for Active Control Engine Mount) |
| *3 | Front Engine Mounting Insulator Assembly |
| *4 | ECM |
| *5 | Air Cleaner |
| *6 | Vacuum Tank |
| *a | to Vacuum Switching Valve (for Air Intake Control Valve) |
|
| ||||
| OK | |
 |
| 2.CHECK VACUUM |
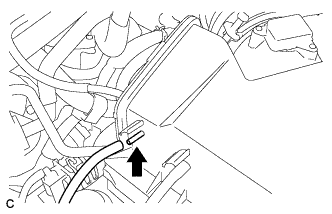 |
Disconnect the vacuum hose from the air cleaner cap.
Start the engine.
Check that the disconnected port located on the vacuum tank applies suction to your finger.
|
| ||||
| OK | |
|
| 3.INSPECT DUTY VACUUM SWITCHING VALVE (FOR ACTIVE CONTROL ENGINE MOUNT) (OPERATION) |
Inspect the duty vacuum switching valve (for active control engine mount) operation .
|
| ||||
| OK | |
|
| 4.INSPECT DUTY VACUUM SWITCHING VALVE (FOR ACTIVE CONTROL ENGINE MOUNT) (RESISTANCE) |
Inspect the duty vacuum switching valve (for active control engine mount) resistance .
|
| ||||
| OK | |
|
| 5.INSPECT FRONT ENGINE MOUNTING INSULATOR ASSEMBLY |
Inspect the front engine mounting insulator assembly (Click here).
|
| ||||
| OK | |
|
| 6.CHECK TERMINAL VOLTAGE (POWER SOURCE OF DUTY VACUUM SWITCHING VALVE (FOR ACTIVE CONTROL ENGINE MOUNT)) |
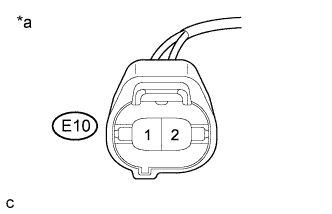 |
Disconnect the duty vacuum switching valve (for active control engine mount) connector.
Turn the engine switch on (IG).
Measure the voltage according to the value(s) in the table below.
| Tester Connection | Switch Condition | Specified Condition |
| E10-1 - Body ground | Engine switch on (IG) | 11 to 14 V |
| *a | Front view of wire harness connector (to Duty Vacuum Switching Valve (for Active Control Engine Mount)) |
|
| ||||
| OK | |
|
| 7.CHECK HARNESS AND CONNECTOR (DUTY VACUUM SWITCHING VALVE (FOR ACTIVE CONTROL ENGINE MOUNT) - ECM) |
Disconnect the duty vacuum switching valve (for active control engine mount) connector.
Disconnect the ECM connector.
Measure the resistance according to the value(s) in the table below.
| Tester Connection | Condition | Specified Condition |
| E10-2 - A25-8 (ACM) | Always | Below 1 Ω |
| E10-2 or A25-8 (ACM) - Body ground | Always | 10 kΩ or higher |
|
| ||||
| OK | ||
 | ||
| ||
| 8.CHECK HARNESS AND CONNECTOR (DUTY VACUUM SWITCHING VALVE (FOR ACTIVE CONTROL ENGINE MOUNT) - NO. 1 INTEGRATION RELAY) |
Disconnect the duty vacuum switching valve (for active control engine mount) connector.
Remove the No. 1 integration relay from the engine room relay block and junction block assembly.
Measure the resistance according to the value(s) in the table below.
| Tester Connection | Condition | Specified Condition |
| E10-1 - 1A-8 | Always | Below 1 Ω |
| E10-1 or 1A-8 - Body ground | Always | 10 kΩ or higher |
|
| ||||
| OK | ||
| ||
| ||

