 |
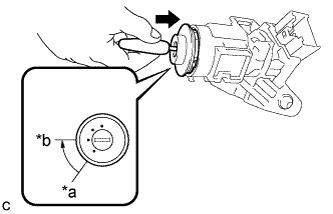
Make sure that the ignition switch lock cylinder assembly is in the ACC position.
| *a | LOCK |
| *b | ACC |
UNLOCK WARNING SWITCH > INSTALLATION |
| 1. INSTALL UNLOCK WARNING SWITCH ASSEMBLY |
Engage the 2 claws and install the unlock warning switch assembly to the steering column upper bracket.
Connect the connector.
| 2. ALIGN FRONT WHEELS FACING STRAIGHT AHEAD |
| 3. INSPECT STEERING WHEEL CENTER POINT |
| 4. INSTALL IGNITION SWITCH LOCK CYLINDER ASSEMBLY |
|
Make sure that the ignition switch lock cylinder assembly is in the ACC position.
| *a | LOCK |
| *b | ACC |
Install the ignition switch lock cylinder assembly to the steering column upper bracket assembly.
Make sure that the ignition switch lock cylinder assembly is securely installed.
| 5. INSTALL TRANSPONDER KEY AMPLIFIER |
Connect the connector to the transponder key amplifier.
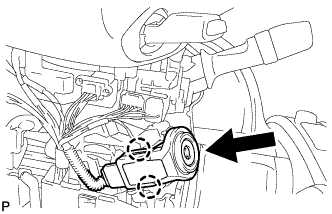 |
Engage the 2 claws to install the transponder key amplifier.
| 6. INSTALL UPPER STEERING COLUMN COVER |
Engage the 2 claws to install the upper steering column cover.
Engage the 4 clips and 2 guides to install the instrument cluster finish panel to the upper steering column cover.
| 7. INSTALL LOWER STEERING COLUMN COVER |
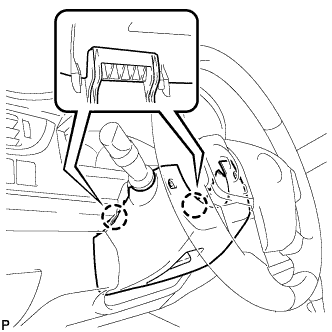 |
Engage the 2 claws.
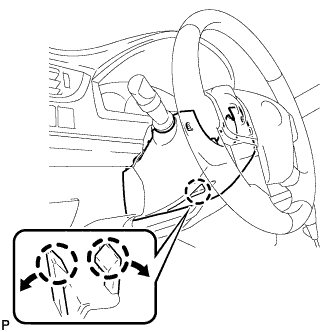 |
Engage the 2 claws.
Turn the steering wheel assembly to the left to install the screw.
Turn the steering wheel assembly to the right to install the lower steering column cover with screw.
| 8. CONNECT CABLE TO NEGATIVE BATTERY TERMINAL |