 |
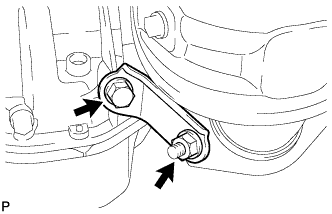
Remove the bolt, nut and manifold stay.
CYLINDER HEAD GASKET > REMOVAL |
| 1. REMOVE TIMING CHAIN COVER SUB-ASSEMBLY |
| 2. REMOVE MANIFOLD STAY |
|
Remove the bolt, nut and manifold stay.
| 3. REMOVE NO. 2 MANIFOLD STAY |
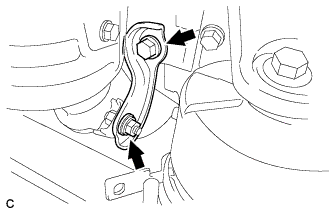 |
Remove the bolt, nut and No. 2 manifold stay.
| 4. REMOVE EGR INLET EXHAUST MANIFOLD PLATE (for PZEV) |
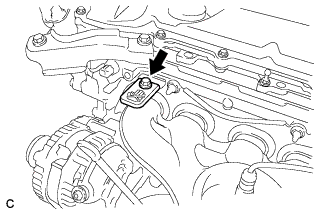 |
Remove the bolt and EGR inlet exhaust manifold plate.
| 5. REMOVE NO. 1 EXHAUST MANIFOLD HEAT INSULATOR (except PZEV) |
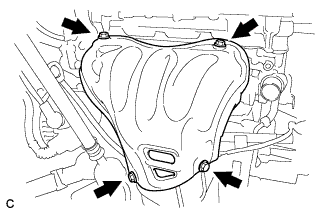 |
Remove the 4 bolts and No. 1 exhaust manifold heat insulator.
| 6. REMOVE EXHAUST MANIFOLD CONVERTER SUB-ASSEMBLY |
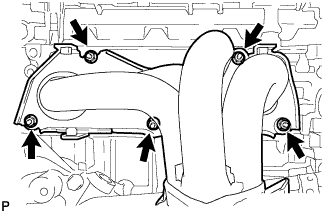 |
Remove the 5 nuts and exhaust manifold converter sub-assembly (except PZEV).
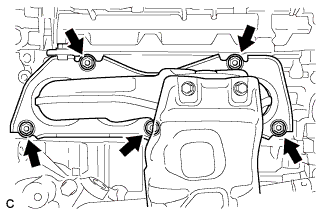 |
Remove the 5 nuts and exhaust manifold converter sub-assembly (for PZEV).
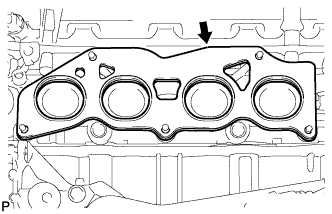 |
Remove the exhaust manifold to head gasket (except PZEV).
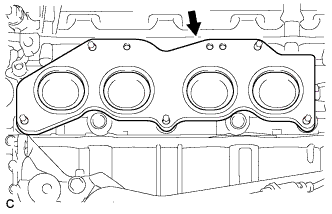 |
Remove the exhaust manifold to head gasket (for PZEV).
| 7. REMOVE THROTTLE WITH MOTOR BODY ASSEMBLY |
| 8. REMOVE VACUUM SWITCHING VALVE ASSEMBLY (for ACIS) |
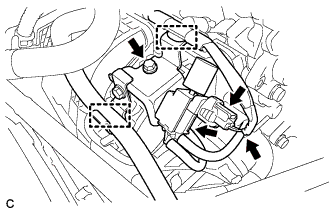 |
Disconnect the union to connector tube hose and wire harness clamp.
Disconnect the 2 vacuum hoses and connector.
Remove the bolt and vacuum switching valve assembly.
| 9. REMOVE FUEL DELIVERY PIPE SUB-ASSEMBLY |
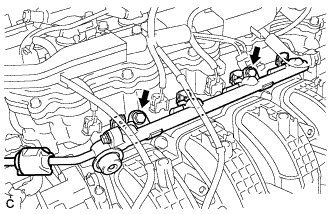 |
Remove the 2 bolts, and then remove the fuel delivery pipe together with the 4 fuel injectors.
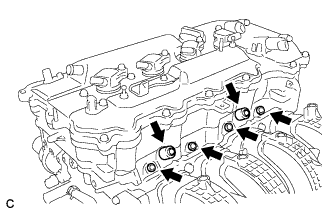 |
Remove the 2 fuel delivery spacers from the cylinder head.
Remove the 4 injector vibration insulators from the cylinder head.
| 10. DISCONNECT NO. 2 VENTILATION HOSE |
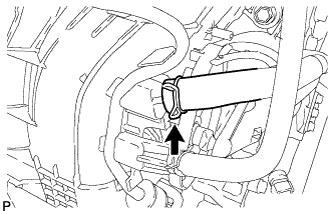 |
Disconnect the No. 2 ventilation hose from the intake manifold.
| 11. REMOVE INTAKE MANIFOLD |
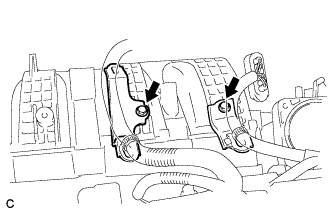 |
Remove the 2 bolts and 2 wire harness clamp brackets.
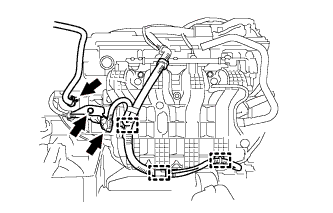 |
Disconnect the fuel vapor feed hose.
Disconnect the 3 wire harness clamps and connector.
Remove the bolt and wire harness clamp bracket.
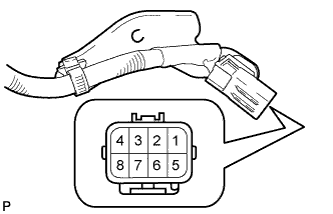 |
Apply battery voltage to the terminals of the connector to close the tumble control valves.
| Tester Connection | Specified Condition |
| Positive (+) battery voltage applied to terminal 8 (M-), and negative (-) battery voltage applied to terminal 4 (M+) | Open → Closed |
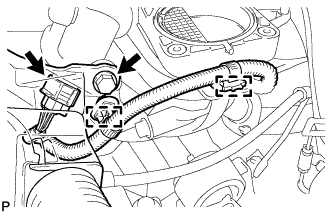 |
Remove the bolt and separate the wire harness.
Disconnect the 2 wire harness clamps and intake air control valve actuator connector.
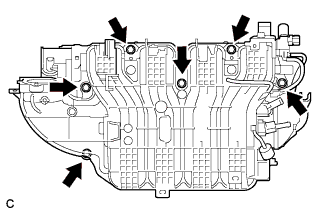 |
Remove the 6 bolts and intake manifold.
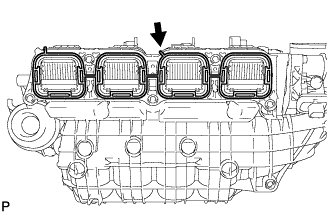 |
Remove the intake manifold gasket from the intake manifold.
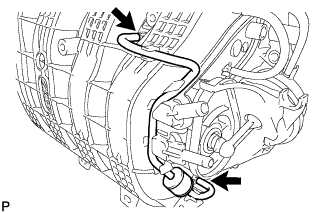 |
Disconnect the 2 vacuum hoses from the intake manifold and remove the No. 1 check valve.
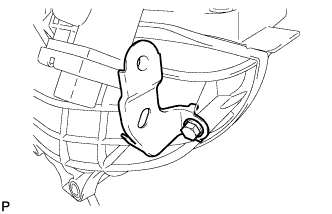 |
Remove the bolt and wire harness clamp bracket.
| 12. SET NO. 1 CYLINDER TO TDC/COMPRESSION |
Temporarily install the crankshaft pulley bolt.
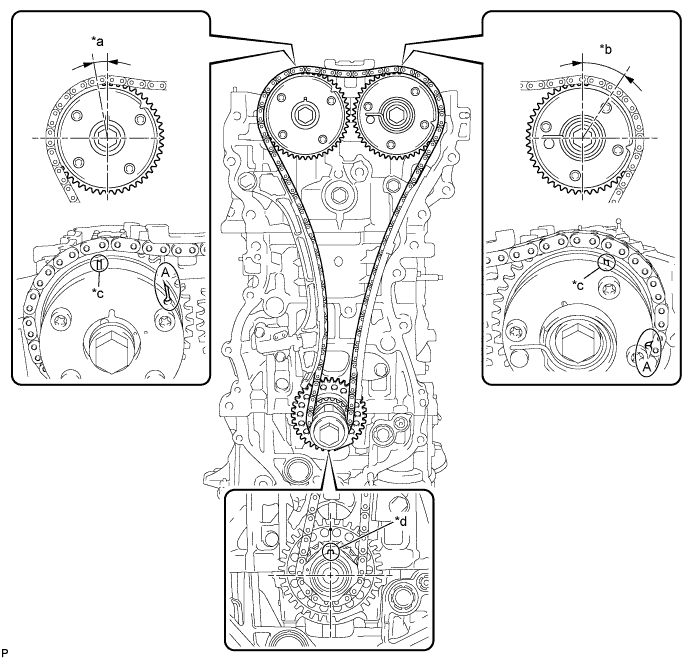
| *a | Approximately 7° | *b | Approximately 32° |
| *c | Timing Mark | *d | Key |
Rotate the crankshaft clockwise so that the timing marks on the crankshaft timing gear and camshaft timing gears are as shown in the illustration.
Remove the crankshaft pulley bolt.
| 13. REMOVE TIMING CHAIN GUIDE |
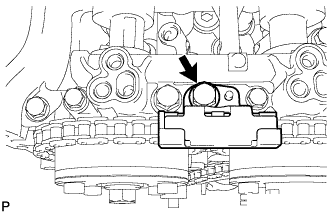 |
Remove the bolt and timing chain guide.
| 14. REMOVE NO. 1 CHAIN TENSIONER ASSEMBLY |
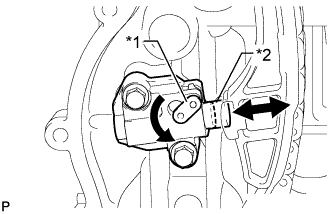 |
Allow the plunger to extend slightly, and then rotate the stopper plate counterclockwise to release the lock. Once the lock is released, push the plunger into the tensioner.
| *1 | Stopper Plate |
| *2 | Plunger |
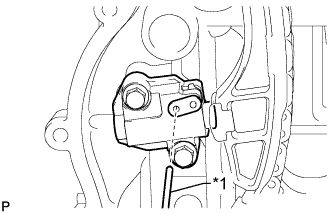 |
Move the stopper plate clockwise to set the lock, and insert a pin into the stopper plate hole.
| *1 | Pin |
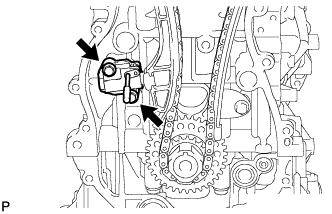 |
Remove the 2 bolts, chain tensioner and gasket.
| 15. REMOVE CHAIN TENSIONER SLIPPER |
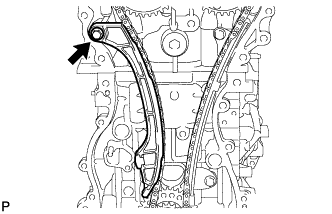 |
Remove the bolt and chain tensioner slipper.
| 16. REMOVE CHAIN SUB-ASSEMBLY |
Remove the chain sub-assembly.
| 17. REMOVE NO. 1 CHAIN VIBRATION DAMPER |
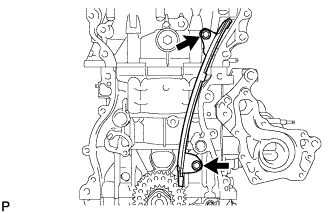 |
Remove the 2 bolts and chain vibration damper.
| 18. REMOVE CAMSHAFT TIMING GEAR ASSEMBLY |
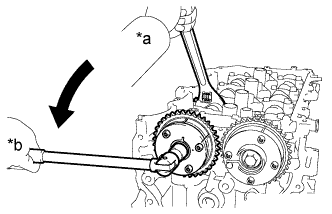 |
Hold the hexagonal portion of the camshaft with a wrench and remove the bolt and camshaft timing gear assembly.
| *a | Hold |
| *b | Turn |
| 19. REMOVE CAMSHAFT TIMING EXHAUST GEAR ASSEMBLY |
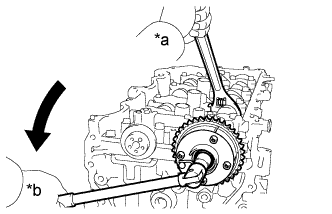 |
Hold the hexagonal portion of the camshaft with a wrench and remove the bolt and camshaft timing exhaust gear assembly.
| *a | Hold |
| *b | Turn |
| 20. REMOVE CAMSHAFT HOUSING SUB-ASSEMBLY |
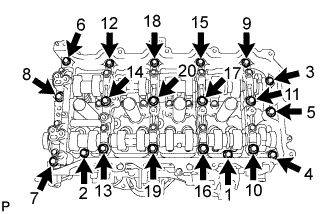 |
Uniformly loosen and remove the 20 bearing cap bolts in the sequence shown in the illustration.
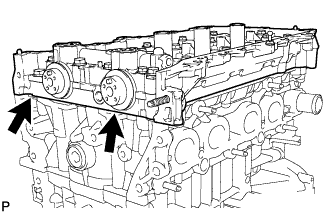 |
Remove the camshaft housing by prying between the cylinder head sub-assembly and camshaft housing sub-assembly with a screwdriver.
| 21. REMOVE CAMSHAFT BEARING CAP |
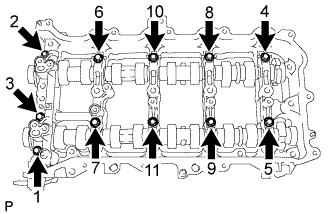 |
Remove the 11 bearing cap bolts in the sequence shown in the illustration.
Remove the 5 bearing caps.
| 22. REMOVE OIL CONTROL VALVE FILTER |
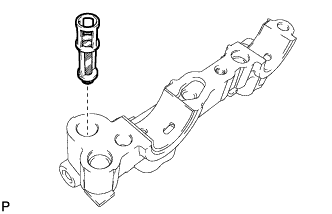 |
Remove the oil control valve filter from the No. 1 camshaft bearing cap.
| 23. REMOVE NO. 1 CAMSHAFT BEARING |
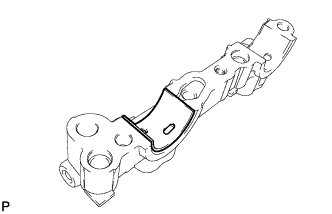 |
Remove the No. 1 camshaft bearing.
| 24. REMOVE CAMSHAFT |
Remove the camshaft and No. 2 camshaft.
| 25. REMOVE NO. 2 CAMSHAFT BEARING |
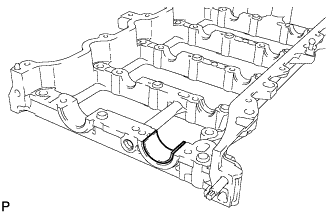 |
Remove the No. 2 camshaft bearing.
| 26. REMOVE NO. 1 VALVE ROCKER ARM SUB-ASSEMBLY |
Remove the 16 valve rocker arms from the cylinder head sub-assembly.
| 27. REMOVE VALVE LASH ADJUSTER ASSEMBLY |
Remove the 16 valve lash adjusters from the cylinder head sub-assembly.
| 28. REMOVE VALVE STEM CAP |
Remove the 16 valve stem caps from the cylinder head sub-assembly.
| 29. REMOVE CYLINDER HEAD SUB-ASSEMBLY |
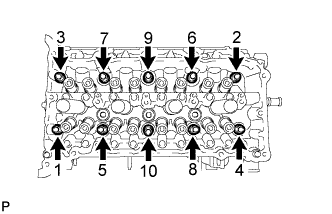 |
Using a 10 mm bi-hexagon wrench, uniformly loosen the 10 bolts in the sequence shown in the illustration. Remove the 10 cylinder head bolts and plate washers.
Remove the cylinder head sub-assembly.
| 30. REMOVE CYLINDER HEAD GASKET |
Remove the cylinder head gasket from the cylinder block.