AUDIO AND VISUAL SYSTEM (for Radio and Display Type with Intuitive Parking Assist System) > OPERATION CHECK |
| CHECK HARD DISK DRIVE |
Enter diagnostic mode (Click here).
![]() |
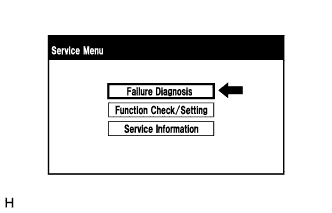
Select "Failure Diagnosis" from the "Service Menu" screen.
![]() |
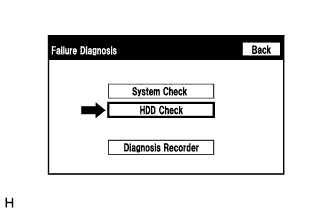
Select "HDD Check" from the "Failure Diagnosis" screen.
![]() |
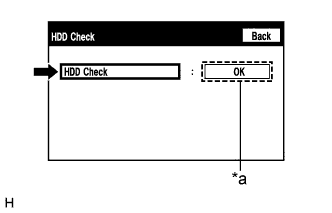
HDD Check
Select "HDD Check" to start the HDD check.
Check that the result is displayed when the HDD check is completed.
| Display (Result) | Description |
| Checking | Check is in progress |
| OK | Hard disk drive is normal |
| NG | Hard disk drive is malfunctioning |
| *a | Result |
| CHECK PANEL & STEERING SWITCH |
Enter diagnostic mode (Click here).
![]() |
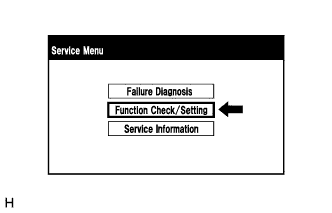
Select "Function Check/Setting" from the "Service Menu" screen.
![]() |
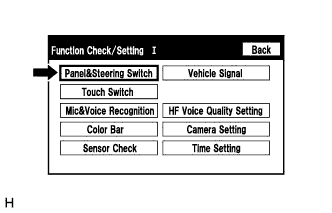
Select "Panel & Steering Switch" from the "Function Check/Setting I" screen.
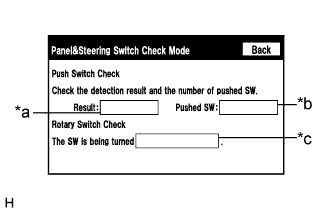
Panel & Steering Switch Check Mode
![]() |
Operate each switch and check that the switch conditions are correctly displayed.
| Display | Content |
| *a: Switch condition | "Pushed" is displayed when any switch is pushed |
| *b: Number of switches pushed |
|
| *c: Rotary switch direction | Direction of rotary switch is displayed |
| CHECK TOUCH SWITCH |
Enter diagnostic mode (Click here).
![]() |
Select "Function Check/Setting" from the "Service Menu" screen.
![]() |
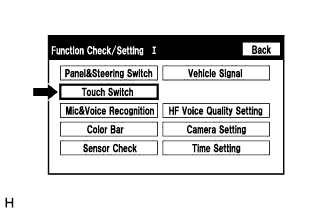
Select "Touch Switch" from the "Function Check/Setting I" screen.
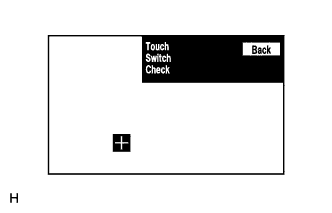
Touch Switch Check
![]() |
Touch the display anywhere in the open area to perform the check when the "Touch Switch Check" screen is displayed.
| CHECK MIC & VOICE RECOGNITION |
Enter diagnostic mode (Click here).
![]() |
Select "Function Check/Setting" from the "Service Menu" screen.
![]() |
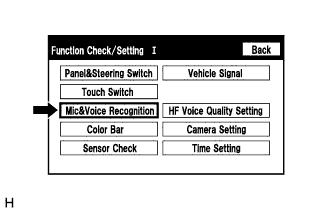
Select "Mic & Voice Recognition" from the "Function Check/Setting I" screen.
![]() |
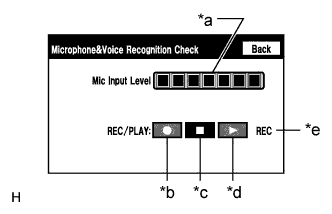
Microphone & Voice Recognition Check
| Display | Content |
| *a: Microphone input level meter | Monitors the microphone input level every 0.1 seconds and displays the results in 8 different levels. |
| *b: Recording switch | Starts recording. |
| *c: Stop switch | Stops recording and playing. |
| *d: Play switch | Plays the recorded voice. |
| *e: Recording indicator | Comes on while recording. |
When speaking into the microphone, check that the microphone input level meter changes according to the input level.
Push the recording switch and perform voice recording.
Check that the recording indicator remains on while recording and that the recording can be played normally.
| CHECK COLOR BAR |
Enter diagnostic mode (Click here).
![]() |
Select "Function Check/Setting" from the "Service Menu" screen.
![]() |
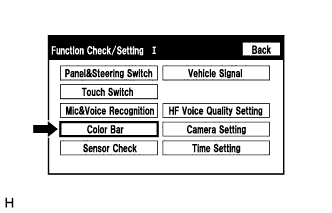
Select "Color Bar" from the "Function Check/Setting I" screen.
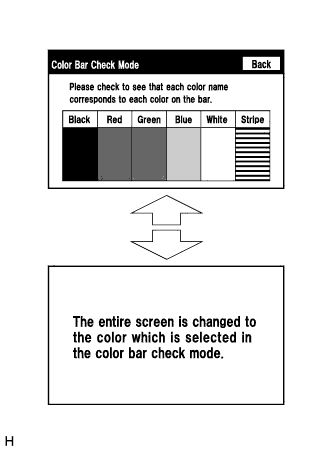
Color Bar Check Mode
![]() |
Select a color bar from the "Color Bar Check Mode" screen.
Check the display color.
| CHECK GPS & VEHICLE SENSORS |
Enter diagnostic mode (Click here).
![]() |
Select "Function Check/Setting" from the "Service Menu" screen.
![]() |
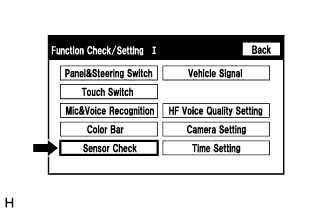
Select "Sensor Check" from the "Function Check/Setting I" screen.
![]() |
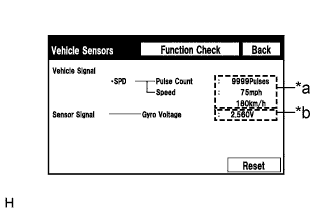
Vehicle Sensors
| Display | Content |
| *a: Vehicle signal | Vehicle speed signal condition is displayed. |
| *b: Sensor signal | Gyro sensor output condition is displayed. |
Check all the signals and sensors when vehicle signal information is displayed.
| CHECK VEHICLE SIGNAL |
Enter diagnostic mode (Click here).
![]() |
Select "Function Check/Setting" from the "Service Menu" screen.
![]() |
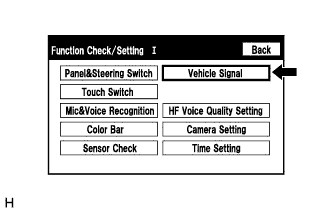
Select "Vehicle Signal" from the "Function Check/Setting I" screen.
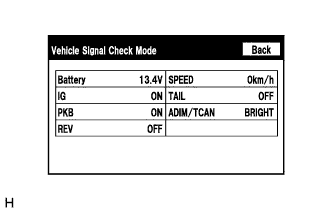
Vehicle Signal Check Mode
![]() |
When the "Vehicle Signal Check Mode" screen is displayed, check all the vehicle signal conditions.
| Display | Content |
| Battery | Battery voltage is displayed. |
| IG | Ignition switch ON/OFF state is displayed. |
| PKB | Parking brake ON/OFF state is displayed. |
| REV | Reverse signal ON/OFF state is displayed. |
| SPEED | Vehicle speed is displayed in km/h. |
| TAIL | Tail signal (Light control switch) ON/OFF state is displayed. |
| ADIM/TCAN | Brightness state DIM (with) / BRIGHT (without) is displayed. |
| CHECK HANDS-FREE VOICE QUALITY AND VOLUME SETTING |
Enter diagnostic mode (Click here).
![]() |
Select "Function Check/Setting" from the "Service Menu" screen.
![]() |
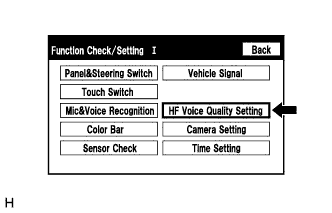
Select "HF Voice Quality Setting" from the "Function Check/Setting I" screen.
![]() |
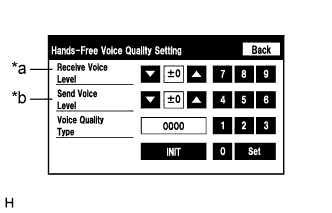
Hands-Free Voice Quality Setting (Receive/Send Voice Level adjustment)
| Display | Content |
| *a: Receive voice level adjustment | Setting for the voice level received from "Bluetooth" compatible phones. |
| *b: Send voice level adjustment | Setting for the voice level sent from "Bluetooth" compatible phones. |
If the voice level is low, press the up button, and if the voice level is loud, press the down button.
![]() |
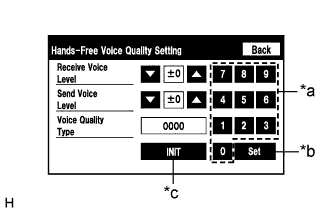
Hands-Free Voice Quality Setting (Voice Quality Type adjustment)
| *a | Numeric keypad |
| *b | Setting button |
| *c | Reset button |
If necessary, refer to the table below to adjust the voice quality type with the numeric keypad.
When adjusting the settings, use the number pad on the screen to input the voice quality type according to the table.
| Parameter | Target Phenomenon | Voice Quality Type | Positive Effect of Changing Voice Quality | Negative Effect of Changing Voice Quality |
| A (Noise) | The change in background noise the other party hears becomes unpleasant. | 1000 | The change in background noise the other party hears is reduced. | Background noise when not talking becomes large. |
| B (Noise) | The volume of the noise the other party hears temporarily becomes large. | 2000 | The temporary noise is reduced. | The volume of voice may drop temporarily. |
| C (Echo) | The other party hears weak echoes. | 0100 | The amount of echo is reduced (low level). | Sound quality of the other party deteriorates (low level). |
| D (Echo) | The other party hears strong echoes. | 0200 | The amount of echo is reduced (high level). | Sound quality of the other party deteriorates (high level). |
| E (Quality) | The other party hears harsh noises. | 0010 | Sound the other party hears becomes soft. | Sound the other party hears becomes muffled. |
| F (Quality) | You hear harsh noises. | 0020 | Sound you hear becomes soft. | Sound you hear becomes muffled. |
| Parameter | Target Phenomenon | Voice Quality Type | Positive Effect of Changing Voice Quality | Negative Effect of Changing Voice Quality |
| A+C | The change in background noise the other party hears becomes unpleasant and the other party hears weak echoes. | 1100 |
|
|
| A+D | The change in background noise the other party hears becomes unpleasant and the other party hears strong echoes. | 1200 |
|
|
| B+C | The volume of the noise the other party hears temporarily becomes large and the other party hears weak echoes. | 2100 |
|
|
| B+D | The volume of the noise the other party hears temporarily becomes large and the other party hears strong echoes. | 2200 |
|
|
| C+E | The other party hears weak echoes and harsh noises. | 0110 |
|
|
| C+F | The other party hears weak echoes and you hear harsh noises. | 0120 |
|
|
| CHECK SOFTWARE ERROR HISTORY |
Check software error history.
Connect the Techstream to the DLC3.
Turn the ignition switch to ON.
Turn the Techstream on.
Enter the following menus: Body Electrical / Navigation System/ Utility / Software Error History.
When an item is stored for Software Error History, record it before repairing the navigation ECU sub-assembly.
| Error Description | Trigger | Detail |
| Software Reset | Navi Microcomputer | Hexadecimal Number |
| Audio Microcomputer | ||
| CAN Microcomputer | ||
| No Video Signal | Front Monitor | |
| Rear Monitor | ||
| MOST Cold Restart | Always |
Clear software error history.
When DTCs are cleared using any of the following operations, Software Error History will be cleared as well (Click here).
| CHECK OPTICAL DISC ERROR HISTORY |
Check optical disc error history.
Connect the Techstream to the DLC3.
Turn the ignition switch to ON.
Turn the Techstream on.
Enter the following menus: Body Electrical / Navigation System/ Utility / Optical Disc Error History.
When an item is stored for Optical Disc Error History, record it before proceeding with troubleshooting.
| Display | Content |
| Error Type | Displays the type of error. |
| Device | Displays the malfunctioning device. |
| Date | Displays the date and time that the malfunction occurred. |
| Error Type | Detection Condition | Action |
| Read Error | When a disc read error occurs. | Proceed to next suspected area shown in Problem Symptoms Table (Click here) |
| Disc damaged/up side down/dirty | When it is determined that any of the following is the cause of the disc read error:
| |
| Cannot determine disc type | An unsuitable disc is inserted. | |
| DPS error | When an error occurs while decoding MP3/WMA files. | |
| Some files are corrupt |
| |
| Some files cannot be found |
| |
| Copy protection violation | When a file with copyright protection that cannot be played back is played back. |
| Device | Component |
| DVD-P | Navigation ECU sub-assembly |
| CD-P | Not available |
| R-Seat DVD-P | Not available |
Clear optical disc error history.
When DTCs are cleared using any of the following operations, Optical Disc Error History will be cleared as well (Click here).