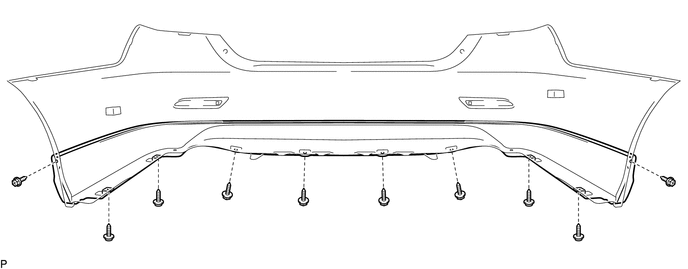
EXTERIOR PANELS / TRIM REAR BUMPER REASSEMBLY
PROCEDURE

 52023
1.INSTALL REAR BUMPER REINFORCEMENT SUB-ASSEMBLY (w/o TOYOTA Parking Assist-sensor System)
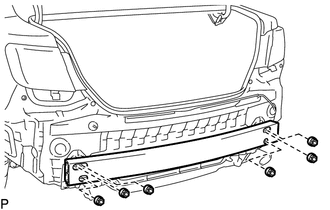
Install the rear bumper reinforcement sub-assembly with the 6 nuts.
- Torque:
- 61 N*m (622 kgf*cm, 45 ft.*lbf)
52023
2.INSTALL REAR BUMPER REINFORCEMENT SUB-ASSEMBLY (w/ TOYOTA Parking Assist-sensor System)
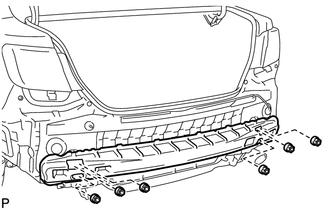
Install the rear bumper reinforcement sub-assembly with the 6 nuts.
- Torque:
- 61 N*m (622 kgf*cm, 45 ft.*lbf)
61648H
3.INSTALL WHEEL HOUSE REINFORCEMENT LH
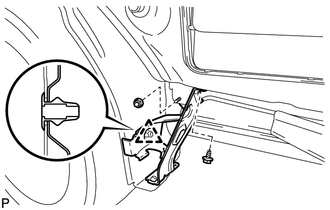
Install the clip.
Install the wheel house reinforcement LH with the screw and nut.
61647F
4.INSTALL WHEEL HOUSE REINFORCEMENT RH
- HINT:
-
Use the same procedure as for the LH side.
52576
5.INSTALL REAR BUMPER SIDE RETAINER LH
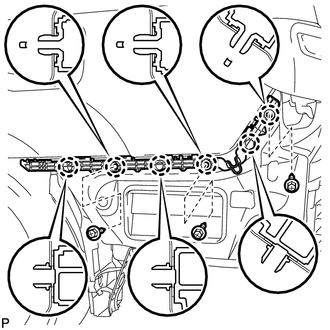
Engage the 6 claws.
Install the rear bumper side retainer LH with the 3 screws.
- Torque:
- 3.0 N*m (31 kgf*cm, 27 in.*lbf)
52575
6.INSTALL REAR BUMPER SIDE RETAINER RH
- HINT:
-
Use the same procedure as for the LH side.
89348A
7.INSTALL NO. 2 ULTRASONIC SENSOR RETAINER (w/ TOYOTA Parking Assist-sensor System)
89341A
8.INSTALL NO. 1 ULTRASONIC SENSOR (w/ TOYOTA Parking Assist-sensor System)
89348J
9.INSTALL ULTRASONIC SENSOR CLIP (w/ TOYOTA Parking Assist-sensor System)
10.INSTALL NO. 2 LUGGAGE ROOM WIRE (w/ TOYOTA Parking Assist-sensor System)
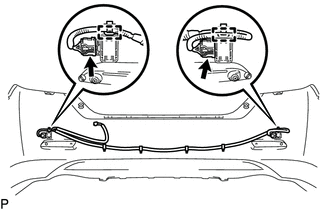
Connect the 2 connectors.
Engage the 2 clamps to install the No. 2 luggage room wire.
81920
11.INSTALL REFLEX REFLECTOR ASSEMBLY LH
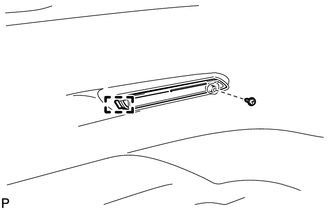
Engage the guide.
Install the reflex reflector assembly LH with the screw.
81910
12.INSTALL REFLEX REFLECTOR ASSEMBLY RH
- HINT:
-
Use the same procedure as for the LH side.
52463
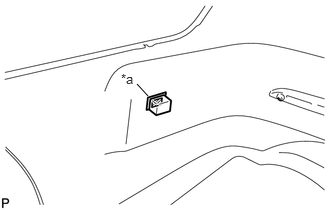
13.INSTALL REAR BUMPER PAD LH
Clean the rear bumper cover.
Remove any remaining double-sided tape from the rear bumper cover.
Wipe off any tape adhesive residue with cleaner.
Remove the release paper from a new rear bumper pad LH.
- HINT:
-
After removing the release paper, keep the exposed adhesive free from foreign matter.
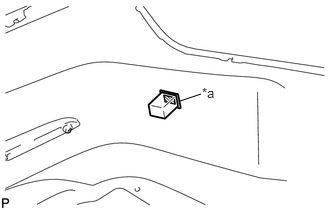
| *a | Line |

|
Double-sided Tape |
Install the rear bumper pad LH as shown in the illustration.
- HINT:
-
Install the rear bumper pad LH along the line marked on the rear bumper cover.
52462
14.INSTALL REAR BUMPER PAD RH
Clean the rear bumper cover.
Remove any remaining double-sided tape from the rear bumper cover.
Wipe off any tape adhesive residue with cleaner.
Remove the release paper from a new rear bumper pad RH.
- HINT:
-
After removing the release paper, keep the exposed adhesive free from foreign matter.
| *a | Line |
|
|
Double-sided Tape |
Install the rear bumper pad RH as shown in the illustration.
- HINT:
-
Install the rear bumper pad RH along the line marked on the rear bumper cover.
76872B
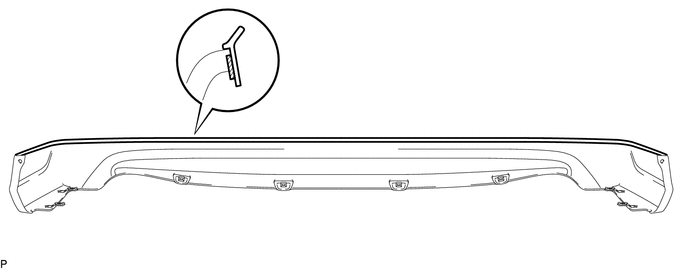
15.INSTALL REAR SPOILER CENTER PROTECTOR (w/ Rear Under Spoiler)
Clean the rear spoiler.
Remove any remaining double-sided tape from the rear spoiler.
Wipe off any tape adhesive residue with cleaner.
Remove the release paper from a new rear spoiler center protector.
- HINT:
-
After removing the release paper, keep the exposed adhesive free from foreign matter.
Install the rear spoiler center protector as shown in the illustration.
|
|
Double-sided Tape | - | - |
76875
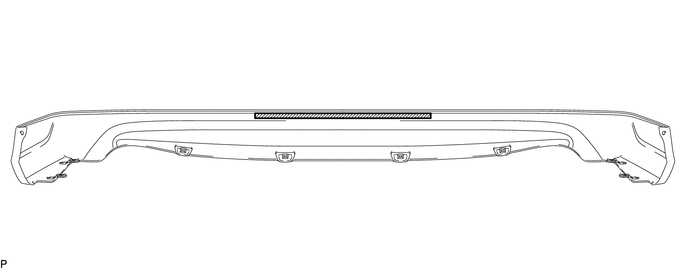
16.INSTALL NO. 4 REAR SPOILER PROTECTOR (w/ Rear Under Spoiler)
Clean the rear spoiler.
Remove any remaining double-sided tape from the rear spoiler.
Wipe off any tape adhesive residue with cleaner.
Remove the release paper from a new No. 4 rear spoiler protector.
- HINT:
-
After removing the release paper, keep the exposed adhesive free from foreign matter.
Install the No. 4 rear spoiler protector as shown in the illustration.
|
|
Double-sided Tape | - | - |
76895
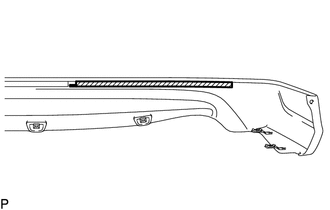
17.INSTALL NO. 5 REAR SPOILER PROTECTOR (w/ Rear Under Spoiler)
Clean the rear spoiler.
Remove any remaining double-sided tape from the rear spoiler.
Wipe off any tape adhesive residue with cleaner.
Remove the release paper from a new No. 5 rear spoiler protector.
- HINT:
-
After removing the release paper, keep the exposed adhesive free from foreign matter.
|
|
Double-sided Tape |
Install the No. 5 rear spoiler protector as shown in the illustration.
76874
18.INSTALL NO. 3 REAR SPOILER PROTECTOR (w/ Rear Under Spoiler)
- HINT:
-
Use the same procedure as for the No. 5 rear spoiler protector.
76896
19.INSTALL NO. 6 REAR SPOILER PROTECTOR (w/ Rear Under Spoiler)
Clean the rear spoiler.
Remove any remaining double-sided tape from the rear spoiler.
Wipe off any tape adhesive residue with cleaner.
Remove the release paper from a new No. 6 rear spoiler protector.
- HINT:
-
After removing the release paper, keep the exposed adhesive free from foreign matter.
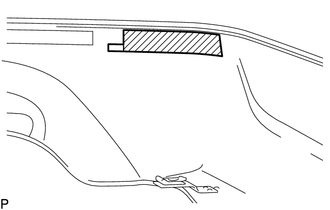
|
|
Double-sided Tape |
Install the No. 6 rear spoiler protector as shown in the illustration.
76873B
20.INSTALL NO. 2 REAR SPOILER PROTECTOR (w/ Rear Under Spoiler)
- HINT:
-
Use the same procedure as for the No. 6 rear spoiler protector.
76883A
21.INSTALL NO. 7 REAR SPOILER PROTECTOR (w/ Rear Under Spoiler)
Clean the rear spoiler.
Remove any remaining double-sided tape from the rear spoiler.
Wipe off any tape adhesive residue with cleaner.
Remove the release paper from a new No. 7 rear spoiler protector.
- HINT:
-
After removing the release paper, keep the exposed adhesive free from foreign matter.
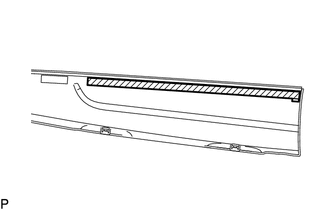
|
|
Double-sided Tape |
Install the No. 7 rear spoiler protector as shown in the illustration.
22.INSTALL NO. 1 REAR SPOILER PROTECTOR (w/ Rear Under Spoiler)
- HINT:
-
Use the same procedure as for the No. 7 rear spoiler protector.
76882
23.INSTALL NO. 1 REAR SPOILER SIDE PROTECTOR LH (w/ Rear Under Spoiler)
Clean the rear spoiler.
Remove any remaining double-sided tape from the rear spoiler.
Wipe off any tape adhesive residue with cleaner.
Remove the release paper from a new No. 1 rear spoiler side protector LH.
- HINT:
-
After removing the release paper, keep the exposed adhesive free from foreign matter.
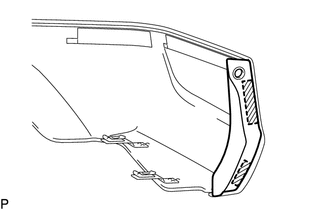
|
|
Double-sided Tape |
Install the No. 1 rear spoiler side protector LH as shown in the illustration.
76881
24.INSTALL NO. 1 REAR SPOILER SIDE PROTECTOR RH (w/ Rear Under Spoiler)
- HINT:
-
Use the same procedure as for the LH side.
25.INSTALL REAR LOWER SPOILER SUB-ASSEMBLY (w/ Rear Under Spoiler)
Clean the rear bumper cover.
Remove any remaining double-sided tape from the rear bumper cover.
Wipe off any tape adhesive residue with cleaner.
Remove each release paper.
- HINT:
-
After removing the release paper, keep the exposed adhesive free from foreign matter.
Temporarily install the rear lower spoiler sub-assembly to the rear bumper cover as shown in the illustration.
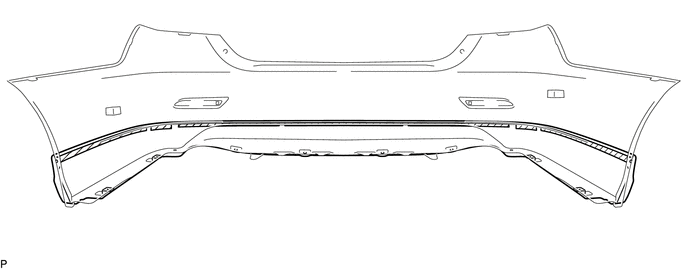
|
|
Double-sided Tape | - | - |
Install the rear lower spoiler sub-assembly with the 10 screws.