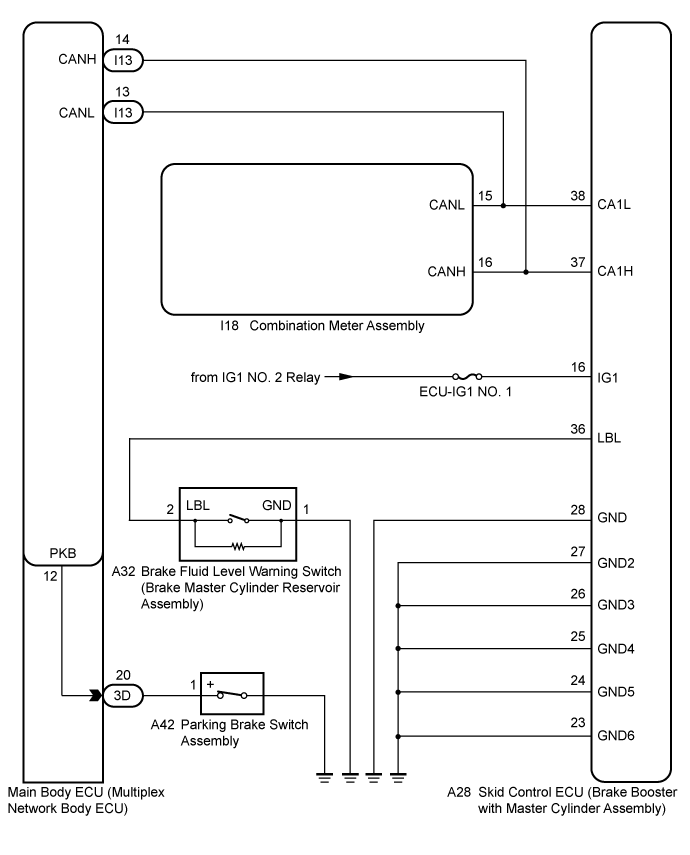
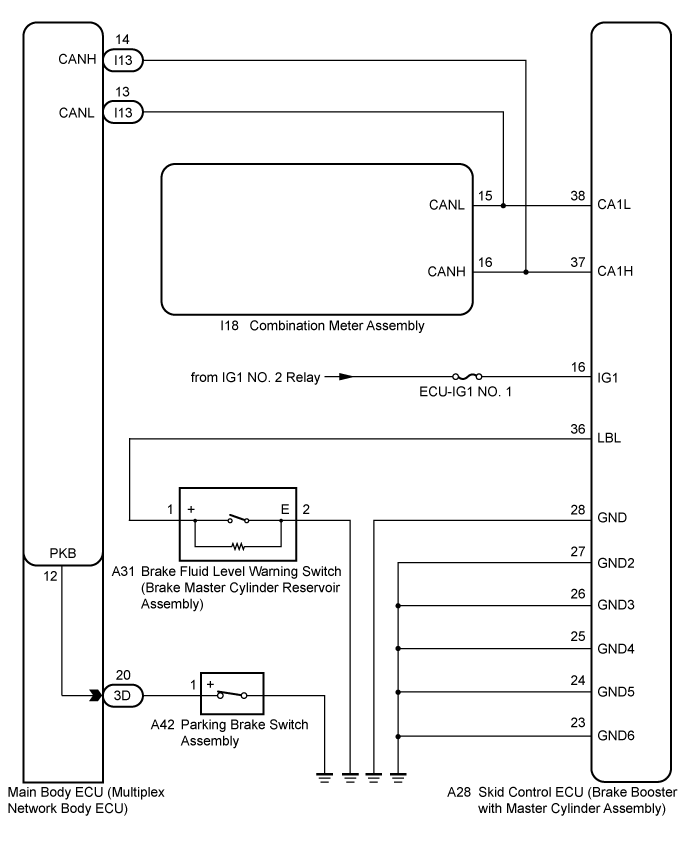
ELECTRONICALLY CONTROLLED BRAKE SYSTEM > Brake Warning Light Remains ON |
| for LHD |
| for RHD |
| 1.CHECK DTC |
Check if ABS, VSC and/or electronically controlled brake system DTCs are output (Click here).
| Result | Proceed to |
| DTC is not output. | A |
| DTC is output. | B |
|
| ||||
| A | |
 |
| 2.CHECK CAN COMMUNICATION SYSTEM |
Check if a CAN communication system DTC is output (Click here).
| Result | Proceed to |
| DTC is not output. | A |
| DTC is output. | B |
|
| ||||
| A | |
|
| 3.CHECK IF SKID CONTROL ECU CONNECTOR IS SECURELY CONNECTED |
Check if the skid control ECU (brake booster with master cylinder assembly) connector is securely connected.
|
| ||||
| OK | |
|
| 4.CHECK AUXILIARY BATTERY |
Check the auxiliary battery voltage.
| Tester Connection | Condition | Specified Condition |
| Auxiliary battery | Power switch on (IG) | 11 to 14 V |
| Auxiliary battery | Power switch on (READY) | 11 to 15.5 V |
|
| ||||
| OK | |
|
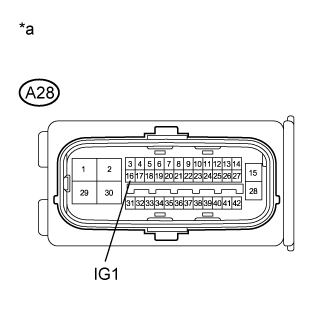
| 5.CHECK HARNESS AND CONNECTOR (IG1 TERMINAL) |
 |
Disconnect the skid control ECU (brake booster with master cylinder assembly) connector.
Turn the power switch on (IG).
Measure the voltage according to the value(s) in the table below.
| Tester Connection | Condition | Specified Condition |
| A28-16 (IG1) - Body ground | Power switch on (IG) | 11 to 14 V |
| *a | Front view of wire harness connector (to Skid Control ECU (Brake Booster with Master Cylinder Assembly)) |
|
| ||||
| OK | |
|
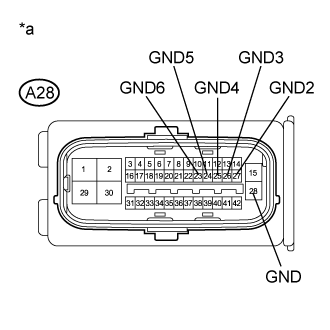
| 6.CHECK HARNESS AND CONNECTOR (GND TERMINAL) |
 |
Turn the power switch off.
Measure the resistance according to the value(s) in the table below.
| Tester Connection | Condition | Specified Condition |
| A28-28 (GND) - Body ground | Always | Below 1 Ω |
| A28-27 (GND2) - Body ground | Always | Below 1 Ω |
| A28-26 (GND3) - Body ground | Always | Below 1 Ω |
| A28-25 (GND4) - Body ground | Always | Below 1 Ω |
| A28-24 (GND5) - Body ground | Always | Below 1 Ω |
| A28-23 (GND6) - Body ground | Always | Below 1 Ω |
| *a | Front view of wire harness connector (to Skid Control ECU (Brake Booster with Master Cylinder Assembly)) |
|
| ||||
| OK | |
|
| 7.READ VALUE USING INTELLIGENT TESTER (PARKING BRAKE SWITCH ASSEMBLY) |
Reconnect the skid control ECU (brake booster with master cylinder assembly) connector.
Connect the intelligent tester to the DLC3.
Turn the power switch on (IG).
Select the Data List on the intelligent tester (Click here).
| Tester Display | Measurement Item/Range | Normal Condition | Diagnostic Note |
| Parking Brake SW | Parking brake switch assembly / ON or OFF | ON: Parking brake applied OFF: Parking brake released | - |
Using the intelligent tester, check if the switch condition on the intelligent tester changes according to parking brake operation.
|
| ||||
| OK | |
|
| 8.INSPECT COMBINATION METER ASSEMBLY |
Turn the power switch off.
Perform the Active Test of the combination meter assembly (meter CPU) using the intelligent tester (Click here).
Check the combination meter assembly.
| Result | Proceed to |
| OK (for LHD) | A |
| OK (for RHD) | B |
| NG | C |
|
| ||||
|
| ||||
| A | ||
 | ||
| ||
| 9.INSPECT PARKING BRAKE SWITCH ASSEMBLY |
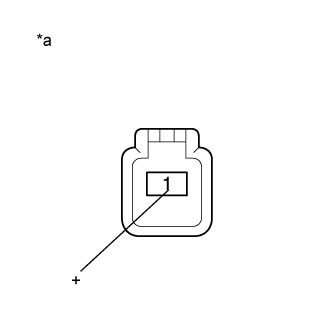 |
Turn the power switch off.
Disconnect the parking brake switch assembly connector.
Measure the resistance according to the value(s) in the table below.
| Tester Connection | Switch Condition | Specified Condition |
| 1 (+) - Body ground | Parking brake switch assembly ON (Switch pin free) | Below 1 Ω |
| 1 (+) - Body ground | Parking brake switch assembly OFF (Switch pin pushed in) | 10 kΩ or higher |
| *a | Component without harness connected (Parking Brake Switch Assembly) |
| Result | Proceed to |
| OK | A |
| NG (for LHD) | B |
| NG (for RHD) | C |
|
| ||||
|
| ||||
| A | |
|
| 10.CHECK HARNESS AND CONNECTOR (MAIN BODY ECU (MULTIPLEX NETWORK BODY ECU) - PARKING BRAKE SWITCH ASSEMBLY) |
Disconnect the main body ECU (multiplex network body ECU) connector.
Measure the resistance according to the value(s) in the table below.
| Tester Connection | Condition | Specified Condition |
| 3D-20 (PKB) - A42-1 (+) | Always | Below 1 Ω |
| 3D-20 (PKB) - Body ground | Always | 10 kΩ or higher |
|
| ||||
| OK | ||
| ||
| ||

