 |
Disengage the 2 clamps and separate the wire harness from the front outer cowl top panel subassembly.
AIR CONDITIONING UNIT > REMOVAL |
| 1. RECOVER REFRIGERANT FROM AIR CONDITIONING SYSTEM |
Turn the power switch on (READY).
Turn the A/C switch on.
Operate the air conditioning with a set temperature of 25°C (77°F) and the blower at low for 10 minutes to circulate the refrigerant. This causes most of the compressor oil from the various components of the air conditioning system to collect in the air conditioning compressor.
Turn the power switch off.
Recover the refrigerant from the air conditioning system using a refrigerant recovery unit.
| 2. REMOVE WINDSHIELD WIPER MOTOR AND LINK ASSEMBLY |
| 3. REMOVE FRONT OUTER COWL TOP PANEL SUB-ASSEMBLY (for LHD) |
|
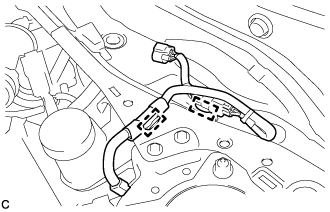
Disengage the 2 clamps and separate the wire harness from the front outer cowl top panel subassembly.
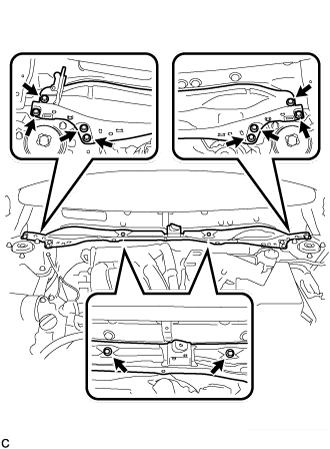 |
Remove the 10 bolts and front outer cowl top panel sub-assembly.
| 4. REMOVE FRONT OUTER COWL TOP PANEL SUB-ASSEMBLY (for RHD) |
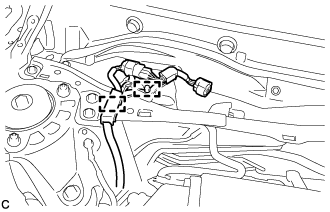 |
Disengage the 2 clamps and separate the wire harness from the front outer cowl top panel sub-assembly.
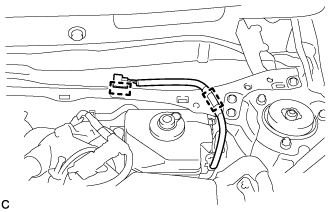 |
Disengage the 2 clamps and separate the wire harness from the front outer cowl top panel sub-assembly.
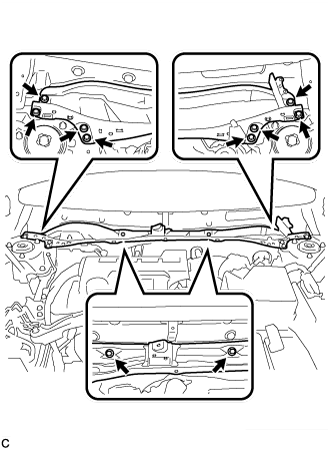 |
Remove the 10 bolts and front outer cowl top panel sub-assembly.
| 5. DISCONNECT HEATER OUTLET WATER HOSE |
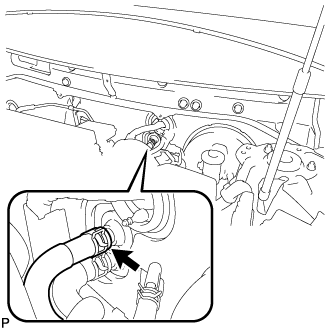 |
Using pliers, grip the claws of the clip and slide the clip to disconnect the heater outlet water hose.
| 6. DISCONNECT HEATER INLET WATER HOSE |
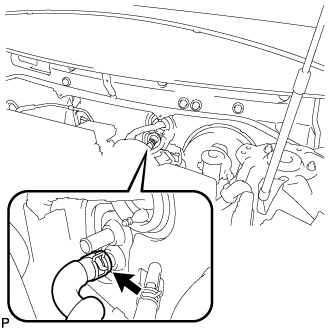 |
Using pliers, grip the claws of the clip and slide the clip to disconnect the heater inlet water hose.
| 7. DISCONNECT SUCTION PIPE SUB-ASSEMBLY |
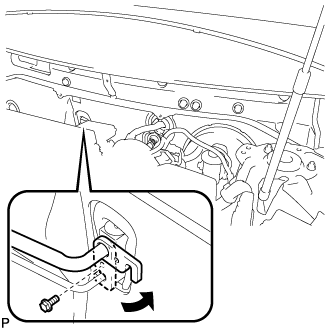 |
Remove the bolt, and slide the hook connector.
Disconnect the suction pipe sub-assembly.
Remove the O-ring from the suction pipe sub-assembly.
| 8. DISCONNECT AIR CONDITIONER TUBE AND ACCESSORY ASSEMBLY |
Disconnect the air conditioner tube and accessory assembly.
Remove the O-ring from the air conditioner tube and accessory assembly.
| 9. REMOVE FRONT SEAT ASSEMBLY LH |
| 10. REMOVE FRONT SEAT ASSEMBLY RH |
| 11. REMOVE INSTRUMENT PANEL SAFETY PAD ASSEMBLY |
| 12. REMOVE STEERING POST ASSEMBLY |
| 13. REMOVE POWER MANAGEMENT CONTROL ECU |
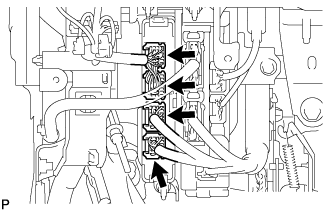 |
Disconnect the 4 connectors.
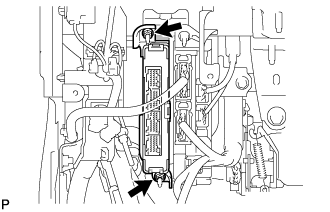 |
Remove the 2 nuts and power management control ECU.
| 14. REMOVE INSTRUMENT PANEL JUNCTION BLOCK ASSEMBLY |
for LHD:
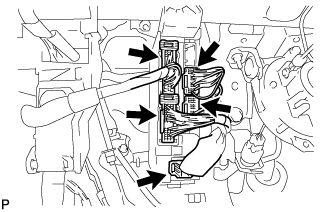 |
Disconnect the 5 connectors.
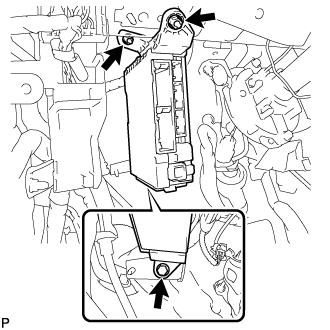 |
Remove the bolt, 2 nuts and disconnect the instrument panel junction block assembly.
for RHD:
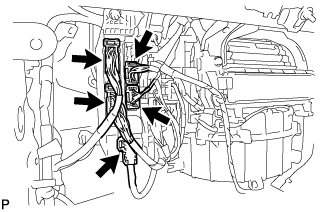 |
Disconnect the 5 connectors.
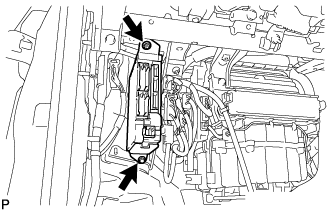 |
Remove the bolt, nut and disconnect the instrument panel junction block assembly.
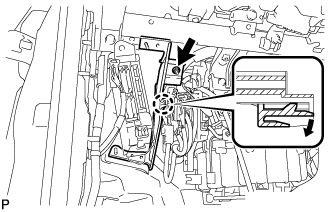 |
Remove the nut.
Disengage the claw as shown in the illustration and remove the wiring harness clamp bracket.
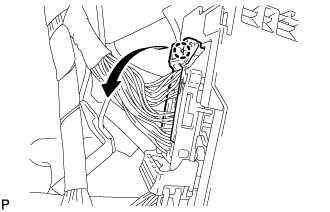 |
Disengage the claw and disconnect the connector as shown in the illustration.
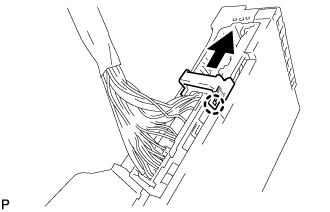 |
Disengage the claw and release the connector lock as shown in the illustration.
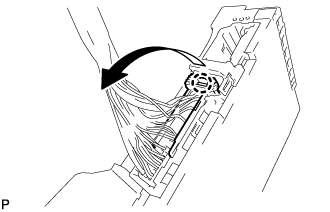 |
Disengage the claw and disconnect the connector as shown in the illustration.
Remove the instrument panel junction block assembly.
| 15. REMOVE ECU INTEGRATION BOX RH (for RHD) |
Disconnect each connector.
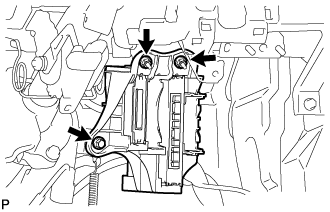 |
Remove the bolt, 2 nuts and ECU integration box RH.
| 16. REMOVE AIR CONDITIONING AMPLIFIER ASSEMBLY |
Disconnect each connector.
for LHD:
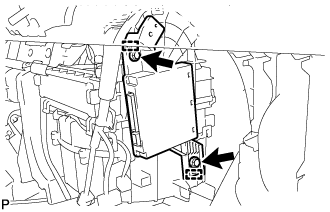 |
Remove the 2 screws.
Disengage the 2 guides and remove the air conditioning amplifier assembly.
for RHD:
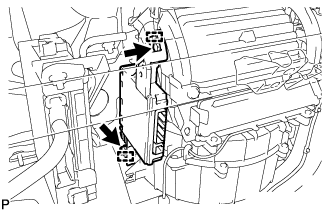 |
Remove the 2 screws.
Disengage the 2 guides and remove the air conditioning amplifier assembly.
| 17. REMOVE WINDSHIELD WIPER RELAY ASSEMBLY |
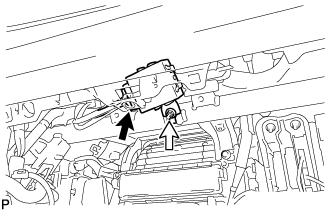 |
Disconnect the connector.
Remove the nut and windshield wiper relay assembly.
| 18. REMOVE FLOOR CARPET HOOK |
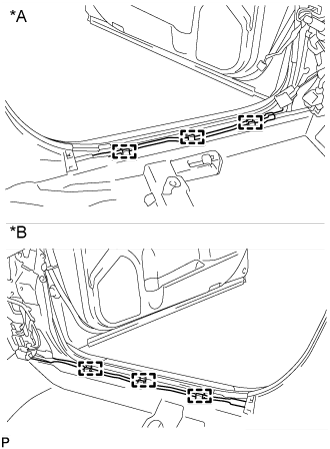 |
Disengage the 6 guides.
| *A | for LH Side |
| *B | for RH Side |
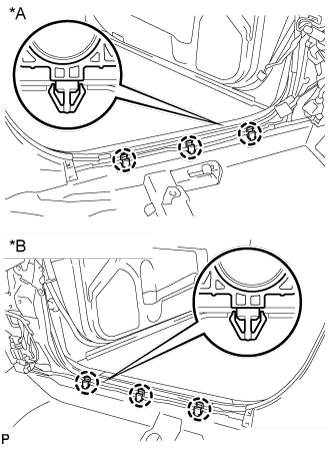 |
Disengage the 6 claws and remove the 6 floor carpet hooks.
| *A | for LH Side |
| *B | for RH Side |
| 19. DISCONNECT FUEL LID LOCK OPEN LEVER SUB-ASSEMBLY |
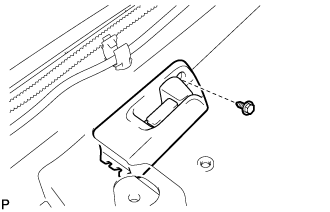 |
Remove the screw.
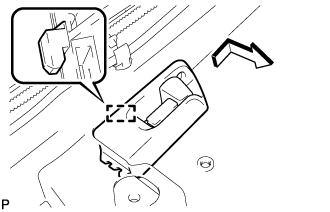 |
Disengage the guide to disconnect the fuel lid lock open lever sub-assembly as shown in the illustration.
| 20. REMOVE REAR NO. 4 AIR DUCT |
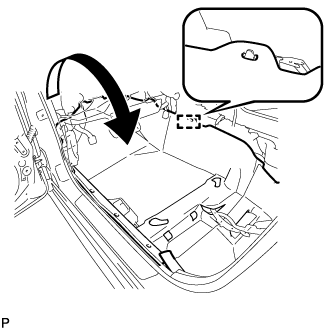 |
Disengage the guide.
Turn back the floor carpet as shown in the illustration.
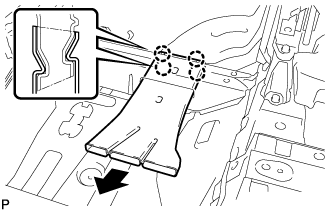 |
Disengage the 4 claws to remove the rear No. 4 air duct.
| 21. REMOVE FLOOR CARPET BRACKET LH |
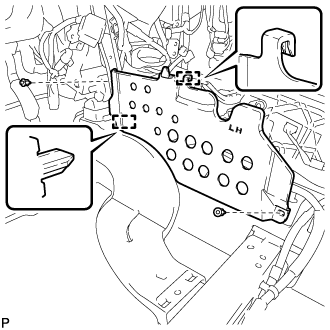 |
Remove the 2 clips.
Disengage the 2 guides to remove the floor carpet bracket LH.
| 22. REMOVE REAR NO. 3 AIR DUCT |
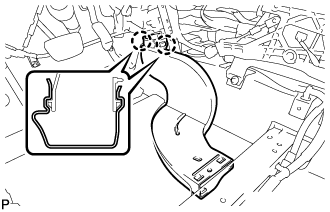 |
Disengage the 2 claws to remove the rear No. 3 air duct.
| 23. REMOVE REAR NO. 2 AIR DUCT |
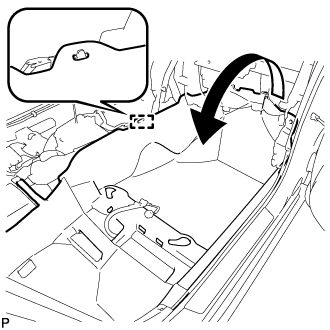 |
Disengage the guide.
Turn back the floor carpet as shown in the illustration.
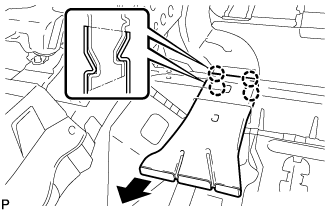 |
Disengage the 4 claws to remove the rear No. 2 air duct.
| 24. REMOVE FLOOR CARPET BRACKET RH |
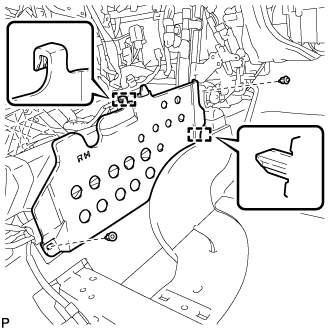 |
Remove the 2 clips.
Disengage the 2 guides to remove the floor carpet bracket RH.
| 25. REMOVE REAR NO. 1 AIR DUCT |
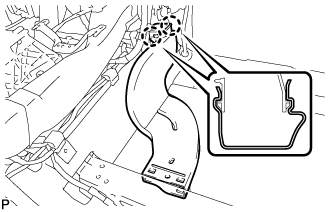 |
Disengage the 2 claws to remove the rear No. 1 air duct.
| 26. REMOVE NO. 1 CONSOLE BOX MOUNTING BRACKET |
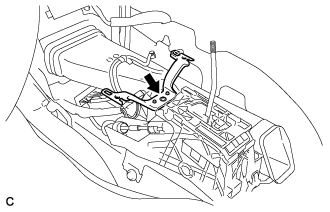 |
Remove the screw and No. 1 console box mounting bracket from the lower shift lever assembly.
| 27. REMOVE NO. 1 CONSOLE BOX DUCT |
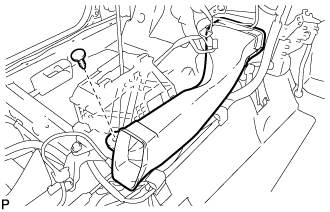 |
Remove the clip and the No. 1 console box duct.
| 28. REMOVE INSTRUMENT PANEL TO COWL BRACE SUB-ASSEMBLY |
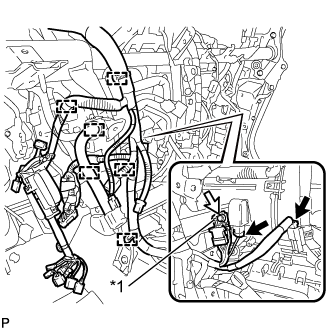 |
Disconnect each connector.
| *1 | Earth Wire |
Disengage each clamp.
Disconnect the connector.
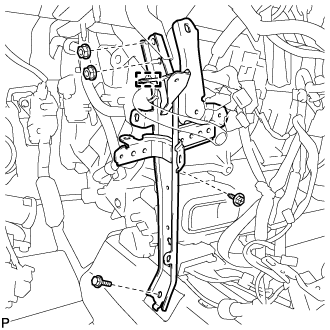 |
Disengage the clamp.
Remove the bolt and 2 nuts.
Remove the screw and the instrument panel to cowl brace sub-assembly.
| 29. REMOVE NO. 2 INSTRUMENT PANEL BRACE SUB-ASSEMBLY |
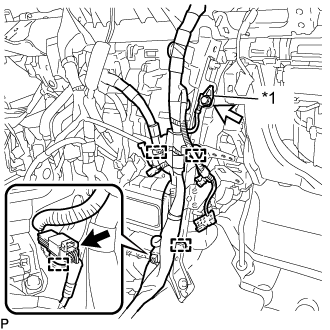 |
Disconnect the connector.
| *1 | Earth Wire |
Disengage each clamp.
Remove the bolt and disconnect the earth wire.
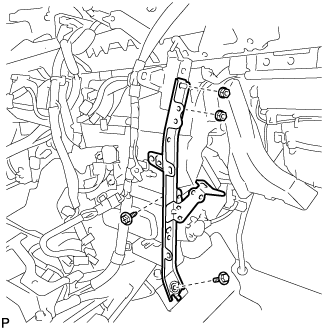 |
Remove the bolt and 2 nuts.
Remove the screw and the No. 2 instrument panel brace sub-assembly.
| 30. REMOVE INSTRUMENT PANEL SAFETY PAD CAP |
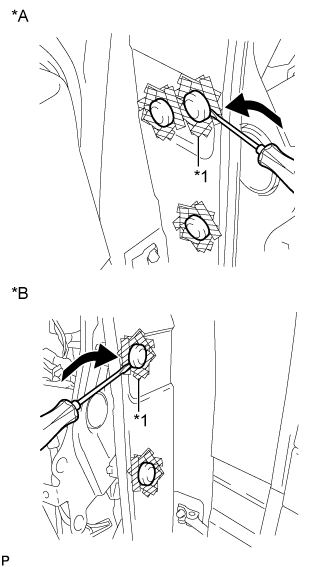 |
Put protective tape around the 5 instrument panel safety pad caps.
| *A | for Driver Side |
| *B | for Passenger Side |
| *1 | Protective Tape |
Using a screwdriver, remove the 5 instrument panel safety pad caps.
| 31. REMOVE FRONT LOWER PANEL PACKING |
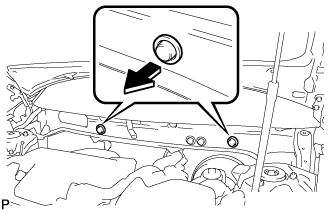 |
Remove the 2 front lower panel packings as shown in the illustration.
| 32. REMOVE INSTRUMENT PANEL REINFORCEMENT ASSEMBLY WITH AIR CONDITIONING UNIT |
for RHD:
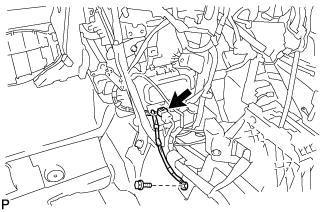 |
Remove the bolt.
Disconnect the connector.
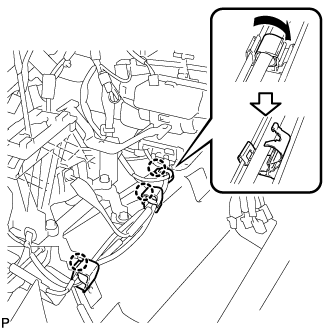 |
Disengage 3 claws to open the 3 clamps.
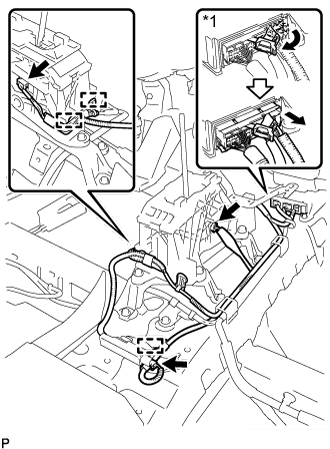 |
Disconnect the center airbag sensor connectors from the center airbag sensor assembly as shown in the illustration.
| *1 | Center Airbag Sensor Connector |
Disconnect the 3 connectors.
Disengage the 3 clamps.
for LHD:
Move the shift lever to N.
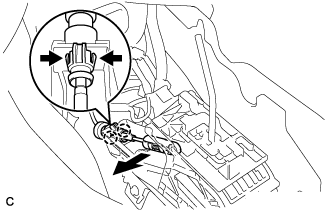 |
Disconnect the end of the transmission control cable assembly from the lower shift lever assembly.
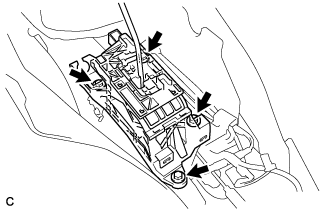 |
Remove the 4 bolts and lower shift lever assembly.
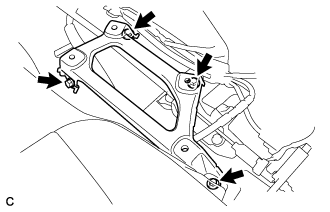 |
Remove the 4 bolts and shift lever support.
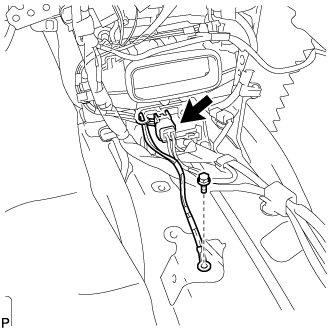 |
Remove the bolt.
Disconnect the connector.
Using a screwdriver, disengage the 2 claws to unlock the retainer as shown in the illustration.
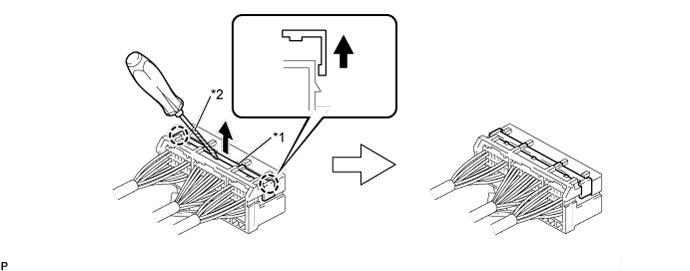
| *1 | Retainer | *2 | Protective Tape |
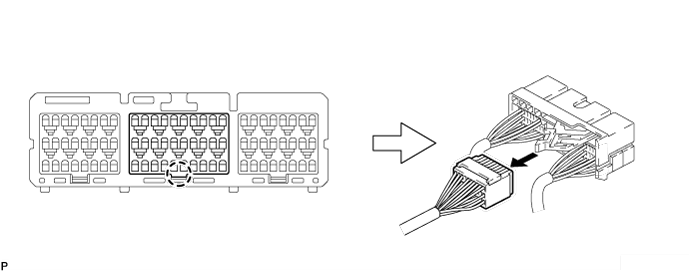
Disengage the claw and disconnect the airbag connector as shown in the illustration.
Disengage each clamp.
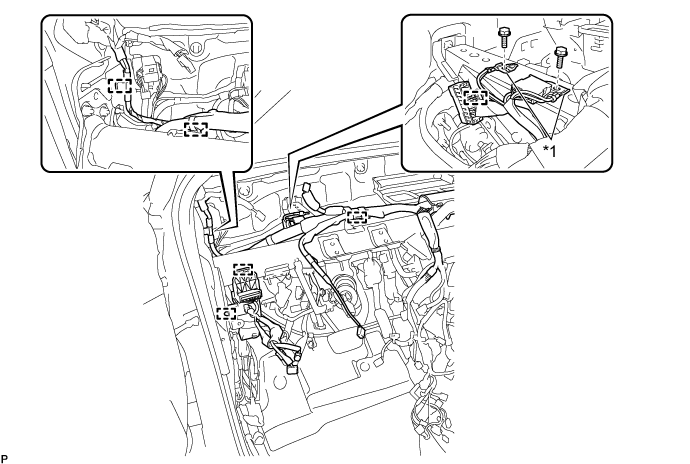
| *1 | Earth Wire | - | - |
Remove the 2 bolts and disconnect the 2 earth wires.
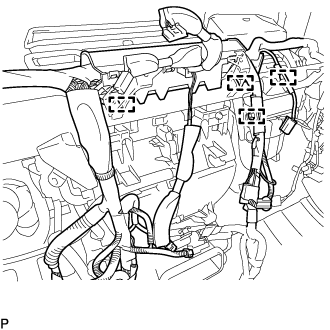 |
Disconnect the connector.
Disengage each clamp.
Remove the bolt and disconnect the earth wire.
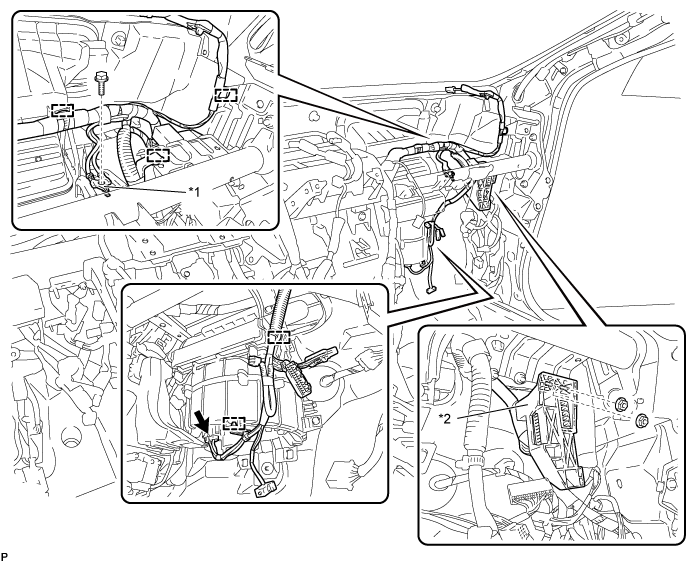
| *1 | Earth Wire | *2 | Connector Holder |
Remove the 2 nuts and disconnect the connector holder.
Disconnect the connector.
Disengage each clamp.
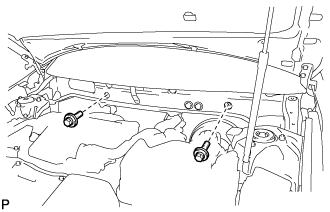 |
Remove the 2 bolts.
Remove the 5 bolts and nut as shown in the illustration.
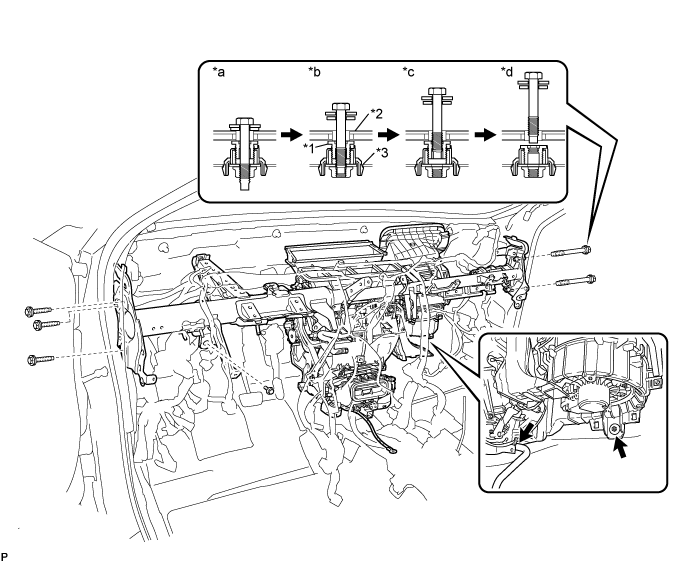
| *1 | Movable Collar | *2 | Body |
| *3 | Instrument Panel Reinforcement | - | - |
| *a | Step 1 | *b | Step 2 |
| *c | Step 3 | *d | Step 4 |
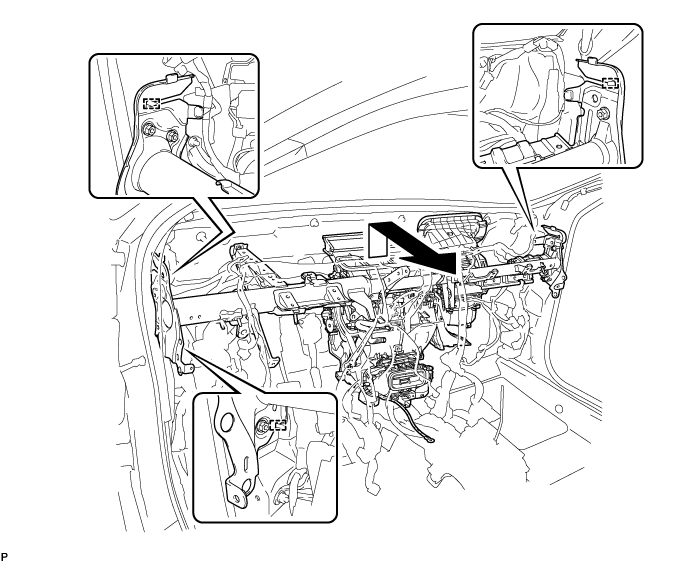
Remove the instrument panel reinforcement assembly with air conditioning unit with the nut.
Disconnect the cooler drain hose.
Remove the bolt.
Disengage the 3 guides and remove the instrument panel reinforcement with air conditioning unit as shown in the illustration.
| 33. REMOVE AIR CONDITIONING UNIT ASSEMBLY |
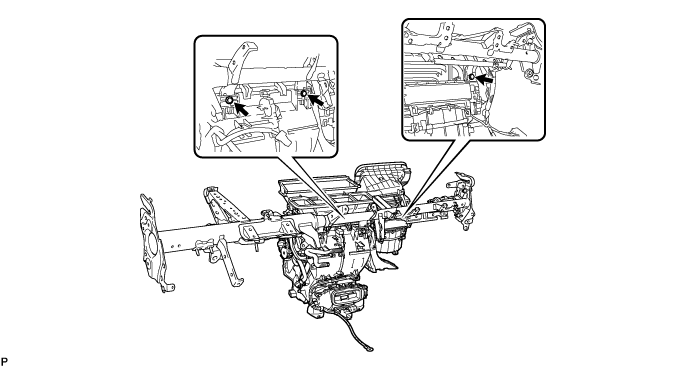
Remove the 3 bolts and the air conditioning unit assembly from the instrument panel reinforcement assembly.