 |
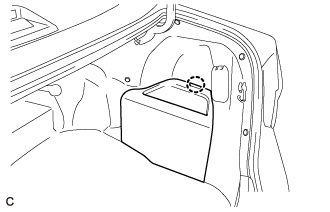
Disengage the claw to remove the luggage trim service hole cover.
PARKING BRAKE PEDAL (for RHD) > REMOVAL |
| 1. PRECAUTION |
| 2. REMOVE LUGGAGE TRIM SERVICE HOLE COVER |
|
Disengage the claw to remove the luggage trim service hole cover.
| 3. DISCONNECT CABLE FROM NEGATIVE AUXILIARY BATTERY TERMINAL |
| 4. TURN FRONT WHEELS TO FACE STRAIGHT AHEAD |
| 5. REMOVE FRONT WHEEL RH |
| 6. REMOVE SHIFT LEVER SUPPORT |
| 7. REMOVE NO. 1 INDOOR ELECTRICAL KEY ANTENNA ASSEMBLY (for Built-in Type Yaw Rate Sensor) |
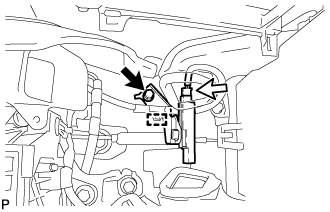 |
Disengage the clamp.
Remove the bolt.
Disconnect the connector and remove the No. 1 indoor electrical key antenna assembly.
| 8. REMOVE YAW RATE SENSOR (for Separate Type Yaw Rate Sensor) |
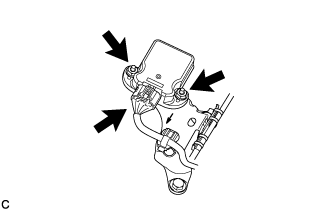 |
Disconnect the connector from the yaw rate sensor.
Remove the 2 nuts and yaw rate sensor.
| 9. REMOVE NO. 3 INDOOR ELECTRICAL KEY ANTENNA ASSEMBLY (for Separate Type Yaw Rate Sensor) |
Disengage the clamp to remove the No. 3 indoor electrical key antenna assembly from the yaw rate sensor bracket.
Disconnect the connector from the No. 3 indoor electrical key antenna assembly.
| 10. REMOVE YAW RATE SENSOR BRACKET (for Separate Type Yaw Rate Sensor) |
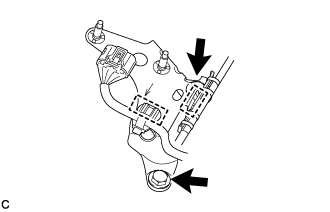 |
Disengage the 2 clamps to separate the wire harnesses.
Remove the 2 bolts and yaw rate sensor bracket.
| 11. REMOVE FLOOR CARPET BRACKET RH |
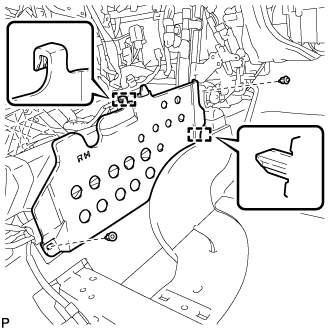 |
Remove the 2 clips.
Disengage the 2 guides to remove the floor carpet bracket RH.
| 12. REMOVE AIRBAG SENSOR ASSEMBLY |
Check that the power switch is off.
Check that the cable is disconnected from the negative (-) auxiliary battery terminal.
Turn back the carpet.
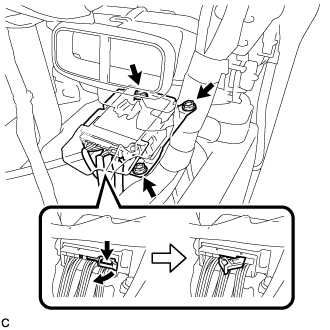 |
Disconnect the connectors from the airbag sensor assembly as shown in the illustration.
Remove the 3 bolts and airbag sensor assembly.
| 13. REMOVE UPPER INSTRUMENT PANEL FINISH PANEL |
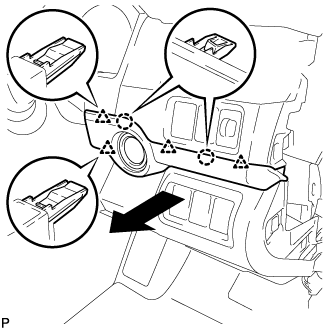 |
Disengage the 2 claws and 4 clips as shown in the illustration.
Disconnect the connector to remove the upper instrument panel finish panel.
| 14. REMOVE NO. 1 INSTRUMENT PANEL REGISTER ASSEMBLY |
| 15. REMOVE INSTRUMENT CLUSTER FINISH PANEL ASSEMBLY |
Operate the tilt and telescopic lever to fully extend and lower the steering column assembly.
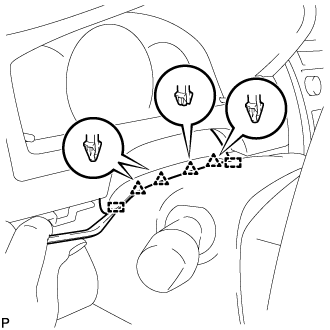 |
Using a moulding remover, disengage the 4 clips and 2 guides.
for LHD:
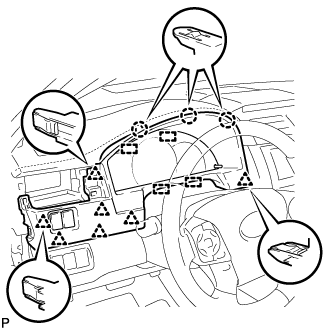 |
Disengage the 3 claws, 7 clips and 4 guides.
for RHD:
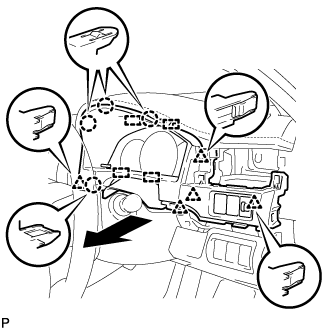 |
Disengage the 4 claws, 5 clips and 4 guides as shown in the illustration.
Disconnect each connector.
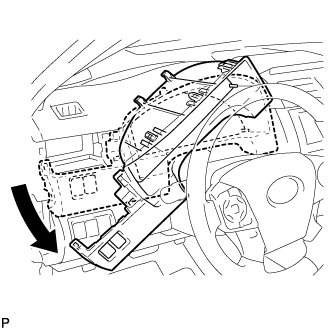 |
Remove the instrument cluster finish panel assembly as shown in the illustration.
| 16. REMOVE COMBINATION METER ASSEMBLY |
| 17. REMOVE NO. 2 AIR DUCT SUB-ASSEMBLY |
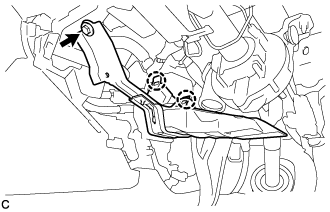 |
Remove the bolt.
Disengage the 2 claws to remove the No. 2 air duct sub-assembly.
| 18. SEPARATE STEERING INTERMEDIATE SHAFT ASSEMBLY |
| 19. REMOVE STEERING INTERMEDIATE SHAFT ASSEMBLY |
| 20. LOOSEN ADJUSTING NUT |
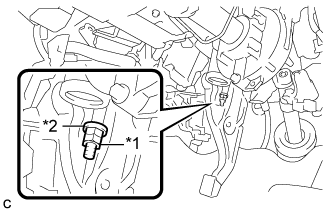 |
Remove the lock nut and loosen the adjusting nut.
| *1 | Lock Nut |
| *2 | Adjusting Nut |
| 21. SEPARATE NO. 4 PARKING BRAKE CABLE ASSEMBLY |
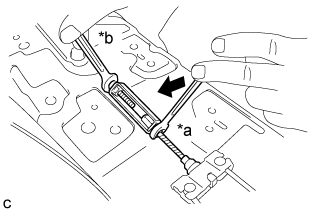 |
Separate the No. 4 parking brake cable assembly from the parking brake control pedal assembly as shown in the illustration.
| *a | Turn |
| *b | Hold |
| 22. REMOVE PARKING BRAKE CONTROL PEDAL ASSEMBLY |
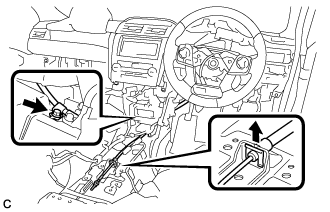 |
Remove the clip from the No. 1 parking brake cable assembly.
Remove the bolt and separate the No. 1 parking brake cable assembly.
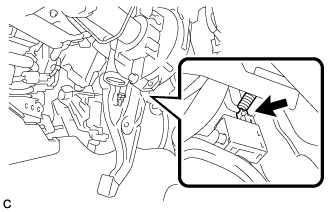 |
Disconnect the parking brake switch connector.
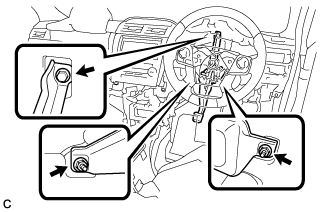 |
Remove the bolt, 2 nuts and parking brake control pedal assembly.