 |
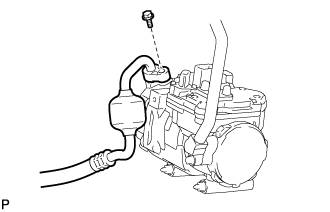
Remove the bolt and disconnect the No. 1 cooler refrigerant discharge hose from the compressor with motor assembly.
COMPRESSOR > REMOVAL |
| 1. RECOVER REFRIGERANT FROM AIR CONDITIONING SYSTEM |
Turn the power switch on (READY).
Turn the A/C switch on.
Operate the air conditioning with a set temperature of 25°C (77°F) and the blower at low for 10 minutes to circulate the refrigerant. This causes most of the compressor oil from the various components of the air conditioning system to collect in the air conditioning compressor.
Turn the power switch off.
Recover the refrigerant from the air conditioning system using a refrigerant recovery unit.
| 2. REMOVE SERVICE PLUG GRIP |
| 3. REMOVE RADIATOR ASSEMBLY |
| 4. CHECK TERMINAL VOLTAGE |
Remove the connector cover assembly .
Check terminal voltage .
Install the connector cover assembly .
| 5. DISCONNECT NO. 1 COOLER REFRIGERANT DISCHARGE HOSE |
|
Remove the bolt and disconnect the No. 1 cooler refrigerant discharge hose from the compressor with motor assembly.
Remove the O-ring from the No. 1 cooler refrigerant discharge hose.
| 6. DISCONNECT NO. 1 COOLER REFRIGERANT SUCTION HOSE |
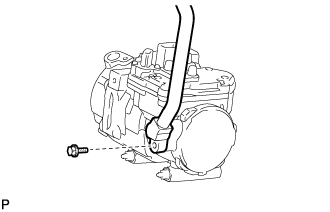 |
Remove the bolt and disconnect the No. 1 cooler refrigerant suction hose from the compressor with motor assembly.
Remove the O-ring from the No. 1 cooler refrigerant suction hose.
| 7. REMOVE COMPRESSOR WITH MOTOR ASSEMBLY |
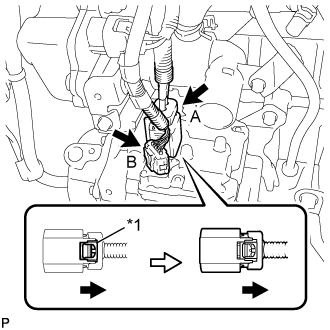 |
Disconnect connector B as shown in the illustration.
| *1 | Green-colored Lock |
Release the green-colored lock and disconnect connector A.
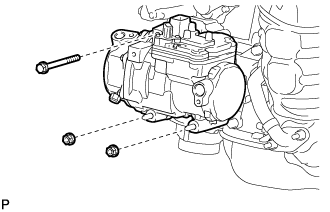 |
Remove the bolt and 2 nuts.
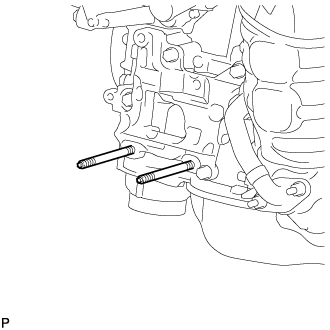 |
Using an E8 "TORX" socket, remove the 2 stud bolts.