Home › Engine / Hybrid System ยท 2AR-FE › FUEL › FUEL INJECTOR

FUEL INJECTOR > REMOVAL

for Preparation Click here


HINT:
Perform "Inspection After Repair" after replacing the fuel injector assembly (Click here).


1. PRECAUTION

NOTICE:
After turning the ignition switch off, waiting time may be required before disconnecting the cable from the negative (-) battery terminal. Therefore, make sure to read the disconnecting the cable from the negative (-) battery terminal notices before proceeding with work (Click here).


2. DISCHARGE FUEL SYSTEM PRESSURE
(Click here)


3. DISCONNECT CABLE FROM NEGATIVE BATTERY TERMINAL

NOTICE:
When disconnecting the cable, some systems need to be initialized after the cable is reconnected (Click here).


4. REMOVE NO. 1 ENGINE COVER SUB-ASSEMBLY


    A255403
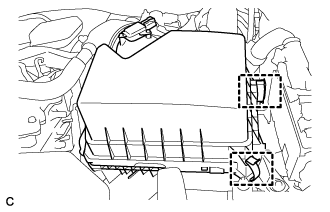
  1. Lift the rear of the engine cover to detach the cover from the 2 pins, and then lift the front of the engine cover to detach the cover from the pin and remove the engine cover.

    NOTICE:
    Attempting to disengage both front and rear clips at the same time may cause the No. 1 engine cover sub-assembly to break.


5. REMOVE AIR CLEANER CAP SUB-ASSEMBLY


    A254779
  1. Disconnect the vacuum switching valve assembly from the air cleaner hose.


    A254778
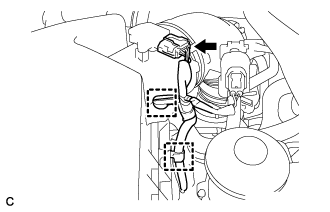
  1. Disconnect the mass air flow meter connector and 2 wire harness clamps from the air cleaner cap sub-assembly.


    A254774
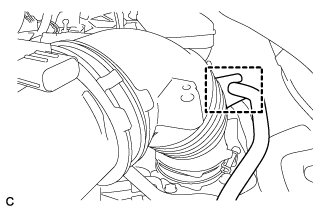
  1. Separate the fuel vapor feed hose from the air cleaner hose.


    A254777
  1. Disconnect the ventilation hose from the cylinder head cover.


    A254775
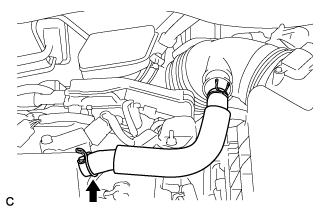
  1. Loosen the hose clamp and disconnect the air cleaner hose from the throttle with motor body assembly.


    A254776
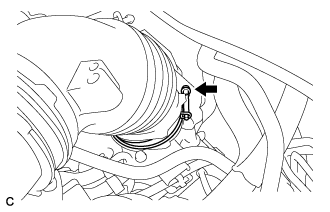
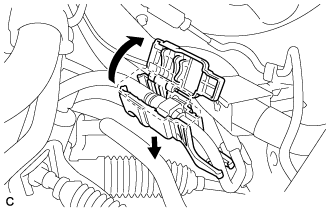
  1. Release the 2 clamps and remove the air cleaner cap sub-assembly.


6. DISCONNECT FUEL TUBE SUB-ASSEMBLY

NOTICE:
Remove any dirt or foreign matter on the fuel tube connector and fuel pipe before performing this work.


    A203577E01
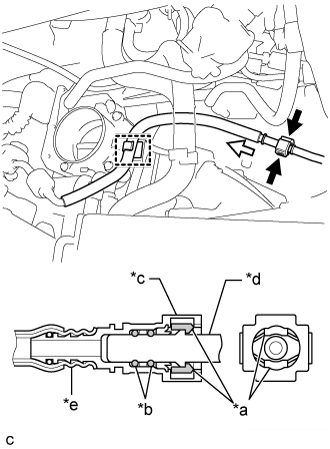
  1. Disengage the claw and remove the No. 1 fuel pipe clamp.


  1. Disconnect the fuel tube sub-assembly from the fuel pipe.


      A252629E03
    1. Pinch the retainer of the fuel tube connector, and then pull the fuel tube connector off of the fuel pipe.
      Text in Illustration 
      *a
      Retainer
      *b
      O-ring
      *c
      Fuel Tube Connector
      *d
      Fuel Pipe
      *e
      Nylon Tube
      V100135
      Pinch
      V100136
      Pull

      NOTICE:
      Be sure to disconnect the fuel tube connector by hand.

    2. If the fuel tube connector and fuel pipe are stuck, push and pull the fuel tube connector to release it. Pull the fuel tube connector off of the fuel pipe carefully.

      NOTICE:
      1. Be sure to disconnect the fuel tube connector by hand.
      2. Do not allow any scratches or foreign matter to get on the parts when disconnecting them as the fuel tube connector has O-rings that seal the fuel pipe.
      3. Do not forcibly bend, twist or turn the nylon tube.

    3. Check if there is any foreign matter on the sealing surfaces of the disconnected fuel lines. Clean them if necessary.

    4. Cover the disconnected fuel pipe and fuel tube connector with plastic bags to prevent damage and contamination.
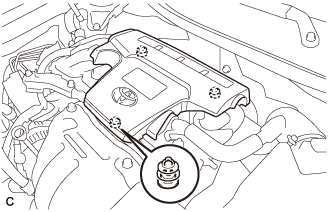
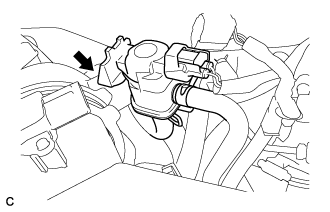
  1. Disengage the clamp to disconnect the fuel tube sub-assembly from the fuel hose clamp.


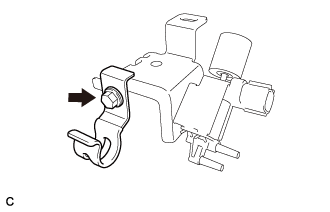
7. REMOVE VACUUM SWITCHING VALVE ASSEMBLY (for ACIS)


    A254719
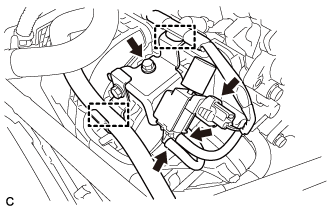
  1. Disconnect the union to connector tube hose and wire harness clamp.

  1. Disconnect the 2 vacuum hoses and connector.

  1. Remove the bolt and vacuum switching valve assembly.


    A254721
  1. Remove the bolt and vacuum hose clamp.


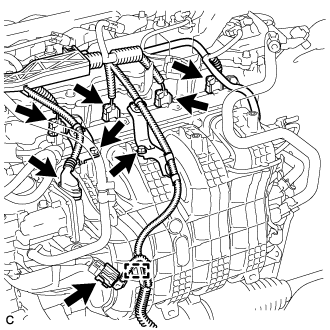
8. DISCONNECT WIRE HARNESS


    A252630
  1. Disconnect the 4 fuel injector assembly connectors, throttle body with motor assembly connector and sensor wire connector.

  1. Remove the 2 bolts and separate the 2 wire harness brackets from the intake manifold.

  1. Disengage the clamp to disconnect the wire harness.


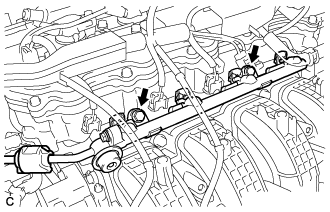
9. REMOVE FUEL DELIVERY PIPE SUB-ASSEMBLY


    A252631
  1. Remove the 2 bolts and fuel delivery pipe sub-assembly with the 4 fuel injector assemblies.

    NOTICE:
    Do not drop the fuel injector assemblies when removing the fuel delivery pipe sub-assembly.


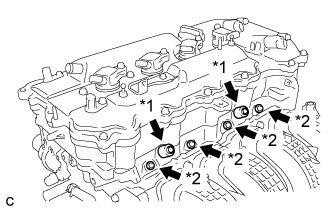
    A211217E01
  1. Remove the 2 fuel delivery spacers from the cylinder head.
    Text in Illustration 
    *1
    Fuel Delivery Spacer
    *2
    Injector Vibration Insulator

  1. Remove the 4 injector vibration insulators from the cylinder head.


10. REMOVE FUEL INJECTOR ASSEMBLY


    A252633E01
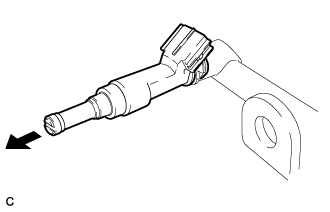
  1. Pull the 4 fuel injector assemblies out of the fuel delivery pipe sub-assembly.

  1. Remove the O-ring from each fuel injector assembly.

  1. For reinstallation, attach a tag or label with the corresponding cylinder number to each fuel injector assembly.

    NOTICE:
    Protect the fuel injector assemblies by covering them with plastic bags.