 |
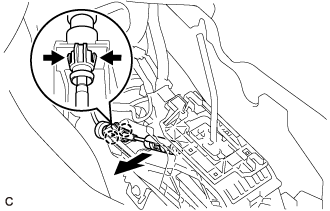
Disconnect the end of the transmission control cable assembly from the lower shift lever assembly.
TRANSMISSION CONTROL CABLE > ADJUSTMENT |
| 1. INSPECT SHIFT LEVER POSITION |
When the shift lever is moved from P to R with the engine switch ON and brake pedal depressed, make sure that the shift lever moves smoothly and correctly to P.
Start the engine and check that the vehicle moves forward when the shift lever is moved from N to D and moves rearward when the shift lever is moved to R.
| 2. ADJUST SHIFT LEVER POSITION |
Move the shift lever to N.
Remove the console box assembly (Click here).
|
Disconnect the end of the transmission control cable assembly from the lower shift lever assembly.
Disengage the 2 claws and disconnect the transmission control cable assembly from the lower shift lever assembly.
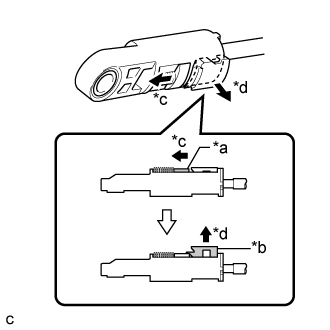 |
Slide the slider of the transmission control cable assembly as shown in the illustration and pull the lock piece outward.
| *a | Slider |
| *b | Lock Piece |
| *c | Slide |
| *d | Pull |
Engage the 2 claws to connect the transmission control cable assembly to the lower shift lever assembly.
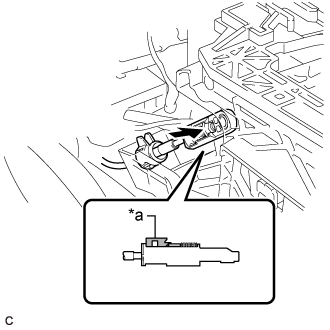 |
Connect the end of the transmission control cable assembly to the lower shift lever assembly.
| *a | Lock Piece |
Push the lock piece into the adjuster case.
After adjusting the shift lever position, check the operation and function of the shift lever. If there is a problem, adjust the position again.
Install the console box assembly (Click here).