 |
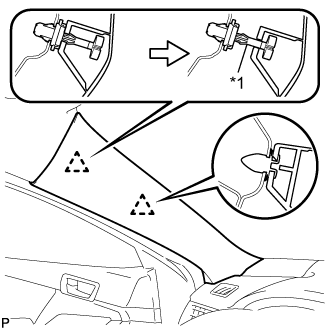
Pull the upper part of the garnish toward the inside of the cabin and disengage the garnish from the base of the 2 clips.
| *1 | Front Pillar Garnish Clip |
- HINT:
- Make the front pillar garnish LH hang down from the front pillar garnish clip.
ENGINE SWITCH > REMOVAL |
| 1. PRECAUTION |
| 2. DISCONNECT CABLE FROM NEGATIVE BATTERY TERMINAL |
| 3. REMOVE RADIO RECEIVER ASSEMBLY WITH AIR CONDITIONING CONTROL ASSEMBLY (w/o Navigation System) |
| 4. REMOVE NAVIGATION RECEIVER ASSEMBLY WITH AIR CONDITIONING CONTROL ASSEMBLY (w/ Navigation System) |
| 5. REMOVE FRONT DOOR SCUFF PLATE LH |
|
Pull the upper part of the garnish toward the inside of the cabin and disengage the garnish from the base of the 2 clips.
| *1 | Front Pillar Garnish Clip |
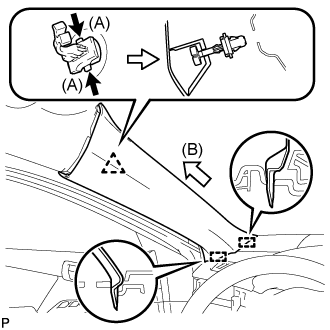 |
While pushing the tabs on the front pillar garnish clip in the direction indicated by the arrow (A) shown in the illustration, disengage the front pillar garnish clip.
Pull the garnish in the direction indicated by the arrow (B) shown in the illustration to disengage the 2 guides and remove the front pillar garnish LH.
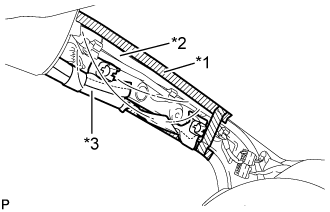 |
Protect the curtain shield airbag assembly.
| *1 | Adhesive Tape |
| *2 | Protective Cover |
| *3 | Curtain Shield Airbag Assembly |
Cover the airbag with a piece of cloth or nylon and secure the edges of the cover with tape as shown in the illustration.
| 6. REMOVE COWL SIDE TRIM SUB-ASSEMBLY LH |
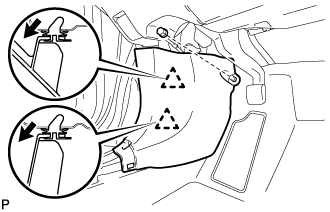 |
Remove the clip.
Disengage the 2 clips and remove the cowl side trim sub-assembly LH.
| 7. DISCONNECT FRONT DOOR OPENING TRIM WEATHERSTRIP LH |
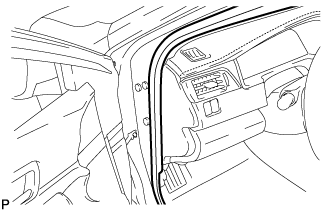 |
Disconnect the front door opening trim weatherstrip LH.
| 8. REMOVE INSTRUMENT SIDE PANEL LH |
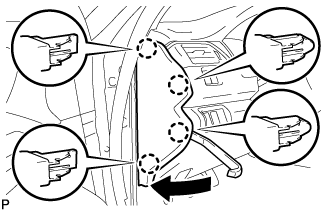 |
Using a moulding remover, disengage the 4 claws as shown in the illustration.
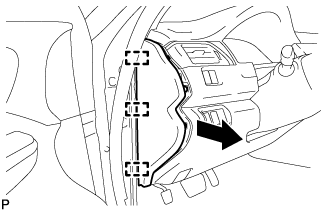 |
Disengage the 3 guides and remove the instrument side panel LH as shown in the illustration.
| 9. REMOVE NO. 1 INSTRUMENT PANEL REGISTER ASSEMBLY |
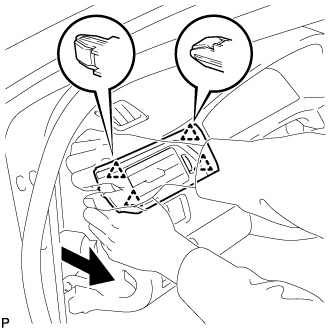 |
Disengage the 4 clips to remove the No. 1 instrument panel register assembly as shown in the illustration.
| 10. REMOVE INSTRUMENT CLUSTER FINISH PANEL ASSEMBLY |
for Manual Tilt and Manual Telescopic Steering Column:
Operate the tilt and telescopic lever to fully extend and lower the steering column assembly.
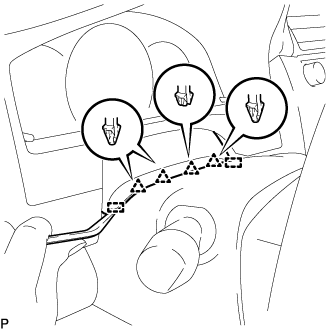 |
Using a moulding remover, disengage the 4 clips and 2 guides.
for LHD:
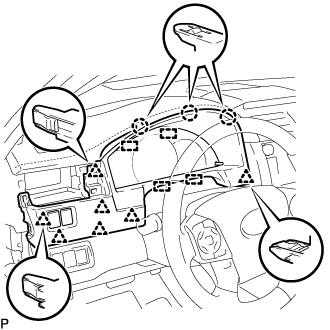 |
Disengage the 3 claws, 7 clips and 4 guides.
for RHD:
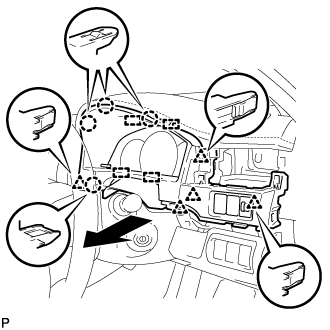 |
Disengage the 4 claws, 5 clips and 4 guides as shown in the illustration.
Disconnect each connector.
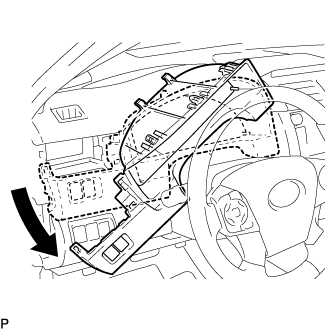 |
Remove the instrument cluster finish panel assembly as shown in the illustration.
| 11. DISCONNECT HOOD LOCK CONTROL LEVER SUB-ASSEMBLY |
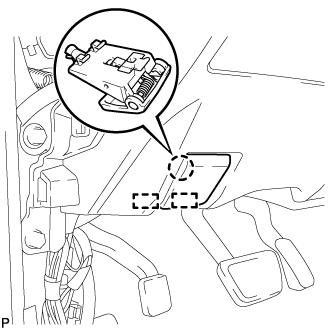 |
Disengage the claw and 2 guides to disconnect the hood lock control lever sub-assembly.
| 12. REMOVE INSTRUMENT PANEL SUB-ASSEMBLY |
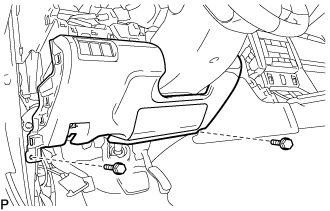 |
Remove the 2 bolts <B>.
w/o Driver Side Knee Airbag:
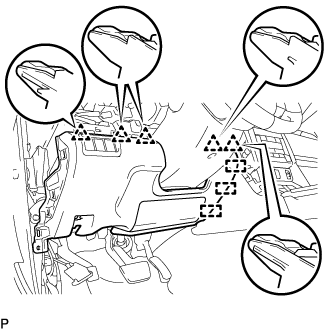 |
Disengage the 5 clips and 3 guides to remove the instrument panel sub-assembly.
w/ Driver Side Knee Airbag:
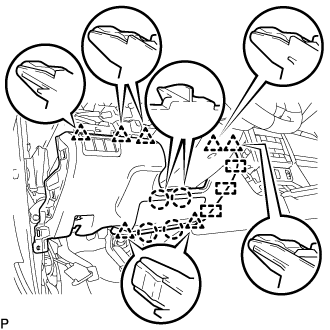 |
Disengage the 4 claws, 7 clips and 3 guides to remove the instrument panel sub-assembly.
| 13. REMOVE FRONT ASH RECEPTACLE ASSEMBLY |
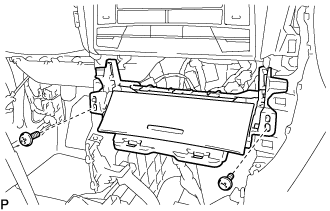 |
Remove the 2 screws <C>.
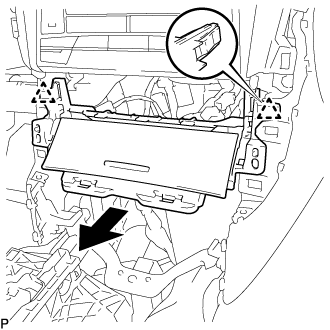 |
Disengage the 2 clips as shown in the illustration.
Disconnect each connector to remove the front ash receptacle assembly.
| 14. REMOVE CONSOLE BOX ASSEMBLY |
| 15. REMOVE FRONT NO. 2 CONSOLE BOX INSERT |
for LHD:
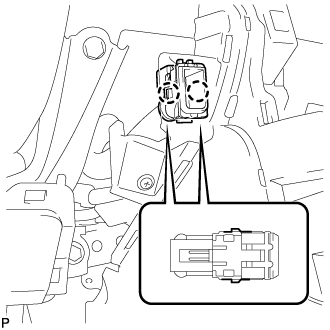 |
Disengage the 2 claws to disconnect the room temperature sensor from the front No. 2 console box insert.
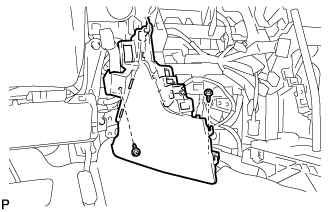 |
Remove the 2 screws <C>.
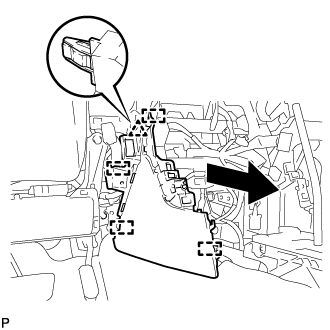 |
Disengage the clip and 4 guides to remove the front No. 2 console box insert as shown in the illustration.
| 16. REMOVE LOWER INSTRUMENT PANEL FINISH PANEL ASSEMBLY |
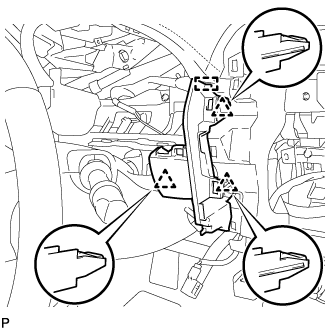 |
Disengage the 3 clips and guide to remove the lower instrument panel finish panel assembly.
for LHD with Smart Entry and Start System:
Disconnect the connector.
| 17. REMOVE ENGINE SWITCH |
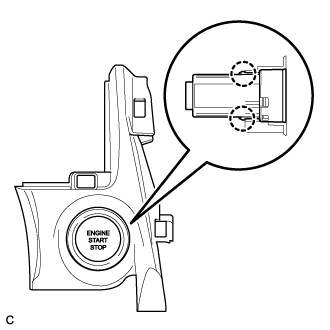 |
Disengage the 2 claws and remove the engine switch.