Home › Audio / Visual / Telematics › AUDIO / VIDEO › NOISE FILTER (for TMMK Made)

NOISE FILTER (for TMMK Made) > INSTALLATION

for Preparation Click here


1. INSTALL RADIO SETTING CONDENSER (for Window Defogger)


    E183101
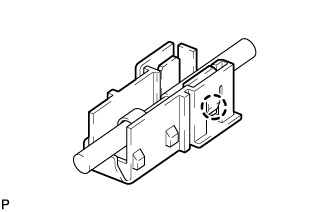
  1. Engage the claw to install a new terminal cover to the wire harness.

    NOTICE:
    1. Make sure to hold the wire harness so that the crimping side of the terminal is facing up when installing the wire harness to the terminal cover.
    2. Make sure not to bend the exposed wire when installing the wire harness to the terminal cover.
    3. Do not use excessive force when inserting the wire harness into the terminal cover.
    4. If the terminal cover has been deformed at installation, replace the terminal and terminal cover with new ones.
    E221975
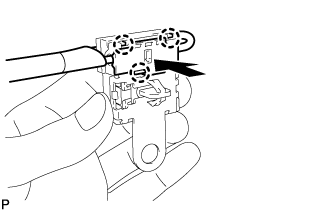
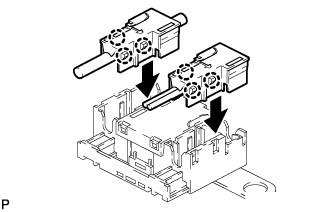
  1. Engage the 3 claws to install the new terminal cover with wire harness to a new condenser.

    NOTICE:
    1. Do not use excessive force when inserting the terminal cover into the condenser.
    2. If the terminal cover has been deformed at installation, replace the terminal, terminal cover and condenser with new ones.

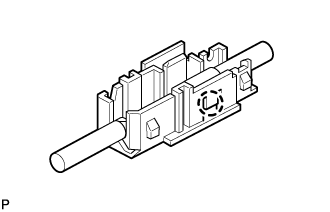
  1. Engage the 2 clamps to temporarily install a new radio setting condenser with wire harness.

  1. Install the new radio setting condenser with the bolt.

    Torque:
    8.0 N*m{ 82 kgf*cm , 71 in.*lbf }


2. INSTALL ROOF SIDE INNER GARNISH LH (for Window Defogger)
  1. Install 5 new clips to the roof side inner garnish LH.

  1. Engage the guide.

  1. Engage the 5 clips to install the roof side inner garnish LH.


3. INSTALL REAR DOOR OPENING TRIM WEATHERSTRIP LH (for Window Defogger)


    B278982E02
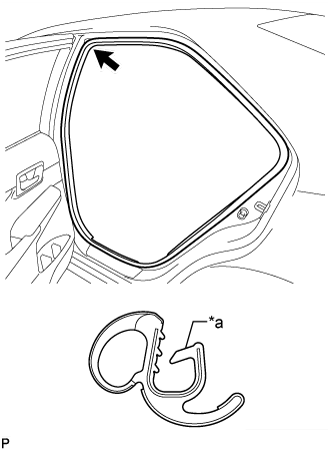
  1. Align the alignment mark (Pink) on the weatherstrip with the protruding portion on the vehicle body indicated by the arrow in the illustration, and install the rear door opening trim weatherstrip LH.
    Text in Illustration 
    *a
    Alignment Mark (Pink)

    NOTICE:
    After installation, check that the corners fit correctly.


4. INSTALL RADIO SETTING CONDENSER (for High Mounted Stop Light)


    E226085
  1. Engage the claw to install a new terminal cover to the wire harness.

    NOTICE:
    1. Make sure to hold the wire harness so that the crimping side of the terminal is facing up when installing the wire harness to the terminal cover.
    2. Make sure not to bend the exposed wire when installing the wire harness to the terminal cover.
    3. Do not use excessive force when inserting the wire harness into the terminal cover.
    4. If the terminal cover has been deformed at installation, replace the terminal and terminal cover with new ones.


    E223710
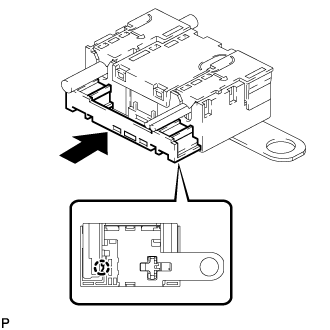
  1. Engage the 6 claws to install the 2 new terminal covers with wire harness to a new condenser.

    NOTICE:
    1. Do not use excessive force when inserting the terminal cover into the condenser.
    2. If the terminal cover has been deformed at installation, replace the terminal, terminal cover and condenser with new ones.


    E226095
  1. Engage the claw to insert the cover as shown in the illustration.

  1. Engage the clamp to temporarily install a new radio setting condenser with wire harness.

  1. Install the new radio setting condenser with the bolt.

    Torque:
    8.0 N*m{ 82 kgf*cm , 71 in.*lbf }


5. INSTALL REAR SIDE SEATBACK ASSEMBLY LH
  1. Engage the hook.

  1. Install the rear side seatback assembly LH with the 2 bolts.

    Torque:
    18 N*m{ 184 kgf*cm , 13 ft.*lbf }

  1. Connect the connector.

  1. Connect the rear seat outer belt assembly to the rear seat shoulder belt guide.


6. INSTALL REAR SEAT CUSHION LOCK HOOK


    B393388
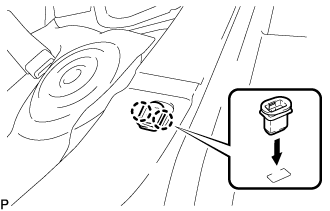
  1. Engage the 2 claws to install a new rear seat cushion lock hook as shown in the illustration.

    NOTICE:
    Rear seat cushion lock hooks must not be reused.

    HINT:
    Use the same procedure for the RH side and the LH side.


7. INSTALL REAR SEAT CUSHION ASSEMBLY
  1. Place the rear seat cushion assembly in the cabin.

    NOTICE:
    Be careful not to damage the vehicle body.

  1. Pass the 2 rear seat inner belt assemblies through the rear seat cushion assembly.


    B280250
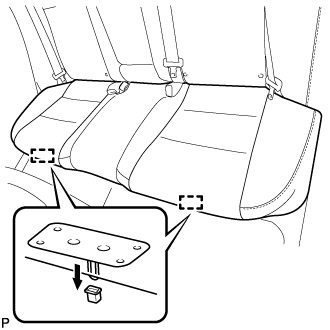
  1. Engage the 2 rear seat cushion frame hooks on the front side of the rear seat cushion assembly to the 2 rear seat cushion lock hooks as shown in the illustration.

  1. Confirm that the rear seat cushion assembly is securely installed.

    NOTICE:
    When installing the rear seat cushion assembly, make sure that the seat belt buckles are not under the rear seat cushion assembly.


8. CONNECT CABLE TO NEGATIVE BATTERY TERMINAL

NOTICE:
When disconnecting the cable, some systems need to be initialized after the cable is reconnected (Click here).


9. INSPECT SRS WARNING LIGHT
(Click here)