w/ Windshield Deicer System:
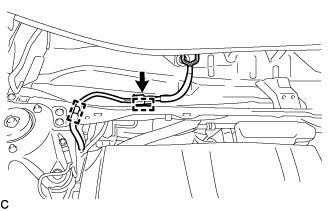
Disengage the 2 clamps.
Disconnect the connector and separate the wire harness from the front outer cowl top panel sub-assembly.
 |
VACUUM WARNING SWITCH > REMOVAL |
| 1. REMOVE WINDSHIELD WIPER MOTOR AND LINK ASSEMBLY |
| 2. REMOVE FRONT OUTER COWL TOP PANEL SUB-ASSEMBLY |
w/ Windshield Deicer System:
|
Disengage the 2 clamps.
Disconnect the connector and separate the wire harness from the front outer cowl top panel sub-assembly.
w/ Heated Windshield Defroster System:
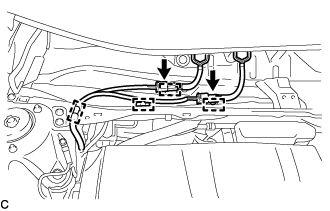 |
Disengage the 4 clamps.
Disconnect the 2 connectors and separate the wire harness from the front outer cowl top panel sub-assembly.
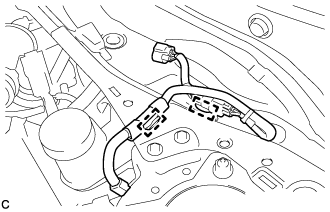 |
Disengage the 2 clamps and separate the wire harness from the front outer cowl top panel sub-assembly.
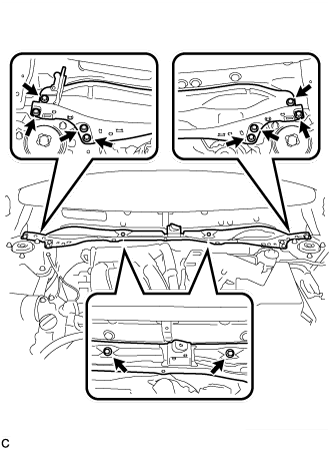 |
Remove the 10 bolts and front outer cowl top panel sub-assembly.
| 3. REMOVE VACUUM WARNING SWITCH ASSEMBLY |
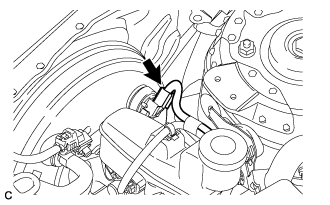 |
Disconnect the engine wire connector from the vacuum warning switch assembly.
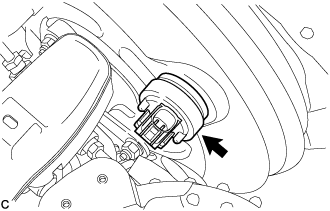 |
Remove the vacuum warning switch assembly from the brake booster assembly.
| 4. REMOVE CHECK VALVE GROMMET |
Remove the check valve grommet from the brake booster assembly.