 |
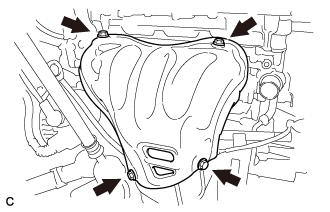
Remove the 4 bolts and No. 1 exhaust manifold heat insulator from the exhaust manifold converter sub-assembly (TWC: Front Catalyst).
CYLINDER HEAD GASKET > REMOVAL |
| 1. REMOVE TIMING CHAIN COVER SUB-ASSEMBLY |
| 2. REMOVE NO. 1 EXHAUST MANIFOLD HEAT INSULATOR |
|
Remove the 4 bolts and No. 1 exhaust manifold heat insulator from the exhaust manifold converter sub-assembly (TWC: Front Catalyst).
| 3. REMOVE EGR PIPE CONNECTOR |
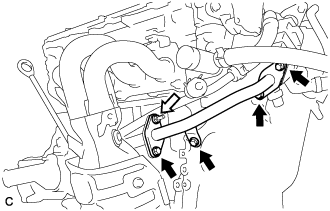 |
Remove the 4 bolts, nut and EGR pipe connector from the exhaust manifold converter sub-assembly (TWC: Front Catalyst), EGR cooler assembly and cylinder block sub-assembly.
 | Bolt |
 | Nut |
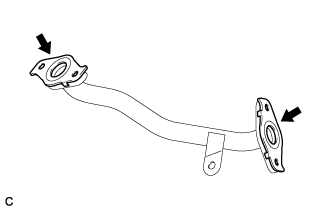 |
Remove the 2 EGR cooler gaskets from the EGR pipe connector.
| 4. REMOVE MANIFOLD STAY |
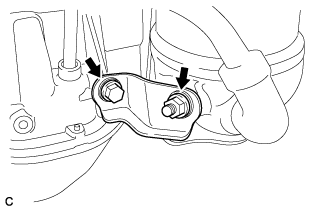 |
Remove the bolt, nut and manifold stay from the exhaust manifold converter sub-assembly (TWC: Front Catalyst) and stiffening crankcase assembly.
| 5. REMOVE NO. 2 MANIFOLD STAY |
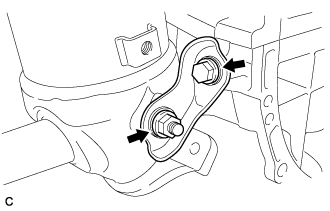 |
Remove the bolt, nut and No. 2 manifold stay from the exhaust manifold converter sub-assembly (TWC: Front Catalyst) and stiffening crankcase assembly.
| 6. REMOVE EXHAUST MANIFOLD CONVERTER SUB-ASSEMBLY (TWC: Front Catalyst) |
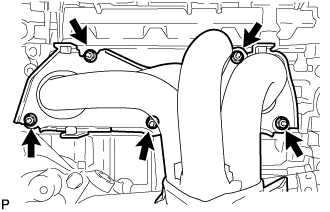 |
Remove the 5 nuts and exhaust manifold converter sub-assembly (TWC: Front Catalyst) from the cylinder head sub-assembly.
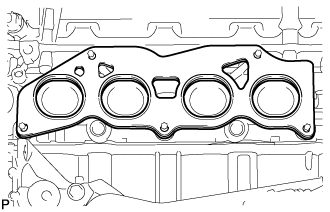 |
Remove the exhaust manifold gasket from the cylinder head sub-assembly.
| 7. DISCONNECT FUEL TUBE SUB-ASSEMBLY |
Disconnect the fuel tube sub-assembly from the fuel delivery pipe.
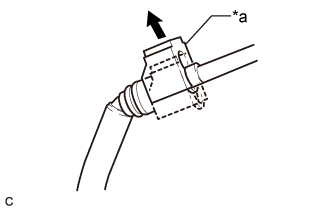 |
Pull off the fuel tube connector cover.
| *a | Fuel Tube Connector Cover |
| Pull off |
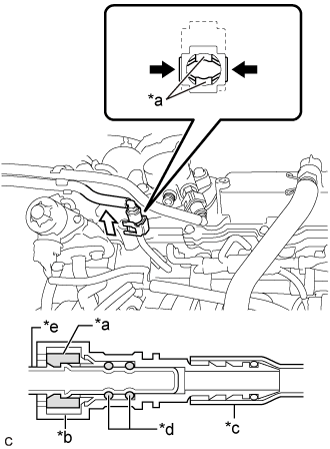 |
Pinch the retainer of the fuel tube connector, and then pull the fuel tube connector off of the fuel pipe.
| *a | Retainer |
| *b | Fuel Tube Connector |
| *c | Nylon Tube |
| *d | O-ring |
| *e | Fuel Pipe |
| Pinch |
| Pull |
If the fuel tube connector and fuel pipe are stuck, push and pull the fuel tube connector to release it. Pull the fuel tube connector off of the fuel pipe carefully.
Check that there is no foreign matter on the sealing surfaces of the disconnected fuel lines. Clean them if necessary.
Cover the disconnected fuel pipe and fuel tube connector with plastic bags to prevent damage and contamination.
| 8. REMOVE FUEL DELIVERY PIPE |
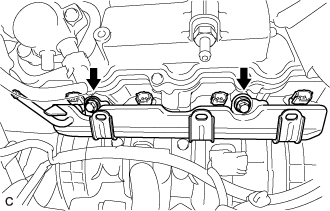 |
Remove the 2 bolts and fuel delivery pipe with the port fuel injector assemblies.
| 9. REMOVE FUEL DELIVERY SPACER |
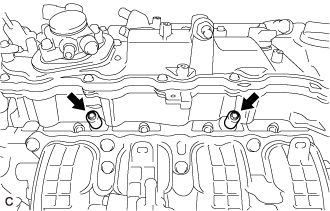 |
Remove the 2 fuel delivery spacers from the cylinder head sub-assembly.
| 10. REMOVE INJECTOR VIBRATION INSULATOR |
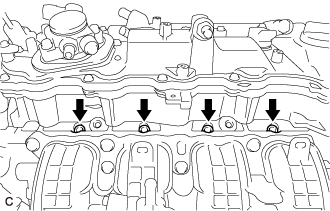 |
Remove the 4 injector vibration insulators from the cylinder head sub-assembly.
| 11. REMOVE PORT FUEL INJECTOR ASSEMBLY |
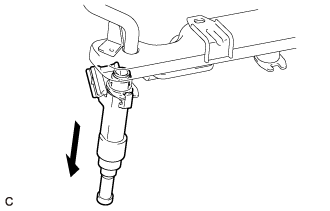 |
Pull the 4 port fuel injector assemblies out of the fuel delivery pipe.
Remove the O-ring from each port fuel injector assembly.
Attach a tag or label with the corresponding cylinder number to each port fuel injector assembly so that they can be installed to their original locations.
| 12. REMOVE THROTTLE BODY WITH MOTOR ASSEMBLY |
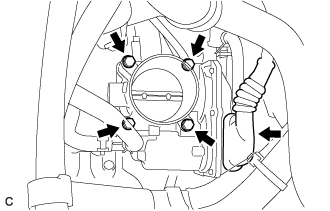 |
Disconnect the throttle body with motor assembly connector.
Remove the 4 bolts and throttle body with motor assembly from the intake manifold.
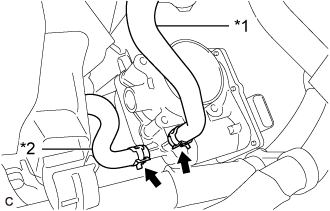 |
Slide the 2 clips and disconnect the No. 2 water by-pass hose and No. 3 water by-pass hose from the throttle body with motor assembly.
| *1 | No. 2 Water By-pass Hose |
| *2 | No. 3 Water By-pass Hose |
| 13. REMOVE THROTTLE BODY GASKET |
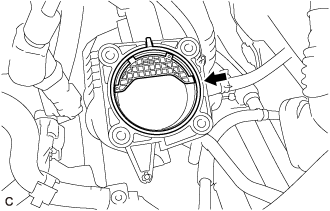 |
Remove the throttle body gasket from the intake manifold.
| 14. REMOVE NO. 2 EGR PIPE |
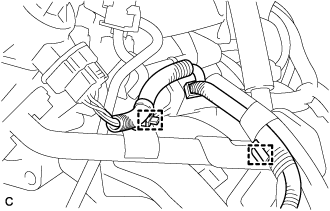 |
Disengage the 2 wire harness clamps from the No. 2 EGR pipe.
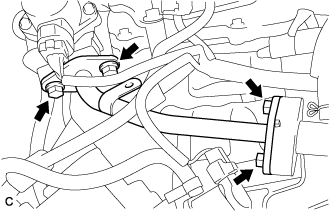 |
Remove the 4 bolts and No. 2 EGR pipe from the EGR valve assembly and intake manifold.
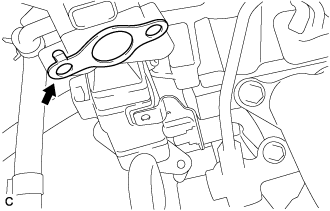 |
Remove the No. 2 EGR pipe gasket from the EGR valve assembly.
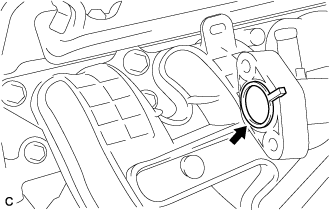 |
Remove the EGR inlet gasket from the intake manifold.
| 15. REMOVE INTAKE MANIFOLD |
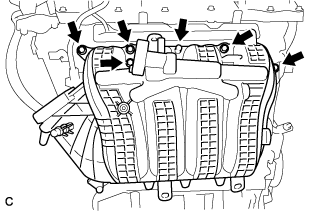 |
Remove the 6 bolts and intake manifold from the cylinder head sub-assembly.
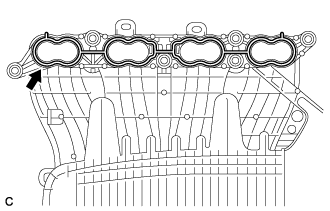 |
Remove the manifold gasket from the intake manifold.
| 16. REMOVE NO. 5 ENGINE WIRE |
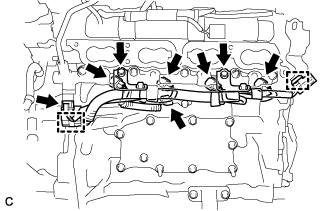 |
Remove the 2 bolts and disconnect the No. 5 engine wire from the fuel delivery pipe sub-assembly.
Disconnect the fuel pressure sensor connector, knock control sensor connector and 4 fuel injector set connectors.
Disengage the 2 clamps and remove the No. 5 engine wire.
| 17. REMOVE FUEL DELIVERY PIPE SUB-ASSEMBLY |
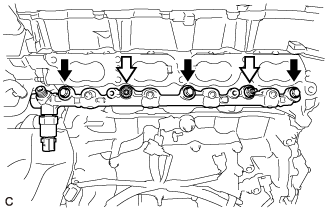 |
Remove the 3 bolts, 2 nuts and fuel delivery pipe sub-assembly with the direct fuel injector assemblies.
| Bolt |
| Nut |
| 18. REMOVE DIRECT FUEL INJECTOR ASSEMBLY |
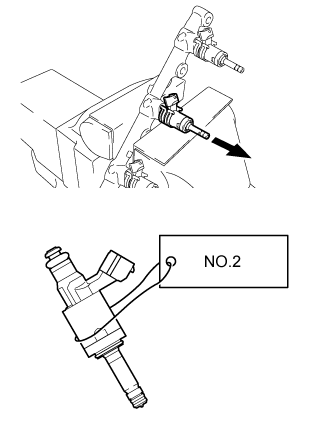 |
Secure the fuel delivery pipe sub-assembly in a vise between aluminum plates and pull out the 4 direct fuel injector assemblies.
Remove the nozzle holder clamp from each direct fuel injector assembly.
Using needle nose pliers, remove the No. 3 fuel injector back-up ring from each direct fuel injector assembly.
Remove the O-ring and No. 1 fuel injector back-up ring from each direct fuel injector assembly.
Remove the C-ring and injector vibration insulator from each direct fuel injector assembly.
| 19. REMOVE FUEL INJECTOR SEAL |
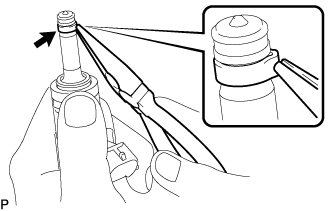 |
Using the tip of needle nose pliers, pinch and pull the fuel injector seal at several points to stretch it.
Remove the fuel injector seal from each direct fuel injector assembly.
| 20. REMOVE EGR VALVE WITH COOLER ASSEMBLY |
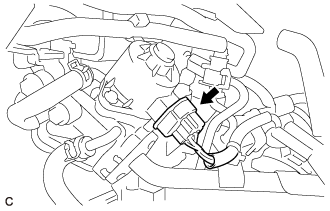 |
Disconnect the EGR valve assembly connector.
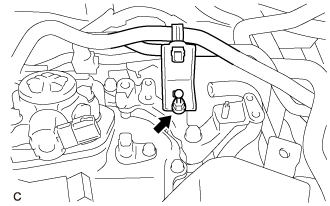 |
Remove the engine cover joint and separate the fuel hose bracket from the EGR valve bracket.
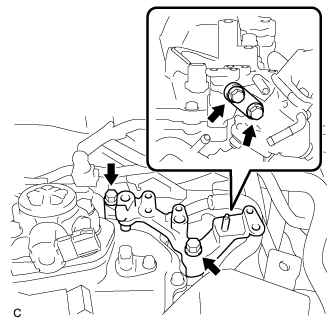 |
Remove the 4 bolts and 2 EGR valve brackets.
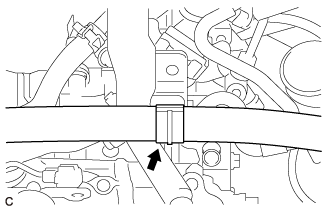 |
Disengage the water hose from the hose clamp.
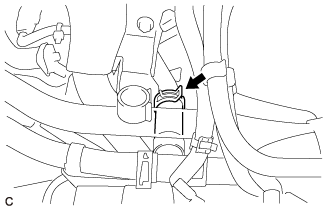 |
Slide the clip and disconnect the water hose sub-assembly from the EGR cooler assembly.
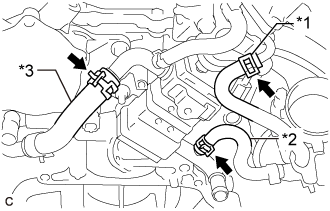 |
Slide the clip and disconnect the No. 2 water by-pass hose from the EGR valve assembly.
| *1 | No. 2 Water By-pass Hose |
| *2 | No. 3 Water By-pass Hose |
| *3 | No. 4 Water By-pass Hose |
Slide the clip and disconnect the No. 3 water by-pass hose from the EGR cooler assembly.
Slide the clip and disconnect the No. 4 water by-pass hose from the EGR cooler assembly.
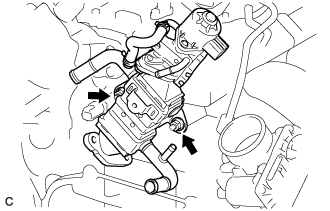 |
Remove the 2 nuts and EGR valve with cooler assembly from cylinder head sub-assembly.
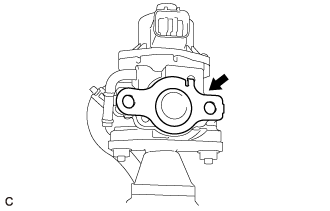 |
Remove the No. 2 EGR pipe gasket from the EGR valve assembly.
| 21. REMOVE VACUUM PUMP ASSEMBLY |
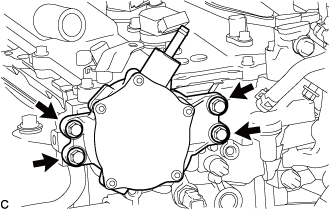 |
Remove the 4 bolts and vacuum pump assembly.
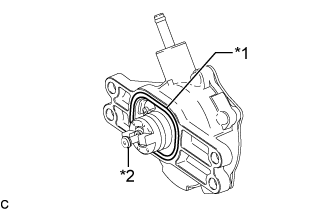 |
Remove the No. 2 O-ring and No. 3 O-ring from the vacuum pump assembly.
| *1 | No. 2 O-ring |
| *2 | No. 3 O-ring |
| 22. SET NO. 1 CYLINDER TO TDC/COMPRESSION |
Temporarily install the crankshaft pulley set bolt.
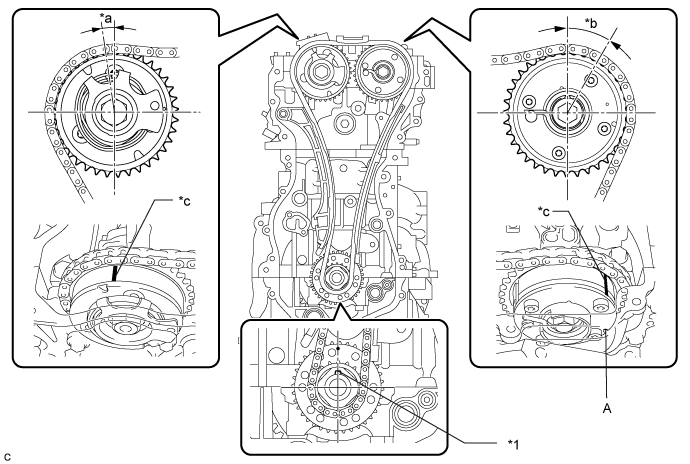
| *1 | Crankshaft Pulley Key | - | - |
| *a | Approximately 7° | *b | Approximately 32° |
| *c | Timing Mark | - | - |
Rotate the crankshaft clockwise and align the crankshaft pulley key as shown in the illustration.
Check that the timing marks on the camshaft timing exhaust gear assembly and camshaft timing gear assembly are as shown in the illustration.
Remove the crankshaft pulley set bolt.
| 23. REMOVE TIMING CHAIN GUIDE |
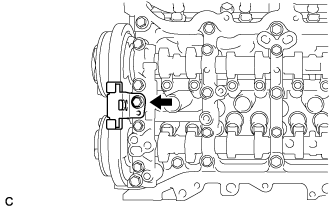 |
Remove the bolt and timing chain guide.
| 24. REMOVE NO. 1 CHAIN TENSIONER ASSEMBLY |
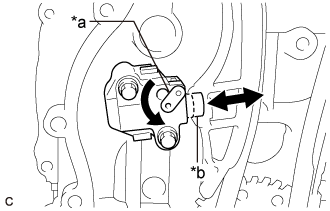 |
Allow the plunger to extend slightly, and then turn the stopper plate counterclockwise to release the lock. Once the lock is released, push the plunger into the No. 1 chain tensioner assembly.
| *a | Stopper Plate |
| *b | Plunger |
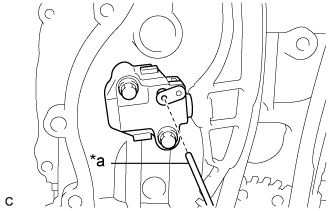 |
Turn the stopper plate clockwise to set the lock, and insert a pin into the stopper plate hole.
| *a | Pin |
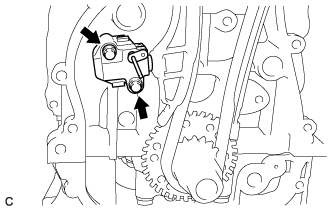 |
Remove the 2 bolts, No. 1 chain tensioner assembly and gasket.
| 25. REMOVE CHAIN TENSIONER SLIPPER |
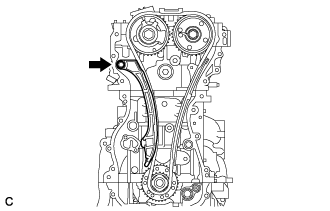 |
Remove the bolt and chain tensioner slipper.
| 26. REMOVE CHAIN SUB-ASSEMBLY |
Remove the chain sub-assembly.
| 27. REMOVE NO. 1 CHAIN VIBRATION DAMPER |
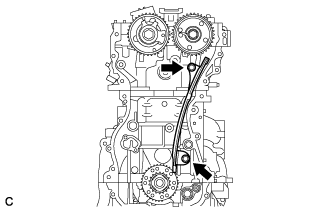 |
Remove the 2 bolts and No. 1 chain vibration damper.
| 28. REMOVE CAMSHAFT TIMING GEAR ASSEMBLY |
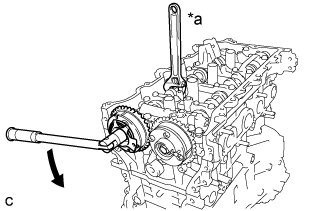 |
Using a wrench to hold the hexagonal portion of the camshaft, remove the camshaft timing gear bolt and camshaft timing gear assembly.
| *a | Hold |
| Turn |
| 29. REMOVE CAMSHAFT TIMING EXHAUST GEAR ASSEMBLY |
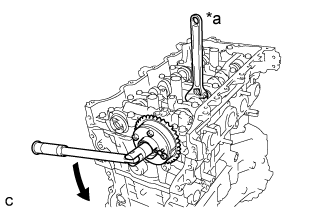 |
Using a wrench to hold the hexagonal portion of the No. 2 camshaft, remove the bolt and camshaft timing exhaust gear assembly.
| *a | Hold |
| Turn |
| 30. REMOVE CAMSHAFT HOUSING SUB-ASSEMBLY |
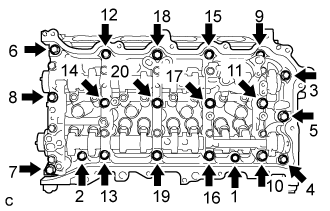 |
Uniformly loosen and remove the 20 bolts in the order shown in the illustration.
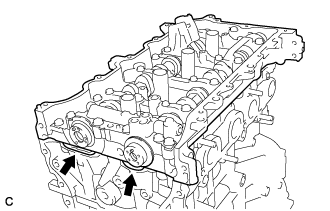 |
Remove the camshaft housing sub-assembly by prying between the cylinder head sub-assembly and camshaft housing sub-assembly with a screwdriver.
| 31. REMOVE CAMSHAFT BEARING CAP |
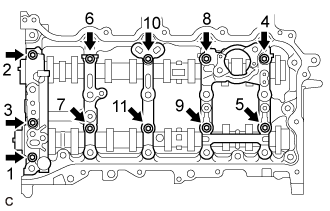 |
Remove the 11 bolts in the order shown in the illustration.
Remove the No. 1 camshaft bearing cap, No. 2 camshaft bearing cap, No. 3 camshaft bearing cap and No. 4 camshaft bearing cap.
| 32. REMOVE CAMSHAFT |
Remove the camshaft from the camshaft housing sub-assembly.
| 33. REMOVE NO. 2 CAMSHAFT |
Remove the No. 2 camshaft from the camshaft housing sub-assembly.
| 34. REMOVE OIL CONTROL VALVE FILTER |
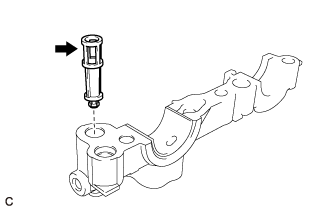 |
Remove the oil control valve filter from the No. 1 camshaft bearing cap.
| 35. REMOVE NO. 1 CAMSHAFT BEARING |
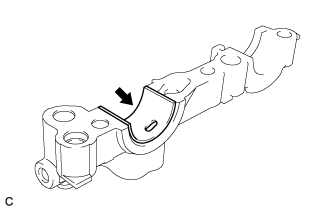 |
Remove the No. 1 camshaft bearing from the No. 1 camshaft bearing cap.
| 36. REMOVE NO. 2 CAMSHAFT BEARING |
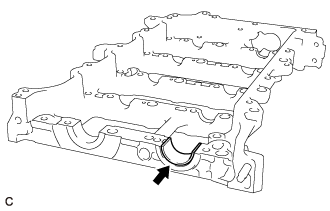 |
Remove the No. 2 camshaft bearing from the camshaft housing sub-assembly.
| 37. REMOVE NO. 1 VALVE ROCKER ARM SUB-ASSEMBLY |
Remove the 16 No. 1 valve rocker arm sub-assemblies.
| 38. REMOVE VALVE LASH ADJUSTER ASSEMBLY |
Remove the 16 valve lash adjuster assemblies from the cylinder head sub-assembly.
| 39. REMOVE VALVE STEM CAP |
Remove the 16 valve stem caps from the cylinder head sub-assembly.
| 40. REMOVE CYLINDER HEAD SUB-ASSEMBLY |
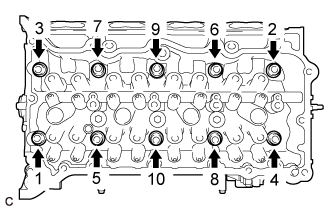 |
Using a 10 mm bi-hexagon wrench, uniformly loosen the 10 cylinder head set bolts in the order shown in the illustration. Remove the 10 cylinder head set bolts and 10 plate washers.
Remove the cylinder head sub-assembly.
| 41. REMOVE CYLINDER HEAD GASKET |
Remove the cylinder head gasket from the cylinder block sub-assembly.