SEAT REAR SEAT RECLINING CONTROL CABLE REMOVAL
CAUTION / NOTICE / HINT
The necessary procedures (adjustment, calibration, initialization or registration) that must be performed after parts are removed and installed, or replaced during rear seatback lock assembly removal/installation are shown below.
| Replaced Part or Performed Procedure | Necessary Procedure | Effect/Inoperative Function when Necessary Procedure not Performed | Link |
|---|---|---|---|
| Disconnect cable from negative battery terminal | Perform steering sensor zero point calibration | Lane departure alert system (w/ Steering Control) | ( ) |
| Pre-collision system | |||
| Memorize steering angle neutral point | Parking assist monitor system | ()
|
- CAUTION:
- ·
Wear protective gloves. Sharp areas on the parts may injure your hands.
·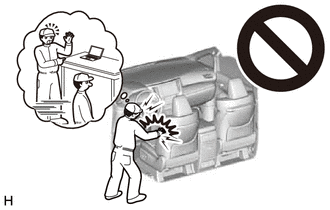
Some of these service operations affect the SRS airbag system. Read the precautionary notices concerning the SRS airbag system before servicing.
Click hereVehicle Interior>SUPPLEMENTAL RESTRAINT SYSTEMS>AIRBAG SYSTEM>PRECAUTION
PROCEDURE

 64770
1.REMOVE SPARE WHEEL COVER ASSEMBLY
2.REMOVE REAR SEAT ASSEMBLY
81006
3.REMOVE CENTER STOP LIGHT SET
64727A
4.REMOVE LUGGAGE COMPARTMENT TRIM INNER PAD
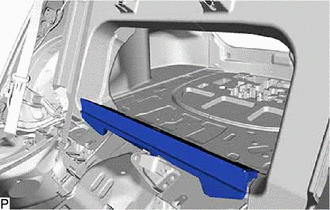
Remove the luggage compartment trim inner pad.
73370E
5.DISCONNECT REAR SEAT OUTER BELT ASSEMBLY LH
73360D
6.DISCONNECT REAR SEAT OUTER BELT ASSEMBLY RH
- HINT:
-
Use the same procedure as for the LH side.
62472A
7.REMOVE INNER ROOF SIDE GARNISH LH
62471A
8.REMOVE INNER ROOF SIDE GARNISH RH
- HINT:
-
Use the same procedure as for the LH side.
73373F
9.REMOVE REAR SEAT SHOULDER BELT HOLE COVER
64330
10.REMOVE PACKAGE TRAY TRIM PANEL ASSEMBLY (w/o Rear Sunshade)
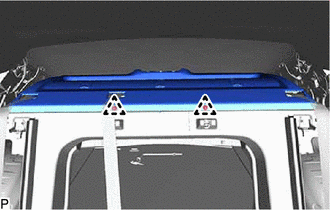
Remove the 2 clips.
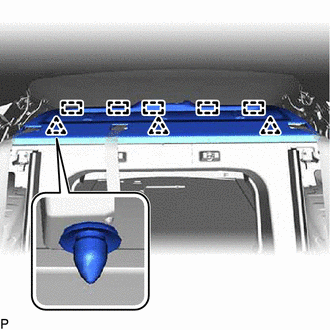
Disengage the 3 clips and 5 guides.
Pass the 3 rear seat belt floor anchors through the package tray trim panel assembly then remove the package tray trim panel assembly.
64330
11.REMOVE PACKAGE TRAY TRIM PANEL ASSEMBLY (w/ Rear Sunshade)
64272B
12.REMOVE ROOM PARTITION BOARD LH
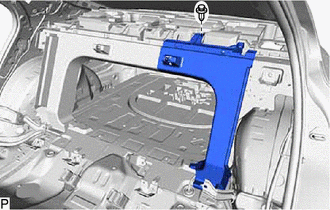
Remove the clip.
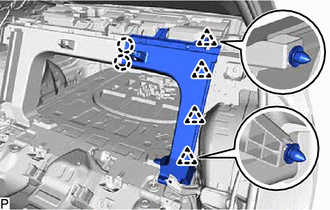
Disengage the 2 claws.
Disengage the 4 clips to remove the room partition board LH.
64271G
13.REMOVE ROOM PARTITION BOARD RH
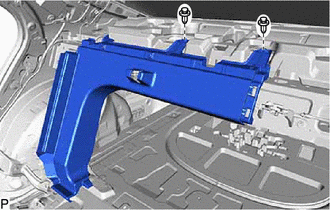
Remove the 2 clips.
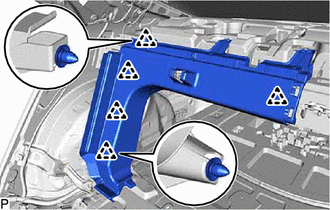
Disengage the 5 clips to remove the room partition board RH.
72640A
14.REMOVE REAR SEATBACK LOCK ASSEMBLY LH
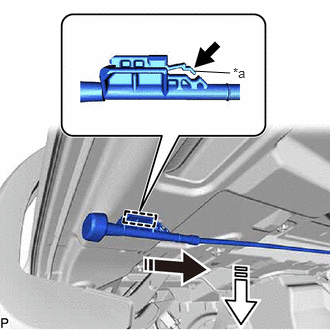
| *a | Stopper |

|
Release |

|
Remove in this Direction (1) |

|
Remove in this Direction (2) |
Release the stopper and disengage the guide as shown in the illustration.
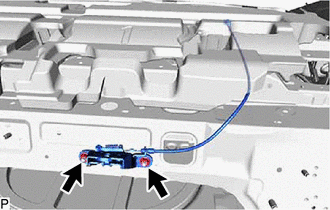
Remove the 2 nuts and rear seatback lock assembly LH.
72630C
15.REMOVE REAR SEATBACK LOCK ASSEMBLY RH
- HINT:
-
Use the same procedure as for the LH side.