EXTERIOR PANELS / TRIM FRONT BUMPER REMOVAL
CAUTION / NOTICE / HINT
The necessary procedures (adjustment, calibration, initialization, or registration) that must be performed after parts are removed and installed, or replaced during front bumper assembly removal/installation are shown below.
| Replaced Part or Performed Procedure | Necessary Procedure | Effect/Inoperative Function when Necessary Procedure not Performed | Link |
|---|---|---|---|
| Front bumper assembly (w/ Panoramic View Monitor System) | Front television camera view adjustment | Panoramic View Monitor System | ( ) |
- HINT:
-
When the front bumper is damaged or deformed due to an accident or contact with other objects, etc., or the bumper installation area on the body is repaired, it is necessary to perform millimeter wave radar sensor adjustment.
-
Click hereEngine / Hybrid System>CRUISE CONTROL>FRONT CAMERA>ADJUSTMENT (SEQUENTIAL RECOGNITION)
PROCEDURE

 53295E
1.REMOVE COOL AIR INTAKE DUCT SEAL
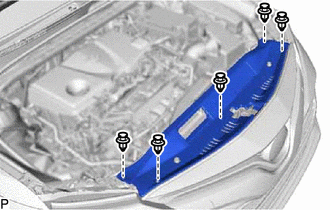
Remove the 5 clips.
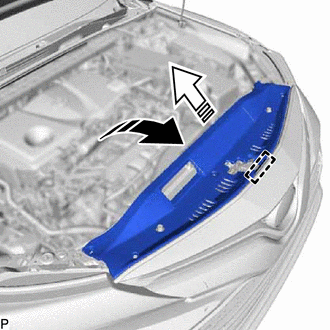

|
Remove in this Direction (1) |

|
Remove in this Direction (2) |
Disengage the guide and remove the cool air intake duct seal as shown in the illustration.
2.REMOVE FRONT BUMPER ASSEMBLY
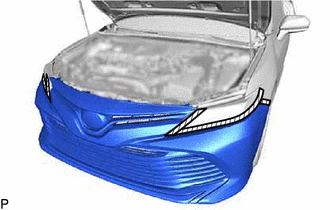

|
Protective Tape |
Apply protective tape around the front bumper assembly as shown in the illustration.
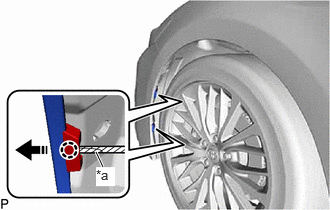
| *a | Protective Tape |
|
|
Remove in this Direction |
Using a screwdriver with its tip wrapped with protective tape, disengage the 2 claws as shown in the illustration.
- HINT:
-
Use the same procedure for the RH side and LH side.
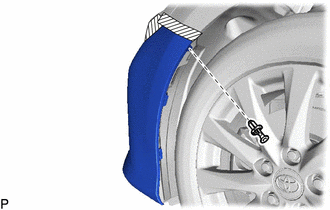
Remove the clip.
- HINT:
-
Use the same procedure for the RH side and LH side.
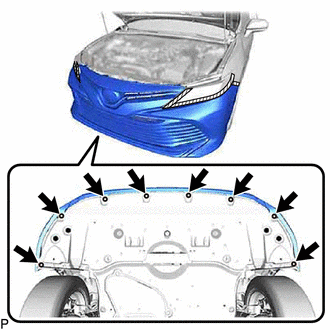
Remove the 8 screws.
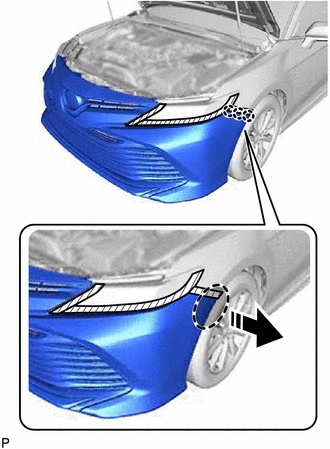

|
Place Hand Here |
|
|
Remove in this Direction |
Disengage the 3 claws as shown in the illustration.
- HINT:
-
Use the same procedure for the RH side and LH side.
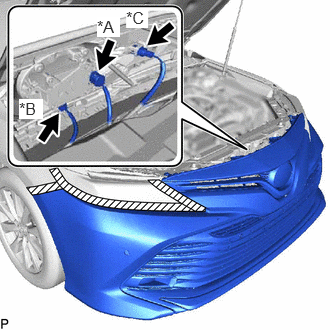
| *A | w/ Pre-collision System |
| *B | w/ Blind Spot Monitor System |
| *C | w/ TOYOTA Parking Assist-sensor System |
w/ Pre-collision System:
Disconnect the connector.
w/ Blind Spot Monitor System:
Disconnect the connector.
w/ TOYOTA Parking Assist-sensor System:
Disconnect the connector.
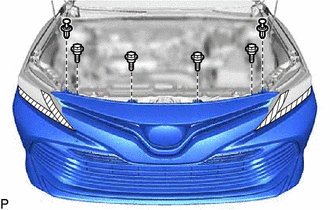
Remove the 2 clips.
Remove the 4 bolts.
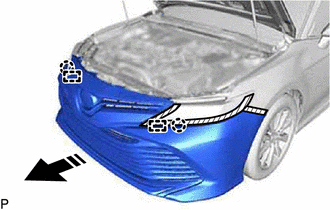
|
|
Remove in this Direction |
Disengage the 2 claws and 2 guides to remove the front bumper assembly as shown in the illustration.
w/ Fog Light:
Disconnect the connector.
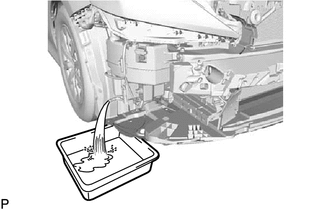
w/ Headlight Cleaner System:
Disconnect the headlight cleaner hose and drain the washer fluid.
- HINT:
-
Use a container to collect the washer fluid.