BRAKE SYSTEM (OTHER) BRAKE PEDAL(for LHD) REMOVAL
CAUTION / NOTICE / HINT
The necessary procedures (adjustment, calibration, initialization, or registration) that must be performed after parts are removed, installed, or replaced during brake pedal support assembly removal/installation are shown below.
| Replaced Part or Performed Procedure | Necessary Procedure | Effect/Inoperative Function when Necessary Procedure not Performed | Link |
|---|---|---|---|
| Auxiliary battery terminal is disconnected/reconnected | Perform steering sensor zero point calibration | Lane departure alert system (w/ steering control) | ( ) |
| Pre-collision system | |||
| Memorize steering angle neutral point | Parking assist monitor system | ()
|
|
| Replacement of brake pedal support assembly | 1.
Clear the data stored during previous linear solenoid valve offset learning, ABS holding solenoid valve learning, brake pedal stroke sensor assembly zero point calibration and system information memorization. 2.
Perform linear solenoid valve offset learning, ABS holding solenoid valve learning, brake pedal stroke sensor assembly zero point calibration and system information memorization. |
·
DTCs are stored ·
ABS warning light illuminates ·
Brake warning light / yellow (minor malfunction) illuminates ·
Slip indicator light illuminates ·
VSC disabled or malfunctions |
()for Initialization
( )for Calibration
|
CAUTION / NOTICE / HINT
- NOTICE:
-
While the auxiliary battery is connected, even if the power switch is off, the brake control system activates when the brake pedal is depressed or any door courtesy switch turns on. Therefore, when servicing the brake system components, do not operate the brake pedal or open/close the doors while the auxiliary battery is connected.
PROCEDURE

 47210L
1.REMOVE BRAKE BOOSTER WITH MASTER CYLINDER ASSEMBLY
89510D
2.REMOVE BRAKE PEDAL STROKE SENSOR ASSEMBLY
84340
3.REMOVE STOP LIGHT SWITCH ASSEMBLY
4.REMOVE BRAKE PEDAL SUPPORT ASSEMBLY
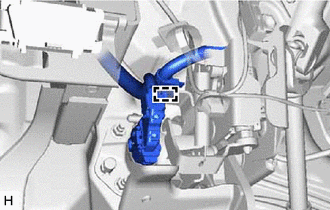
Disengage the clamp to separate the wire harness from the brake pedal support assembly.
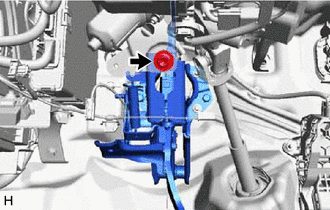
Remove the bolt and separate the brake pedal support assembly from the instrument panel reinforcement assembly.
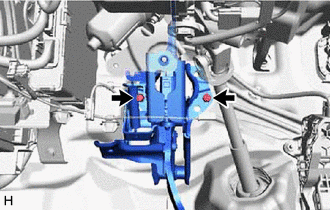
Remove the 2 clips.
Remove the brake pedal support assembly while avoiding the stud bolts of the brake booster support base.
- NOTICE:
-
Be careful not to deform the bracket of the instrument panel reinforcement assembly.
47101A
5.REMOVE BRAKE PEDAL RETURN SPRING
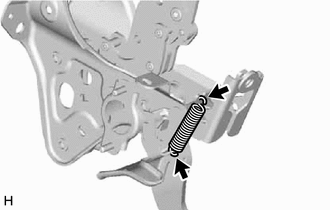
Remove the brake pedal return spring from the brake pedal support assembly.
84345
6.REMOVE STOP LIGHT SWITCH MOUNTING ADJUSTER
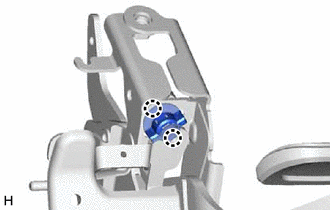
Disengage the 2 claws and remove the stop light switch mounting adjuster.
47121
7.REMOVE BRAKE PEDAL PAD
Remove the brake pedal pad from the brake pedal support assembly.