AUDIO / VIDEO RADIO RECEIVER REMOVAL
PROCEDURE

 1. PRECAUTION (w/o Navigation System)
- NOTICE:
- ·
When replacing the radio and display receiver assembly, always replace it with a new one. If a radio and display receiver assembly which was installed to another vehicle is used, the following may occur:
-A communication malfunction DTC may be stored.
-The radio and display receiver assembly may not operate normally.
2. PRECAUTION (w/ Navigation System)
- NOTICE:
- ·
When replacing the radio and display receiver assembly or navigation ECU, always replace it with a new one. If a radio and display receiver assembly or navigation ECU which was installed to another vehicle is used, the following may occur:
-A communication malfunction DTC may be stored.
-The radio and display receiver assembly or navigation ECU may not operate normally.
·After replacing the radio and display receiver assembly, if "New software is not compatible with the system. Contact your dealer." is displayed on the multi-display, update the software of the navigation ECU.
3. CHANGE POWER TILT AND POWER TELESCOPIC STEERING COLUMN SYSTEM SETTINGS (for Power Tilt and Power Telescopic Steering Column)
55435B
4.REMOVE NO. 1 METER HOOD CLUSTER
55012A
5.REMOVE NO. 2 INSTRUMENT PANEL GARNISH SUB-ASSEMBLY
55480D
6.REMOVE LOWER INSTRUMENT PANEL FINISH PANEL ASSEMBLY
55670
7.REMOVE NO. 3 INSTRUMENT PANEL REGISTER ASSEMBLY
8.REMOVE RADIO AND DISPLAY RECEIVER ASSEMBLY WITH BRACKET
for Manual Tilt and Manual Telescopic Steering Column:
Release the tilt and telescopic lever and fully extend and lower the steering column assembly.
Lock the tilt and telescopic lever.
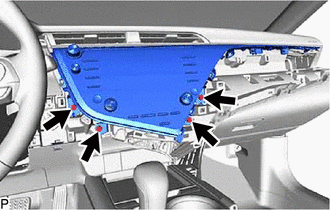
Remove the 4 bolts.
Disengage the 4 clips in the order shown in the illustration.
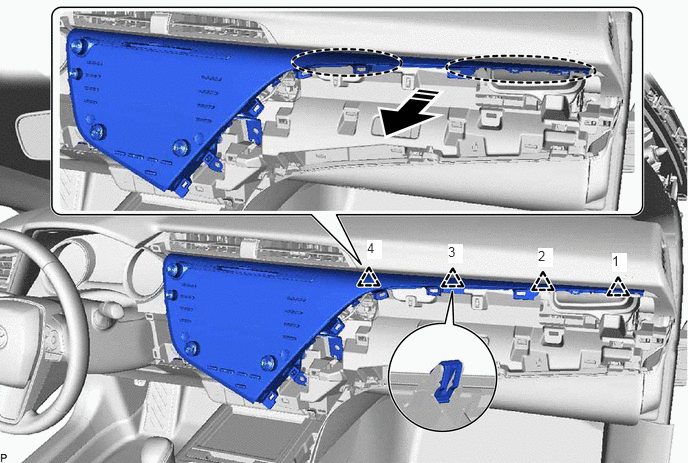

|
Place Hand Here | 
|
Remove in this Direction |
Disengage the 7 clips as shown in the illustration.
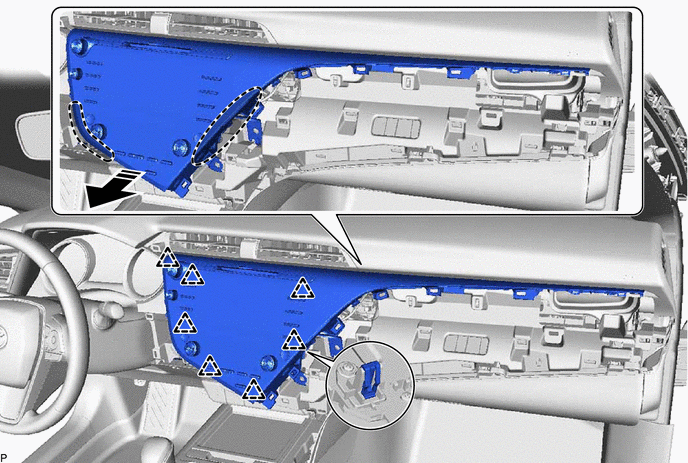
|
|
Place Hand Here |
|
Remove in this Direction |
Disengage the 2 guides as shown in the illustration.
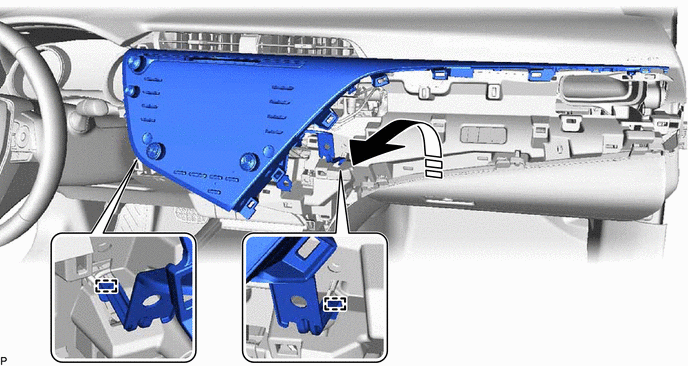
|
|
Remove in this Direction | - | - |
Disconnect each connector and remove the radio and display receiver assembly with bracket.
86453
9.REMOVE MULTI-MEDIA MODULE WIRE
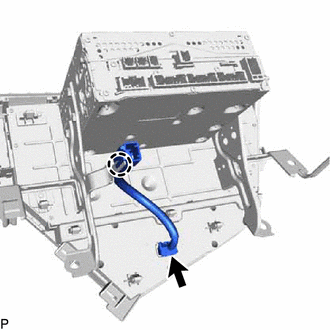
Disconnect the connector.
Disengage the claw to remove the multi-media module wire.
10.DISCONNECT NAVIGATION ECU WITH WIRE (w/ Navigation System)
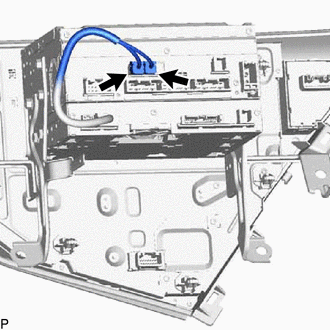
Disconnect the 2 connectors to disconnect the navigation ECU with wire.
86211J
11.REMOVE NO. 1 RADIO RECEIVER BRACKET
w/o Navigation System:
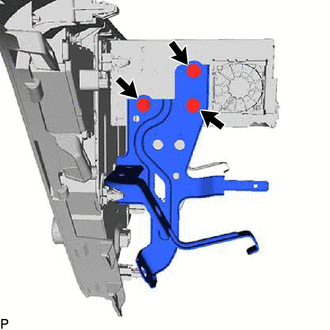
Remove the 3 screws and No. 1 radio receiver bracket.
w/ Navigation System:
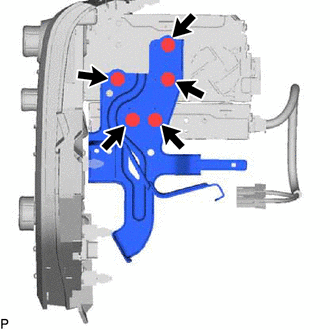
Remove the 5 screws and No. 1 radio receiver bracket.
86212C
12.REMOVE NO. 2 RADIO RECEIVER BRACKET
w/o Navigation System:
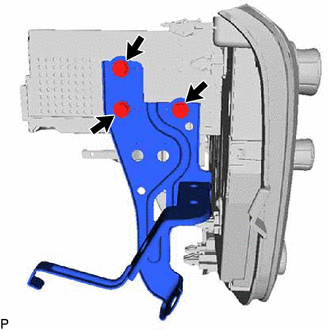
Remove the 3 screws and No. 2 radio receiver bracket.
w/ Navigation System:
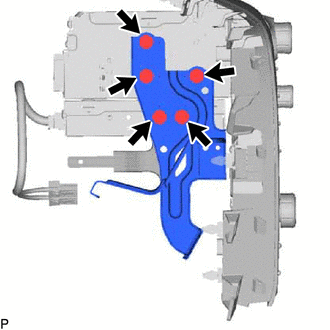
Remove the 5 screws and No. 2 radio receiver bracket.
13.REMOVE NAVIGATION ECU WITH WIRE (w/ Navigation System)
86140A
14.REMOVE RADIO AND DISPLAY RECEIVER ASSEMBLY