AUDIO / VIDEO RADIO ANTENNA CORD REMOVAL
CAUTION / NOTICE / HINT
The necessary procedures (adjustment, calibration, initialization, or registration) that must be performed after parts are removed and installed, or replaced during antenna cord sub-assembly removal/installation are shown below.
| Replaced Part or Performed Procedure | Necessary Procedures | Effect/Inoperative Function When Necessary Procedures are not Performed | Link |
|---|---|---|---|
|
*: When performing learning using the GTS Click here( |
|||
| Disconnect cable from negative auxiliary battery terminal | Perform steering sensor zero point calibration | Lane Departure Alert System (w/ Steering Control) | ( ) |
| Parking Support Brake System* | |||
| Pre-collision System | |||
| Memorize steering angle neutral point | Parking Assist Monitor System | ()
|
|
- CAUTION:
-
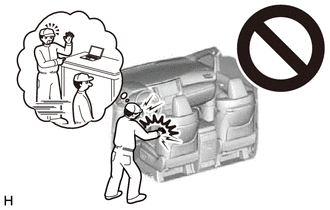
-
Some of these service operations affect the SRS airbag system. Read the precautionary notices concerning the SRS airbag system before servicing.
-
Click hereVehicle Interior>SUPPLEMENTAL RESTRAINT SYSTEMS>AIRBAG SYSTEM>PRECAUTION
PROCEDURE

 1.REMOVE INSTRUMENT PANEL SAFETY PAD SUB-ASSEMBLY
55972C
2.REMOVE NO. 2 SIDE DEFROSTER NOZZLE DUCT (for LHD)
55086
3.REMOVE NO. 3 HEATER TO REGISTER DUCT SUB-ASSEMBLY (for LHD)
86101
4.REMOVE ANTENNA CORD SUB-ASSEMBLY (for LHD)
Disengage the 6 clamps and remove the antenna cord sub-assembly.
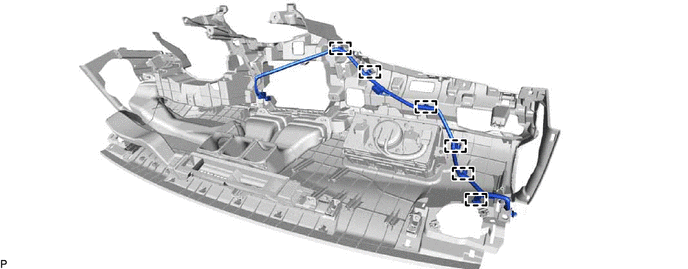
55971C
5.REMOVE NO. 1 SIDE DEFROSTER NOZZLE DUCT (for RHD)
- HINT:
-
Use the same procedure as for LHD.
-
Click hereVehicle Interior>INTERIOR PANELS / TRIM>INSTRUMENT PANEL SAFETY PAD>DISASSEMBLY
55972C
6.REMOVE NO. 2 SIDE DEFROSTER NOZZLE DUCT (for RHD)
w/ Headup Display:
- HINT:
-
Use the same procedure as for LHD.
-
Click hereVehicle Interior>INTERIOR PANELS / TRIM>INSTRUMENT PANEL SAFETY PAD>DISASSEMBLY
55950G
7.REMOVE DEFROSTER NOZZLE ASSEMBLY (for RHD)
w/ Headup Display:
- HINT:
-
Use the same procedure as for LHD.
-
Click hereVehicle Interior>INTERIOR PANELS / TRIM>INSTRUMENT PANEL SAFETY PAD>DISASSEMBLY
83108
8.REMOVE METER MIRROR SUB-ASSEMBLY (for RHD)
w/ Headup Display:
- HINT:
-
Use the same procedure as for LHD.
-
Click hereVehicle Interior>METER / GAUGE / DISPLAY>HEADUP DISPLAY>REMOVAL
55084E
9.REMOVE NO. 1 HEATER TO REGISTER DUCT SUB-ASSEMBLY (for RHD)
- HINT:
-
Use the same procedure as for LHD.
-
Click hereVehicle Interior>INTERIOR PANELS / TRIM>INSTRUMENT PANEL SAFETY PAD>DISASSEMBLY
86101
10.REMOVE ANTENNA CORD SUB-ASSEMBLY (for RHD)
Disengage the 6 clamps and remove the antenna cord sub-assembly.
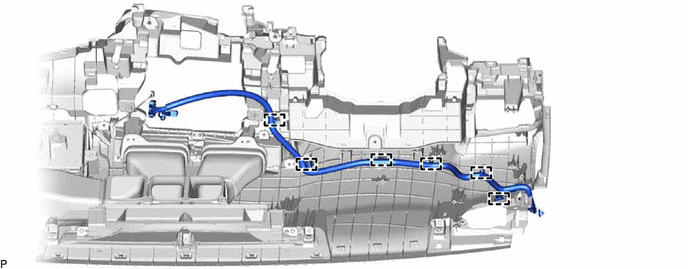
11.REMOVE ROOF HEADLINING ASSEMBLY
86101J
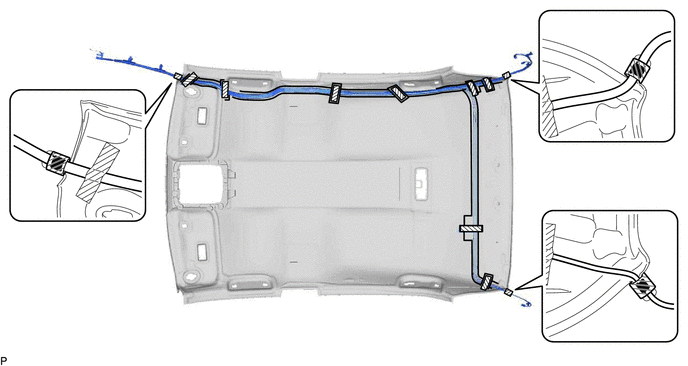
12.REMOVE NO. 2 ANTENNA CORD SUB-ASSEMBLY
Remove the adhesive tape from the roof headlining assembly.
for Normal Roof:

|
Adhesive Tape | - | - |
for Moon Roof:
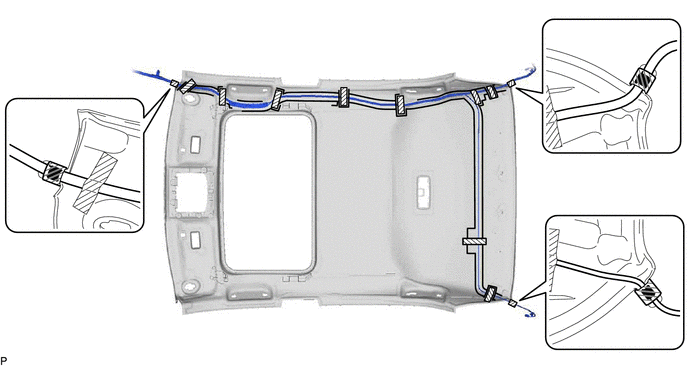
|
|
Adhesive Tape | - | - |
for Panoramic Moon Roof:
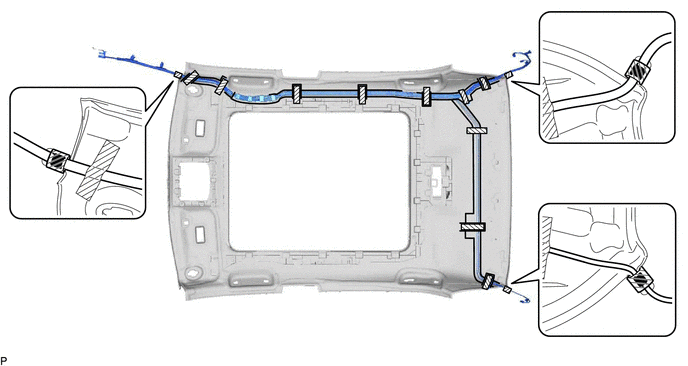
|
|
Adhesive Tape | - | - |
Remove the No. 2 antenna cord sub-assembly from the roof headlining assembly.
86101Q
13.REMOVE NO. 4 ANTENNA CORD SUB-ASSEMBLY (w/ Digital Audio Broadcasting Antenna)
w/o Telematics Transceiver:
Disconnect the connector.
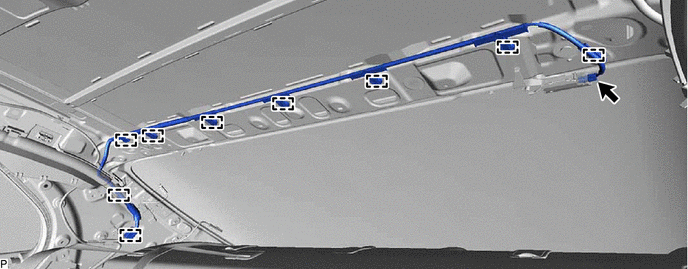
Disengage the 9 clamps to remove the No. 4 antenna cord sub-assembly.
86101R
14.REMOVE NO. 5 ANTENNA CORD SUB-ASSEMBLY (w/ Digital Audio Broadcasting Antenna)
w/ Telematics Transceiver: Click hereAudio / Visual / Telematics>TELEMATICS>TELEPHONE ANTENNA CORD>REMOVAL