1HZ LUBRICATION OIL PUMP INSTALLATION
CAUTION / NOTICE / HINT
PROCEDURE

 11301
1.INSTALL OIL PUMP (TIMING GEAR CASE)
Remove any old packing (FIPG) material and be careful not to drop any oil on the contact surfaces of the timing gear case and cylinder block.
Using a razor blade and gasket scraper, remove all the old packing (FIPG) material from the gasket surfaces and sealing groove.
Thoroughly clean all components to remove all the loose material.
Using a non-residue solvent, clean both sealing surfaces.
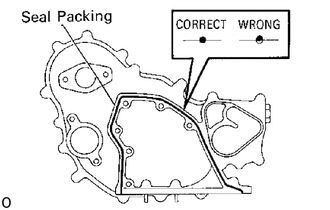
Apply seal packing to the timing gear case as shown in the illustration.
- Seal packing:
Part No.08826-00080 or equivalent
Install a nozzle that has been cut to a 2 - 3 mm (0.08 - 0.12 in.) opening.
Parts must be assembled within 5 minutes of application. Otherwise the material must be removed and reapplied.
Immediately remove nozzle from the tube and reinstall cap.
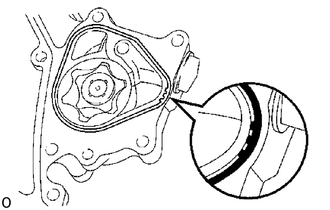
Place a new gasket into the groove of the timing gear case as shown in the illustration.
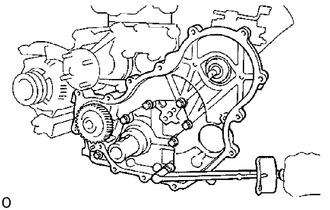
Install the timing gear case with the seven bolts.
- Torque:
200 kg*cm (14 ft*lb, 20 N*m)
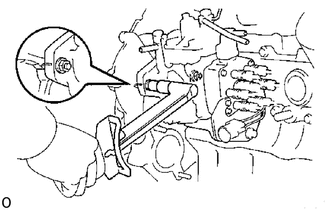
Install the two nuts holding the injection pump to the timing gear case.
- Torque:
185 kg*cm (13 ft*lb, 18 N*m)
Check that the injection pump period lines (or matchmarks) are aligned.
If not correct, align the period lines (or matchmarks) by tilting the injection pump.
2.POUR ENGINE OIL INTO OIL PUMP
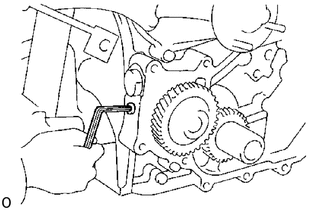
Using a 5 mm hexagon wrench, remove the taper screw plug.
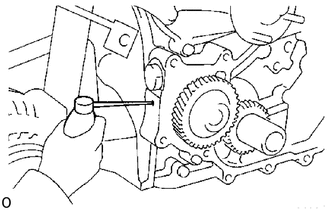
Pour in approx. 10 cc (0.061 cu in.) of engine oil into the oil pump.
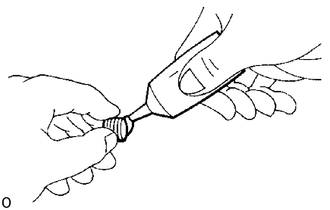
Apply adheshive to two or three threads of the taper screw.
- Adhesive:
Part No. 08833-00070, THREE BOND 1324 or equivalent
Using a 5 mm hexagon wrench, install the taper screw.
15104
3.INSTALL OIL STRAINER
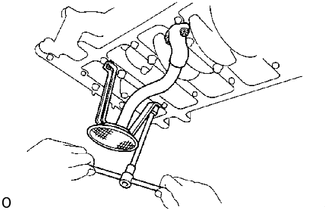
Install a new gasket and the oil strainer with the two bolts and two nuts.
- Torque:
90 kg*cm (78 in.*lb, 8.8 N*m)
12101
4.INSTALL OIL PAN
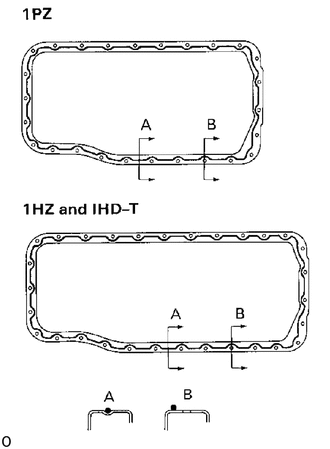
Remove any old packing (FIPG) material and be careful not to drop any oil on the contact surfaces of the oil pan and cylinder block.
Using a razor blade and gasket scraper, remove all the old packing (FIPG) material from the gasket surfaces and sealing groove.
Thoroughly clean all components to remove all the loose material.
Using a non-residue solvent, clean both sealing surfaces.
- NOTICE:
-
Do not use a solvent which will affect the painted surfaces.
Apply seal packing to the oil pan as shown in the illustration.
- Seal packing:
Part No.08826-00080 or equivalent
Install a nozzle that has been cut to a 5 mm (0.20 in.) opening.
Parts must be assembled within 5 minutes of application. Otherwise the material must be removed and reapplied.
Immediately remove nozzle from the tube and reinstall cap.
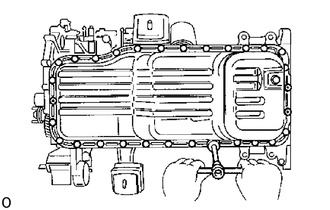
Install the oil pan with the twenty-three bolts (1PZ) or twenty-seven bolts (1HZ and 1HD-T) and three nuts.
- Torque:
100 kg*cm (7 ft*lb, 10 N*m)
5.INSTALL TIMING GEARS
6.FILL WITH ENGINE OIL
7.FILL WITH ENGINE COOLANT
8.START ENGINE AND CHECK FOR LEAKS