14B ENGINE MECHANICAL CYLINDER BLOCK CYLINDER BLOCK ASSEMBLY
CAUTION / NOTICE / HINT
- HINT:
- ·
Thoroughly clean all parts to be assembled.
·Before installing the parts, apply fresh engine oil to all sliding and rotating surfaces.
·Replace all gaskets and oil seals with new ones.
PROCEDURE

 1.INSTALL VALVE LIFTERS
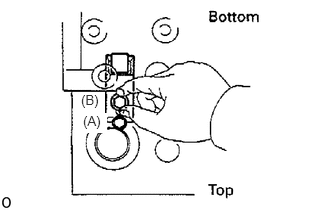
Install bolt (A) to the cylinder block with a new gasket.
- Torque:
7.5 N*m (76 kgf*cm, 66 in.*lbf)
Install the valve lifter so that the tip of bolt (A) fits in the groove.
Install bolt (B) with a new gasket by hand, check that its tip is inside the long hole.
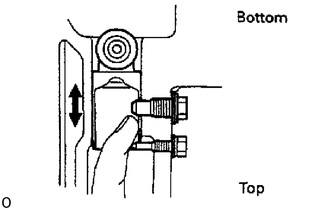
Torque bolt (B).
- Torque:
37 N*m (375 kgf*cm, 28 ft.*lbf)
- HINT:
-
Check that the valve lifter moves smoothly up and down.
2.INSTALL OIL NOZZLES AND CHECK VALVES (15B-F, 15B-FT)
3.INSTALL MAIN BEARINGS
- HINT:
-
Upper bearings have an oil groove and oil hole; lower bearings do not.
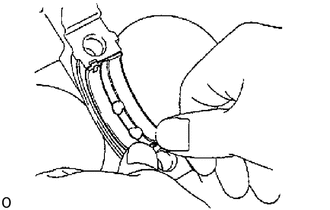
Align the bearing claw with the claw groove of the cylinder block, and push in the 5 upper bearings.
Align the bearing claw with the claw groove of the main bearing cap, and push in the 5 lower bearings.
4.INSTALL UPPER THRUST WASHERS
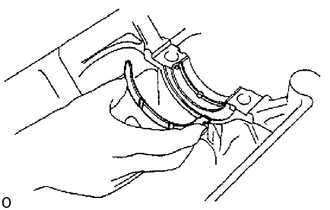
Install the 2 thrust washers under the No.3 journal position of the cylinder block with the oil grooves facing outward.
5.PLACE CRANKSHAFT ON CYLINDER BLOCK
6.INSTALL MAIN BEARING CAPS AND LOWER THRUST WASHERS
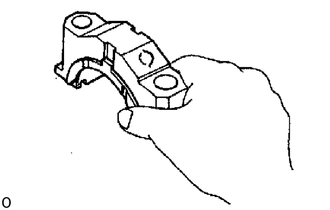
Install the 2 lower thrust washers on the No.3 main bearing cap with the grooves facing outward.
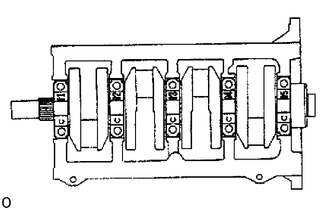
Install the 5 main bearing caps in their proper locations.
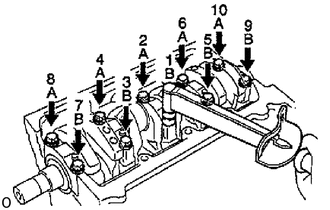
Apply a light coat of the engine oil on the threads and under the bolt heads of the main bearing caps.
Install and uniformly tighten the 10 bolts of the main bearing caps, in several passes, in the sequence shown.
- Torque:
200 N*m (2,039 kgf*cm, 148 ft.*lbf)
- HINT:
-
Each bolt length is indication in the illustration.
- Bolt length:
A 129.5 mm (5.098 in.)
B 93.5 mm (3.681 in.)
Check that the crankshaft turns smoothly.
7.CHECK CRANKSHAFT THRUST CLEARANCE
8.INSTALL PISTON AND CONNECTING ROD ASSEMBLIES
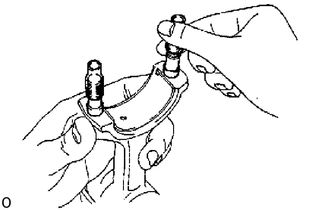
Cover the connecting rod bolts with a short piece of hose to protect the crankshaft and cylinder bore from damage.
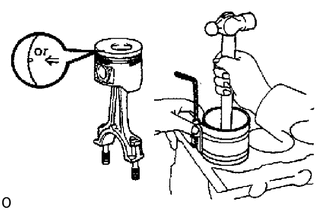
Using a piston ring compressor, push the correctly numbered piston and connecting rod assembly into the cylinder with the front mark of the piston facing forward.
9.INSTALL CONNECTING ROD CAPS
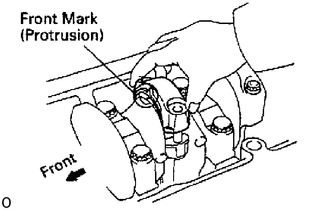
Place connecting rod cap on connecting rod
Match the numbered connecting rod cap with the connecting rod.
Install the connecting rod cap with the front mark facing forward.
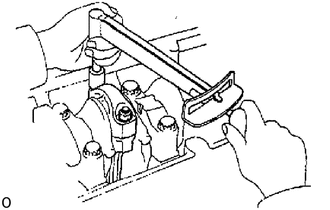
Install connecting rod cap nuts
- HINT:
- ·
The connecting rod cap nuts are tightened in 2 progressive steps (steps [*1] and [*2]).
·If any connecting rod bolt is broken or deformed, replace it.
Apply a light of engine oil on the threads and under the heads of the connecting rod cap bolts and nuts.
Install and alternately tighten the nuts of the connecting rod cap in several passes.[*1]
- Torque:
68.6 N*m (700 kgf*cm, 51 ft.*lbf)
If any one of the connecting rod cap nuts does not meet the torque specification, replace the cap nuts.
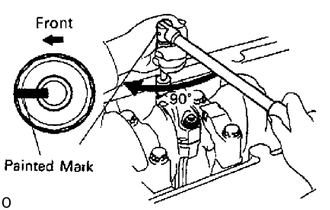
Mark the front of the connecting rod cap nuts with paint.
Retighten the connecting rod cap nuts 90° as shown.[*2]
Check that the painted mark is now at a 90° angle to the front.
Check that the crankshaft turns smoothly.
10.CHECK CONNECTING ROD THRUST CLEARANCE
11381
11.INSTALL REAR OIL SEAL RETAINER
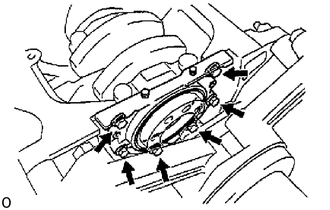
Install a new gasket and the retainer with the 6 bolts.
- Torque:
18.5 N*m (189 kgf*cm, 14 ft.*lbf)