AUDIO / VIDEO MICROPHONE REMOVAL
PROCEDURE

 86250
1.REMOVE AMPLIFIER MICROPHONE ASSEMBLY
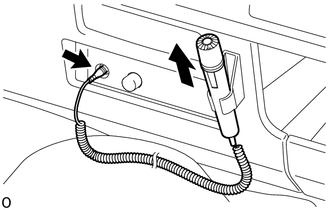
Disconnect the plug, pull the amplifier microphone assembly upwards and remove it from the microphone hanger.
33504F
2.REMOVE SHIFT LEVER KNOB SUB-ASSEMBLY (for Manual Transmission)
Remove the shift lever knob sub-assembly.
58534A
3.REMOVE TRANSMISSION COVER MAT (for Manual Transmission)
Remove the transmission cover mat from the shift and select lever support.
58286
4.REMOVE NO. 1 SHIFT AND SELECT LEVER BOOT (for Manual Transmission)
for RHD:
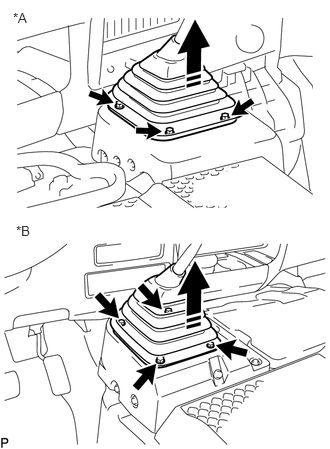
Remove the 3 bolts.
| *A | for RHD |
| *B | for LHD |

|
Removal Direction |
While sliding the shift lever, pull the shift lever boot diagonally to remove it.
for LHD:
Remove the 4 bolts.
While sliding the shift lever, pull the shift lever boot diagonally to remove it.
58123A
5.REMOVE SHIFT AND SELECT LEVER SUPPORT (for Manual Transmission)
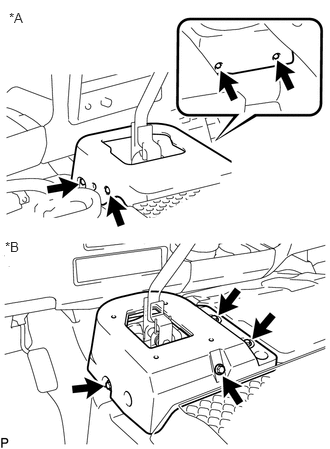
Remove the 4 bolts and shift lever hole cover.
| *A | for RHD |
| *B | for LHD |
58841A
6.REMOVE SHIFTING HOLE COVER (for Automatic Transmission)
55412D
7.REMOVE CENTER INSTRUMENT CLUSTER FINISH PANEL
86259A
8.REMOVE MICROPHONE HANGER
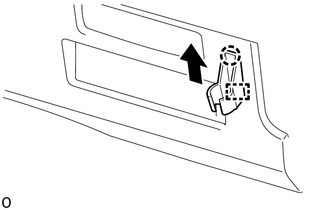
Move the microphone hanger in the direction indicated by the arrow shown in the illustration, detach the guide and claw and remove the microphone hanger.