AIR CONDITIONING FRONT COOLING UNIT REMOVAL
CAUTION / NOTICE / HINT
- HINT:
- ·
Use the same procedure for LHD and RHD vehicles.
·The procedure listed below is for RHD vehicles.
PROCEDURE

 1. RECOVER REFRIGERANT FROM REFRIGERATION SYSTEM
2.DISCONNECT CABLE FROM NEGATIVE BATTERY TERMINAL
- CAUTION:
-
Wait at least 90 seconds after disconnecting the cable from the negative (-) battery terminal to disable the the SRS system.
- NOTICE:
-
When disconnecting the cable, some systems need to be initialized after the cable is reconnected.
-
Click here
Click hereGeneral>INTRODUCTION>REPAIR INSTRUCTION>INITIALIZATION
63310
3.REMOVE ROOF HEADLINING ASSEMBLY
65936
4.REMOVE NO. 1 CURTAIN RAIL (w/ Curtain)
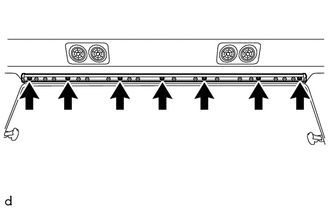
Remove the 7 screws and No. 1 curtain rail.
- HINT:
-
Use the same procedure for other side.
65938
5.REMOVE NO. 3 CURTAIN RAIL (w/ Curtain)
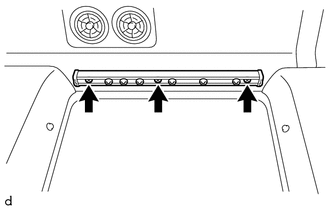
Remove the 3 screws and No. 3 curtain rail.
63930
6.REMOVE NO. 4 COOLER INNER DUCT RH (for Long Body)
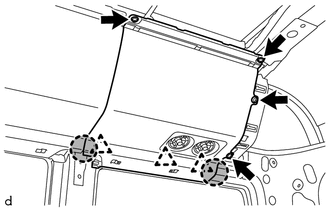
Remove the 4 screws.
Place your hands at the position shown in the illustration and detach the 3 clips.

|
Place Hands Here |
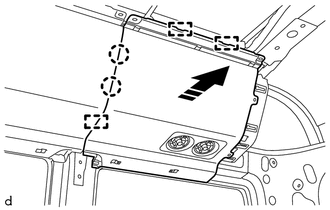
Pull in the direction indicated by the arrow shown in the illustration, detach the 2 claws, 3 guides and remove the No. 4 cooler inner duct RH.

|
Remove in this Direction |
63917
7.REMOVE NO. 3 COOLER INNER DUCT RH
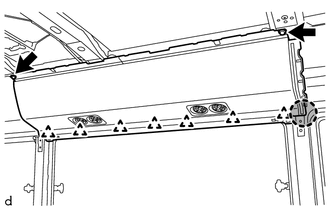
Remove the 2 screws.
Place your hands at the position shown in the illustration and detach the 7 clips.
|
|
Place Hands Here |
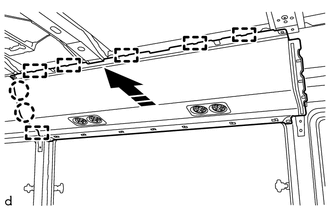
Pull in the direction indicated by the arrow shown in the illustration, detach the 2 claws, 6 guides and remove the No. 3 cooler inner duct RH.
|
|
Remove in this Direction |
63916
8.REMOVE NO. 2 COOLER INNER DUCT RH
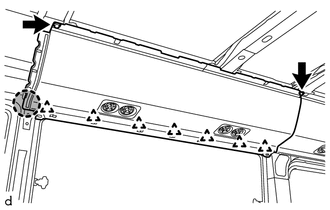
Remove the 2 screws.
Place your hands at the position shown in the illustration and detach the 7 clips.
|
|
Place Hands Here |
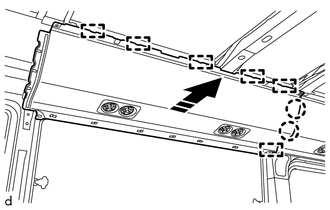
Pull in the direction indicated by the arrow shown in the illustration, detach the 2 claws, 6 guides and remove the No. 2 cooler inner duct RH.
|
|
Remove in this Direction |
63915
9.REMOVE NO. 1 COOLER INNER DUCT RH
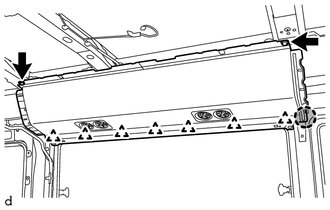
Remove the 2 screws.
Place your hands at the position shown in the illustration and detach the 7 clips.
|
|
Place Hands Here |
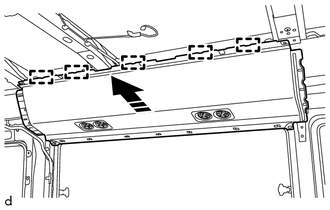
Pull in the direction indicated by the arrow shown in the illustration, detach the 5 guides and remove the No. 1 cooler inner duct RH.
|
|
Remove in this Direction |
63940
10.REMOVE NO. 4 COOLER INNER DUCT LH (for Long Body)
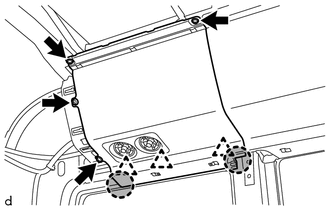
Remove the 4 screws.
Place your hands at the position shown in the illustration and detach the 3 clips.
|
|
Place Hands Here |
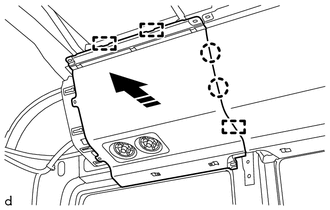
Pull in the direction indicated by the arrow shown in the illustration, detach the 2 claws, 3 guides and remove the No. 4 cooler inner duct LH.
|
|
Remove in this Direction |
63917A
11.REMOVE NO. 3 COOLER INNER DUCT LH
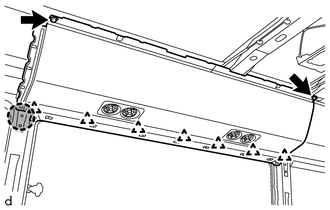
Remove the 2 screws.
Place your hands at the position shown in the illustration and detach the 7 clips.
|
|
Place Hands Here |
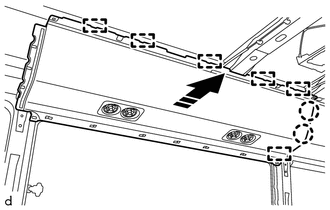
Pull in the direction indicated by the arrow shown in the illustration, detach the 2 claws, 6 guides and remove the No. 3 cooler inner duct LH.
|
|
Remove in this Direction |
63926
12.REMOVE NO. 2 COOLER INNER DUCT LH
Remove the 2 screws.
Place your hands at the position shown in the illustration and detach the 7 clips.
|
|
Place Hands Here |
Pull in the direction indicated by the arrow shown in the illustration, detach the 2 claws, 6 guides and remove the No. 2 cooler inner duct LH.
|
|
Remove in this Direction |
63925
13.REMOVE NO. 1 COOLER INNER DUCT LH
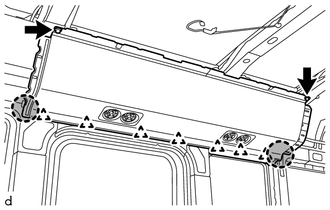
Remove the 2 screws.
Place your hands at the position shown in the illustration and detach the 7 clips.
|
|
Place Hands Here |
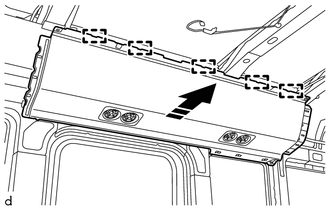
Pull in the direction indicated by the arrow shown in the illustration, detach the 5 guides and remove the No. 1 cooler inner duct LH.
|
|
Remove in this Direction |
63830
14.REMOVE ROOF VENTILATOR DUCT ASSEMBLY
Disconnect the 2 drain cooler hoses from the roof ventilator duct assembly.
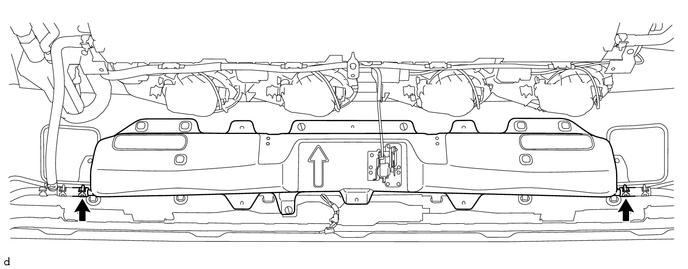
Disconnect the connector.
Remove the 6 bolts.
Remove the 3 clips and roof ventilator duct assembly
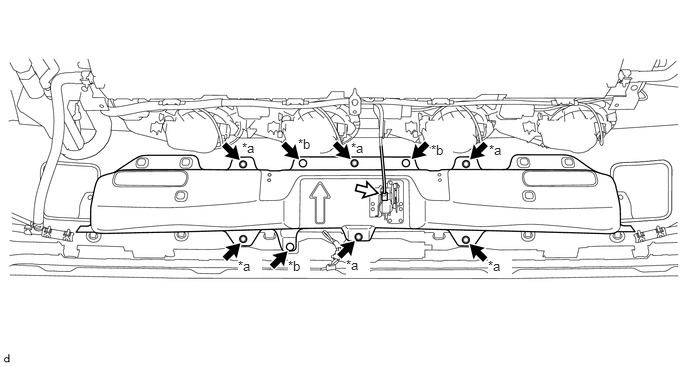
| *a | Bolt | *b | Clip |
88430B
15.REMOVE NO. 2 AIR DUCT ASSEMBLY
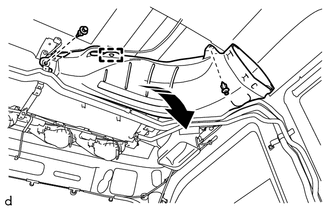
for RHD:
Detach the clamp.
Remove the 2 clips and push the No. 2 air duct assembly towards the rear of the vehicle until the cooler unit assembly bracket bolt is visible.
|
|
Push Direction |
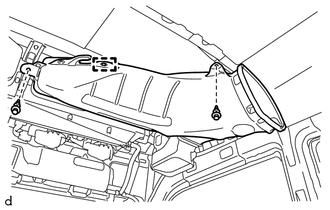
for LHD:
Detach the clamp.
Remove the 2 clips and No. 2 air duct assembly.
88430A
16.REMOVE NO. 1 AIR DUCT ASSEMBLY
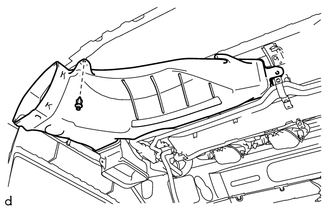
for RHD:
Remove the clip and No. 1 air duct assembly.
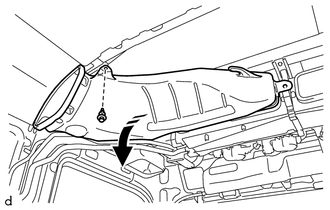
for LHD:
Remove the clip and push the No. 1 air duct assembly towards the rear of the vehicle until the cooler unit assembly bracket bolt is visible.
|
|
Push Direction |
88717B
17.DISCONNECT COOLER REFRIGERANT SUCTION PIPE B AND COOLER REFRIGERANT LIQUID PIPE D (for RHD)
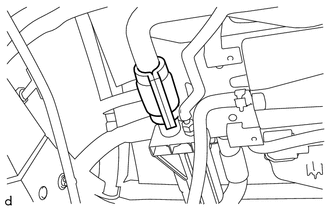
Remove the packing.
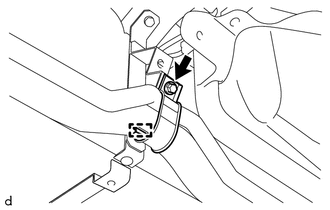
Remove the bolt.
Detach the guide and remove the No. 1 cooler clamp.
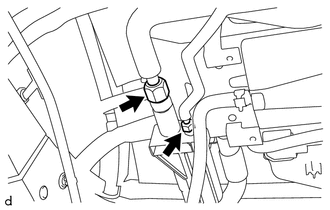
Loosen the 2 union nuts and disconnect the cooler refrigerant suction pipe B and cooler refrigerant liquid pipe D
Remove the 2 O-rings from the cooler refrigerant suction pipe B and cooler refrigerant liquid pipe D.
- NOTICE:
-
Seal the openings of the disconnected parts using vinyl tape to prevent entry of moisture and foreign matter.
88717A
18.DISCONNECT COOLER REFRIGERANT SUCTION PIPE A AND COOLER REFRIGERANT LIQUID PIPE C (for LHD)
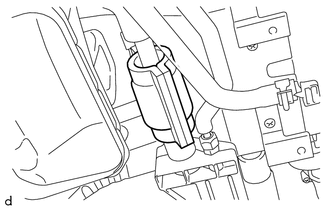
Remove the packing.
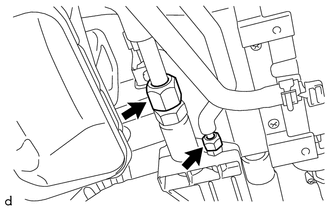
Loosen the 2 union nuts and disconnect the cooler refrigerant suction pipe A and cooler refrigerant liquid pipe C
Remove the 2 O-rings from the cooler refrigerant suction pipe A and cooler refrigerant liquid pipe C.
- NOTICE:
-
Seal the openings of the disconnected parts using vinyl tape to prevent entry of moisture and foreign matter.
88510
19.REMOVE COOLER UNIT ASSEMBLY
Disconnect the connector.
Remove the bolt and disconnect the ground wire.
Disconnect the 2 drain cooler hoses from the cooler unit assembly.
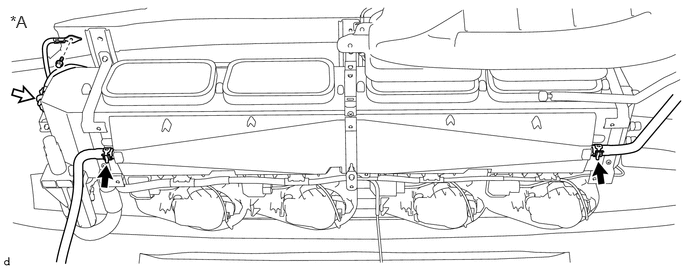
| *A | for RHD | - | - |
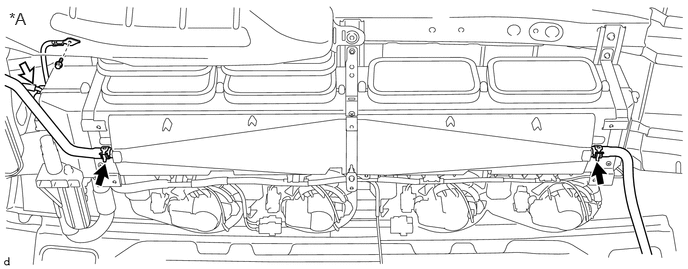
| *A | for LHD | - | - |
Detach the 7 clamps.
Remove the 6 bolts and cooler unit assembly.
- NOTICE:
-
Removing the cooler unit assembly from the vehicle must be performed by multiple people.
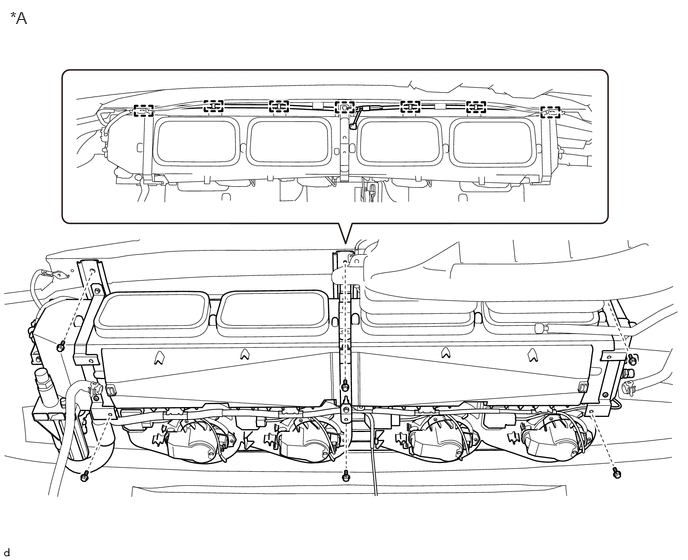
| *A | for RHD | - | - |
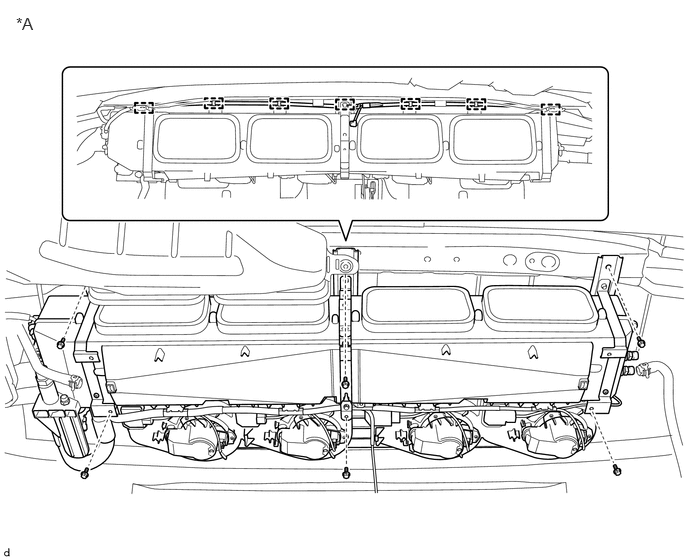
| *A | for LHD | - | - |