AIR CONDITIONING COMPRESSOR AND MAGNETIC CLUTCH(for 2TR-FE) INSTALLATION
PROCEDURE

 1.ADJUST COMPRESSOR OIL
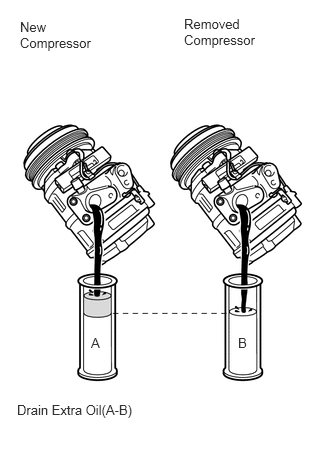
When replacing the compressor with a new one, gradually discharge the refrigerant gas from the service valve. Then drain the following amount of oil from the new compressor before installation, so that the amount of oil contained in it is the same as that in the compressor to be replaced.
- HINT:
-
New compressors are filled with sufficient oil for the whole cycle. Therefore, it is necessary to drain excess oil from the condenser and cooling unit.
- Standard:
(The amount of oil inside a new compressor: 400 (+/- 30) cc (13.5 (+/- 1.01) fl.oz.)) - (The amount of oil in the removed compressor) = The amount of oil to be removed from the new compressor
- NOTICE:
- ·
When checking the compressor oil level, observe the precautions for cooler removal/ installation.
·If a new compressor is installed without removing the excess oil, the amount of oil in the system becomes too large. This prevents heat exchange in the refrigerant cycle and causes refrigeration failure.
·If the amount of oil in the removed compressor is too small, check for oil leakage.
·Use ND-OIL8 compressor oil.
2.INSTALL COMPRESSOR AND MAGNETIC CLUTCH
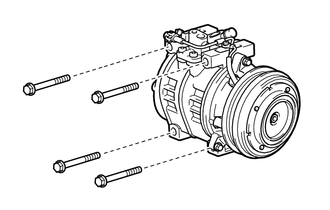
Install the compressor with the 4 bolts.
- Torque:
47 N*m (479 kgf*cm, 35 ft.*lbf)
Connect the connector.
88712
3.CONNECT COOLER REFRIGERANT NO. 1 SUCTION HOSE
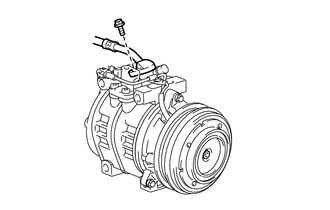
Remove the attached vinyl tape from the suction hose.
Apply sufficient compressor oil to a new O-ring and the fitting surface of the compressor.
- Compressor oil:
ND-OIL8 or equivalent
Install the O-ring onto the suction hose.
Connect the suction hose to the compressor with the bolt.
- Torque:
9.8 N*m (100 kgf*cm, 87 in.*lbf)
88711
4.CONNECT COOLER REFRIGERANT NO. 1 DISCHARGE HOSE
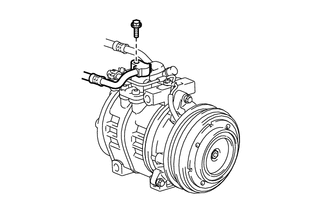
Remove the attached vinyl tape from the discharge hose.
Apply sufficient compressor oil to a new O-ring and the fitting surface of the compressor.
- Compressor oil:
ND-OIL8 or equivalent
Install the O-ring onto the discharge hose.
Connect the discharge hose to the compressor with the bolt.
- Torque:
9.8 N*m (100 kgf*cm, 87 in.*lbf)
88310A
5.INSTALL V (COOLER COMPRESSOR TO CRANKSHAFT PULLEY) BELT
6. CHARGE REFRIGERANT
- Standard:
2000 +/- 50 g (70.55 +/- 1.76 oz.)
7. WARM UP ENGINE
8.INSPECT FOR REFRIGERANT LEAK
Using a halogen leak detector, check for refrigerant leakage.
If there is leakage, check the tightening torque at the joints.
51441
9.INSTALL NO. 1 ENGINE UNDER COVER
58701A
10.INSTALL FRONT ENGINE SERVICE COVER PANEL SUB-ASSEMBLY
33503F
11.INSTALL FLOOR SHIFT SHIFT LEVER ASSEMBLY
58123A
12.INSTALL SHIFT AND SELECT LEVER SUPPORT WITH BOOTS
58420
13.INSTALL NO.2 ENGINE SERVICE HOLE COVER ASSEMBLY
58521D
14.INSTALL ENGINE SERVICE HOLE COVER MAT
58734B
15.INSTALL REAR ENGINE SERVICE COVER WEATHERSTRIP
16.INSTALL ENGINE SERVICE HOLE MAIN COVER