AIR CONDITIONING CONDENSER(for 1BZ-FPE) INSTALLATION
PROCEDURE

 1.INSTALL COOLER CONDENSER ASSEMBLY
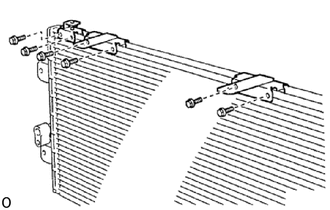
Cooler condenser assembly upper side:
Install the 3 condenser brackets with the 6 screws.
- Torque:
- 4.4 N*m (45 kgf*cm, 39 in.*lbf)
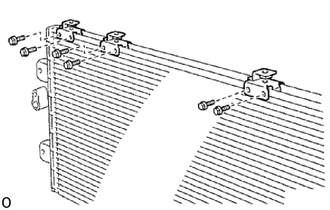
Cooler condenser assembly bottom side:
Install the 3 condenser brackets with the 6 screws.
- Torque:
- 4.4 N*m (45 kgf*cm, 39 in.*lbf)
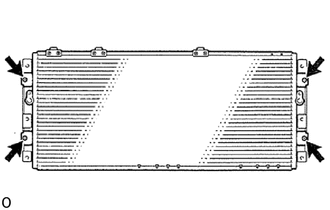
Install the 2 condenser plate assemblies with the 4 bolts.
2.INSTALL BLOWER CONDENSER MOTOR ASSEMBLY
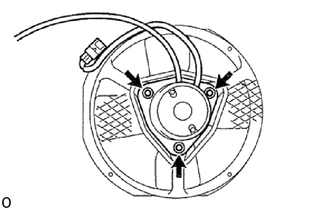
Insgall the blower condenser motor assembly with the 3 bolts.
- HINT:
-
Use the same procedure for the other side.
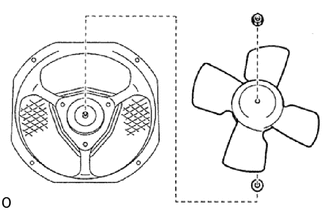
Remove the washer and condenser cooler fan with the nut.
- HINT:
-
Use the same procedure for the other side.
3.INSTALL NO. 3 COOLER CONDENSER FAN SHROUD
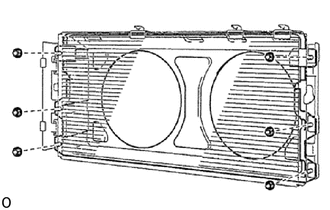
Install the 6 bushes and No. 3 cooler condenser fan shroud with the 6 nuts.
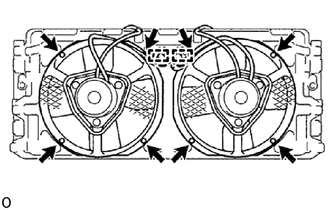
Install the 2 connector clamps and 2 condenser fan assemblies with the 8 bolts.
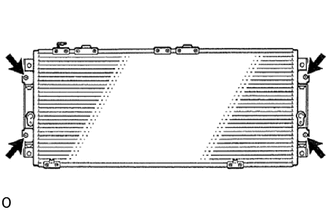
Install the cooler condenser assembly (upper side) with the 4 bolts.
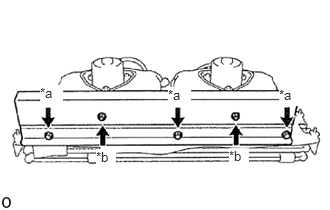
| *a | Bolt |
| *b | Nut |
Install the dust cover with the 3 bolts and 2 nuts.
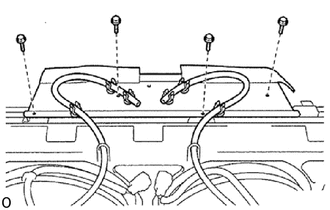
Install the dust cover with the 4 bolts and 2 tubes.
4.INSTALL COOLER REFRIGERANT RIQUID PIPE N
Remove the vinyl tape wrapped around the connection area of cooler refrigerant liquid pipe N.
Apply a sufficient amount of compressor oil (ND-OIL 8) to a new O-ring and the connection area.
Install the O-ring to cooler refrigerant liquid pipe N.
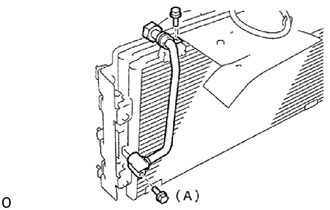
Install cooler refrigerant liquid pipe N with the 2 bolts.
- Torque:
- Bolt A : 5.5 N*m (56 kgf*cm, 49 in.*lbf)
5.INSTALL COOLER REFRIGERANT RIQUID PIPE C
Remove the vinyl tape wrapped around the connection area of cooler refrigerant liquid pipe C.
Apply a sufficient amount of compressor oil (ND-OIL 8) to a new O-ring and the connection area.
Install the O-ring to cooler refrigerant liquid pipe C.
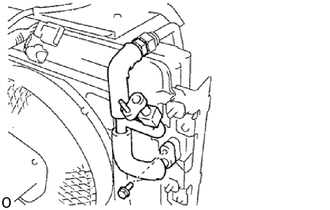
Install cooler refrigerant liquid pipe C with the bolt and flare nut.
- Torque:
- Bolt : 5.5 N*m (56 kgf*cm, 49 in.*lbf)
- Flare nut : 14 N*m (143 kgf*cm, 10 ft.*lbf)
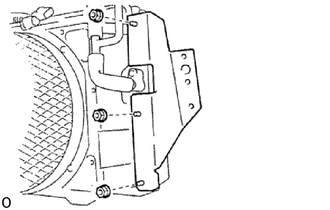
Install the bracket assembly with the 3 nuts.
6.INSTALL COOLER REFRIGERANT DISCHARGE PIPE A
Remove the vinyl tape wrapped around the connection area of cooler refrigerant discharge pipe A.
Apply a sufficient amount of compressor oil (ND-OIL 8) to a new O-ring and the connection area.
Install the O-ring to cooler refrigerant discharge pipe A.
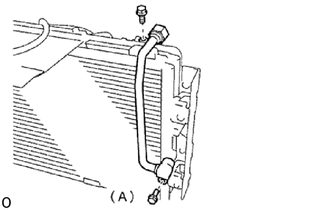
Install cooler refrigerant discharge pipe A with the 2 bolts.
- Torque:
- Bolt A : 5.5 N*m (56 kgf*cm, 49 in.*lbf)
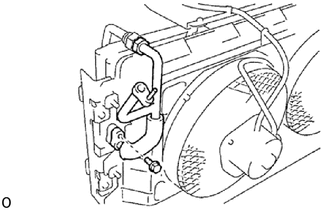
Install cooler refrigerant discharge pipe A with the bolt and flare nut.
- Torque:
- Bolt : 5.5 N*m (56 kgf*cm, 49 in.*lbf)
- Flare nut : 23 N*m (235 kgf*cm, 17 ft.*lbf)
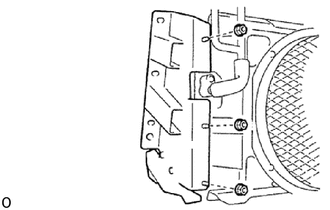
Install the bracket assembly with the 3 nuts.
7.INSTALL COOLER CONDENSER FAN RELAY
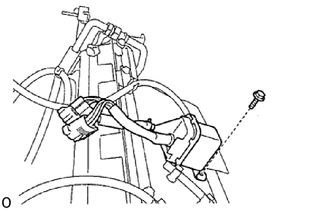
Install the cooler condenser fan relay with the bolt.
8.INSTALL AIR CONDITIONING WIRING HARNESS
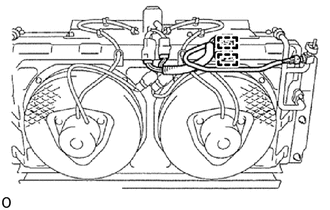
Connect each connector and 2 connector clamps and install the air conditioning wire harness.
9.INSTALL CONDENSER WITH SHROUD ASSEMBLY
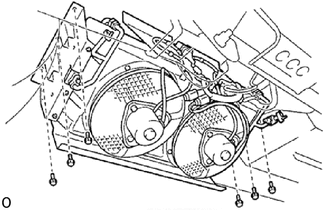
Install the condenser with shroud assembly with the 6 bolts.
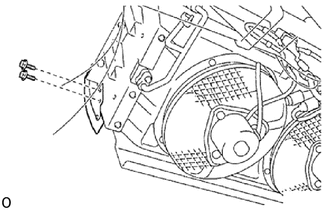
Install the No. 1 dust cover with the 2 bolts.
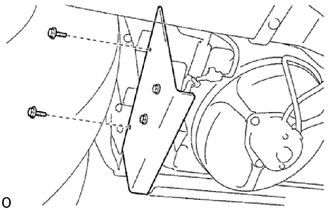
Install the bracket assembly (rear side) with the 2 bolts.
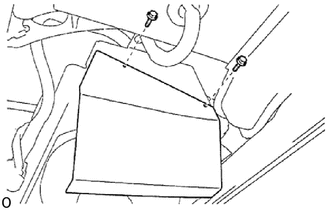
Install the bracket assembly (front side) with the 2 bolts.
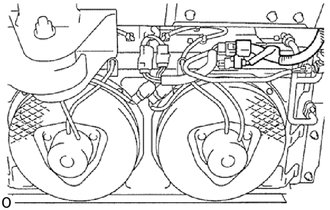
Connect the connector between the air conditioning wire harness and vehicle harness.
10.INSTALL DISCHARGE PIPE
Remove the vinyl tape wrapped around the connection area of the discharge pipe.
Apply a sufficient amount of compressor oil (ND-OIL 8) to a new O-ring and the connection area.
Install the O-ring to the discharge pipe.
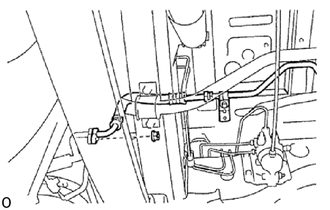
Install the discharge pipe with the nut.
- Torque:
- 5.5 N*m (56 kgf*cm, 49 in.*lbf)
11.INSTALL LIQUID PIPE
Remove the vinyl tape wrapped around the connection area of the liquid pipe.
Apply a sufficient amount of compressor oil (ND-OIL 8) to a new O-ring and the connection area.
Install the O-ring to the liquid pipe.
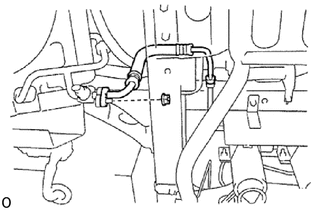
Install the liquid pipe with the nut.
- Torque:
- 5.5 N*m (56 kgf*cm, 49 in.*lbf)
12. CHARGE REFRIGERANT
13. WARM UP ENGINE
14.INSPECT FOR REFRIGERANT LEAK