DOOR LOCK AUTO CENTER DOOR LOCK(for Glide Type) REMOVAL
CAUTION / NOTICE / HINT
- HINT:
- ·
Use the same procedure for RHD and LHD vehicles.
·The procedure listed below is for RHD vehicles.
PROCEDURE

 1. PRECAUTION
- CAUTION:
-
Before disassembling and assembling the glide door, operate the power slide door main switch and check that an auto operation is not performed.
67690
2.REMOVE GLIDE DOOR LOWER TRIM ASSEMBLY
67680A
3.REMOVE GLIDE DOOR TRIM ASSEMBLY
67841A
4.REMOVE GLIDE DOOR SERVICE HOLE COVER
67859F
5.REMOVE GLIDE DOOR LOWER HOLE COVER
69030B
6.REMOVE GLIDE DOOR OPEN LOCK ASSEMBLY
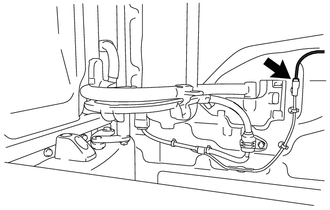
Disconnect the connector.
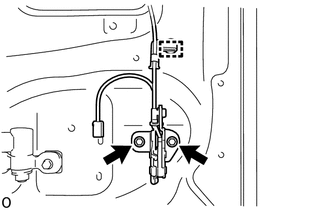
Detach the clamp.
Remove the 2 bolts and glide door open lock assembly.
85453
7.REMOVE DOOR CONTROL MOTOR
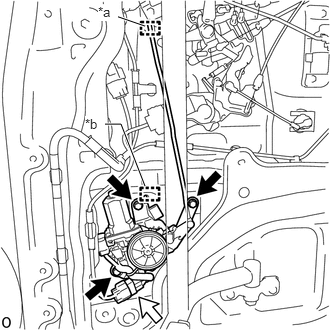
| *a | Clamp |
| *b | Guide |

|
Bolt |

|
Connector |
Detach the clamp.
Disconnect the connector.
Remove the 3 bolts.
Detach the guide and remove the door control motor.
69714B
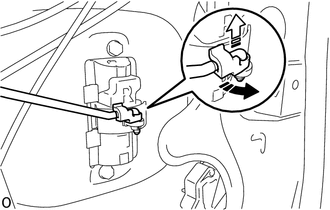
8.REMOVE REAR DOOR OPEN CONTROL LINK

|
Remove in this Direction (1) |

|
Remove in this Direction (2) |
Detach the snap in the direction indicated by the arrow (1) as shown in the illustration.
Disconnect the rear door open control link in the direction indicated by the arrow (2) as shown in the illustration.
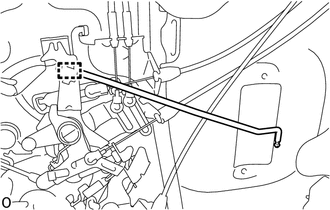
Detach the clamp and remove the rear door open control link.
69630A
9.REMOVE GLIDE DOOR LOCK REMOTE CONTROL ASSEMBLY
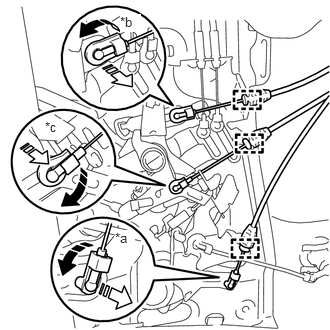
| *a | Locking Cable (Orange) |
| *b | Open Cable (Blue) |
| *c | Close Cable (Purple) |
|
|
Remove in this Direction (1) |
|
|
Remove in this Direction (2) |
Detach the 3 clamps.
Detach the 3 snaps and disconnect the 3 cables from the glide door lock remote control assembly as shown in the illustration.
|
|
Remove in this Direction (1) |
|
|
Remove in this Direction (2) |
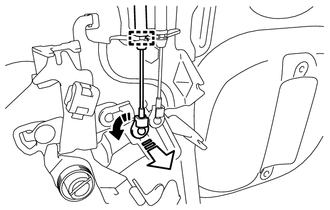
Detach the clamp.
Detach the snap as shown in the illustration.
|
|
Remove in this Direction (1) |
|
|
Remove in this Direction (2) |
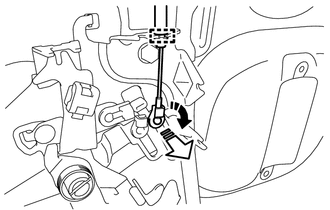
Detach the clamp.
Detach the snap as shown in the illustration.
|
|
Remove in this Direction (1) |
|
|
Remove in this Direction (2) |
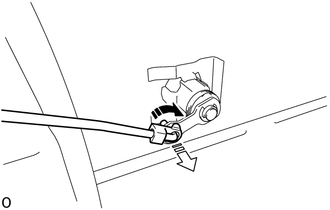
Detach the snap as shown in the illustration.
|
|
Bolt |
|
|
Connector |
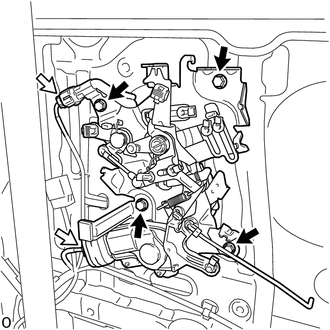
Disconnect the 2 connectors.
Remove the 4 bolts and glide door lock remote control assembly.
69330B
10.REMOVE GLIDE DOOR FRONT LOCK ASSEMBLY
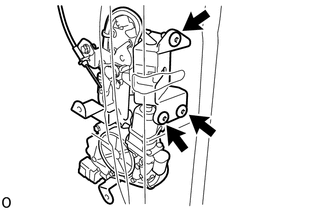
Using a T30 "TORX" socket wrench, remove the 3 "TORX" screws.
|
|
Bolt |
|
|
Connector |
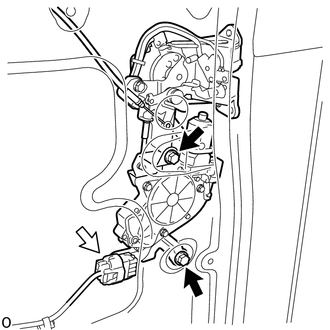
Disconnect the connector.
Remove the 2 bolts and glide door front lock assembly.
69340A
11.REMOVE GLIDE DOOR REAR LOCK ASSEMBLY
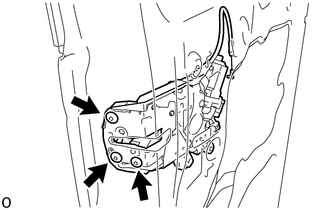
Using a T30 "TORX" socket wrench, remove the 3 "TORX" screws.
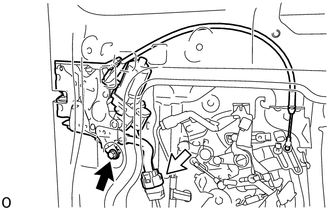
|
|
Bolt |
|
|
Connector |
Disconnect the connector.
Remove the bolt and glide door rear lock assembly.