DOOR LOCK AUTO CENTER DOOR LOCK(for Glide Type) INSTALLATION
CAUTION / NOTICE / HINT
- HINT:
- ·
Use the same procedure for RHD and LHD vehicles.
·The procedure listed below is for RHD vehicles.
PROCEDURE

 69340A
1.INSTALL GLIDE DOOR REAR LOCK ASSEMBLY
Apply MP grease to the sliding part of the glide door rear lock assembly.
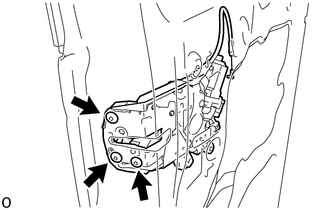
Using a T30 "TORX" socket wrench, install the glide door rear lock assembly with the 3 "TORX" screws.
- Torque:
- 8.0 N*m (82 kgf*cm, 71 in.*lbf)
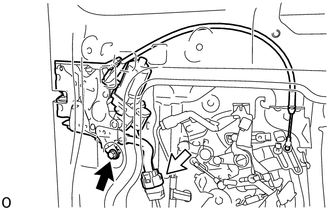

|
Bolt |

|
Connector |
Install the bolt and connect the connector.
- Torque:
- 8.0 N*m (82 kgf*cm, 71 in.*lbf)
69330B
2.INSTALL GLIDE DOOR FRONT LOCK ASSEMBLY
Apply MP grease to the sliding part of the glide door front lock assembly.
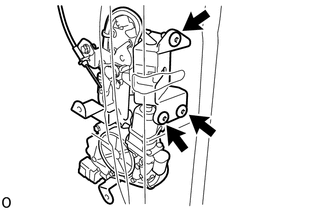
Using a T30 "TORX" socket wrench, install the glide door front lock assembly with the 3 "TORX" screws.
- Torque:
- 8.0 N*m (82 kgf*cm, 71 in.*lbf)
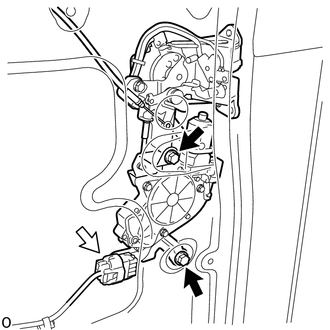
|
|
Bolt |
|
|
Connector |
Install the 2 bolts and connect the connector.
- Torque:
- 8.0 N*m (82 kgf*cm, 71 in.*lbf)
69630A
3.INSTALL GLIDE DOOR LOCK REMOTE CONTROL ASSEMBLY
Apply MP grease to the sliding parts of the glide door lock remote control assembly.
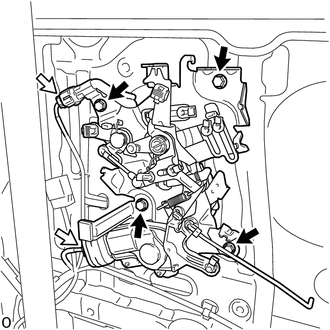
|
|
Bolt |
|
|
Connector |
Install the glide door lock remote control assembly with the 4 bolts.
- Torque:
- 7.5 N*m (76 kgf*cm, 66 in.*lbf)
Connect the 2 connectors.
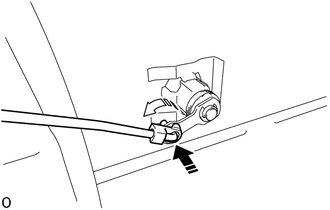

|
Install in this Direction (1) |

|
Install in this Direction (2) |
Attach the snap as shown in the illustration.
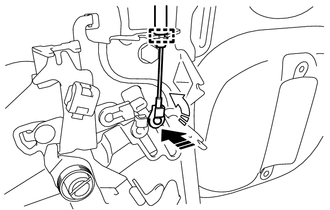
|
|
Install in this Direction (1) |
|
|
Install in this Direction (2) |
Attach the snap as shown in the illustration.
Attach the clamp.
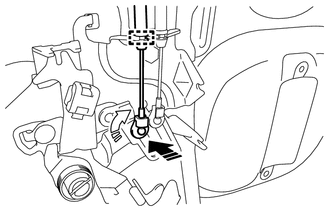
|
|
Install in this Direction (1) |
|
|
Install in this Direction (2) |
Attach the snap as shown in the illustration.
Attach the clamp.
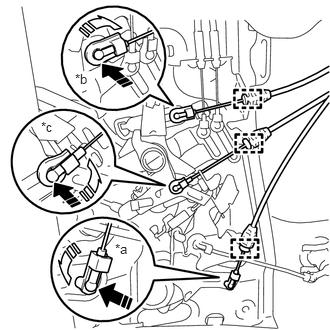
| *a | Locking Cable (Orange) |
| *b | Open Cable (Blue) |
| *c | Close Cable (Purple) |
|
|
Install in this Direction (1) |
|
|
Install in this Direction (2) |
Attach the 3 snaps and connect the 3 cables to the glide door lock remote control assembly as shown in the illustration.
Attach the 3 clamps.
69714B
4.INSTALL REAR DOOR OPEN CONTROL LINK
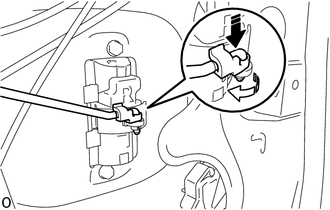
|
|
Install in this Direction (1) |
|
|
Install in this Direction (2) |
Connect the rear door open control link in the direction indicated by the arrow (1) as shown in the illustration
Attach the snap in the direction indicated by the arrow (2) as shown in the illustration.
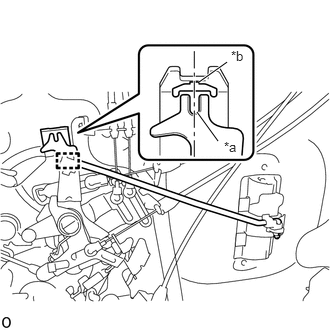
| *a | Cut out |
| *b | Protrusion |
When reusing the glide door lock remote control assembly:
Align the position of the cut out with the position of the protrusion as shown in the illustration.
Attach the clamp and install the rear door open control link.
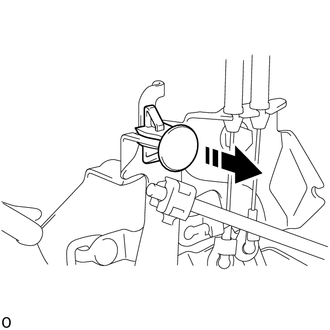
|
|
Remove in this Direction |
When using a new glide door lock remote contrl assembly:
Detach the claw and remove the clip.
85453
5.INSTALL DOOR CONTROL MOTOR
Apply MP grease to the sliding part of the door control motor.
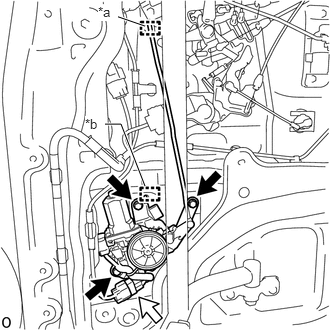
| *a | Clamp |
| *b | Guide |
|
|
Bolt |
|
|
Connector |
Attach the guide and install the door control motor with the 3 bolts.
- Torque:
- 8.0 N*m (82 kgf*cm, 71 in.*lbf)
Connect the connector.
Attach the clamp.
69030B
6.INSTALL GLIDE DOOR OPEN LOCK ASSEMBLY
Apply MP grease to the sliding part of the glide door open lock assembly.
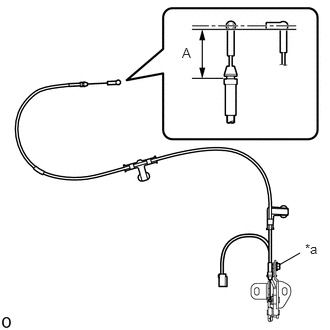
| *a | Adjusting Bolt |
Loosen the adjusting bolt.
Adjust the cable as shown in the illustration.
- OK:
Area Standard Dimension A 56.5 to 58.3 mm (2.22 to 2.30 in.)
Tighten the adjusting bolt.
- Torque:
- 5.4 N*m (55 kgf*cm, 48 in.*lbf)
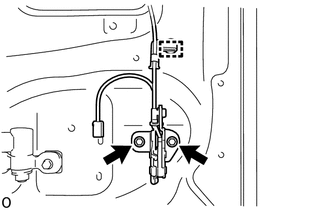
Attach the clamp.
Install the glide door open lock assembly with the 2 bolts.
- Torque:
- 18 N*m (184 kgf*cm, 13 ft.*lbf)
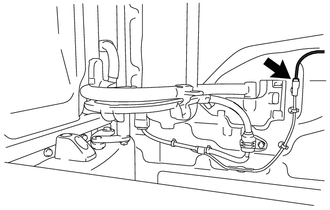
Connect the connector.
67859F
7.INSTALL GLIDE DOOR LOWER HOLE COVER
67841A
8.INSTALL GLIDE DOOR SERVICE HOLE COVER
67680A
9.INSTALL GLIDE DOOR TRIM ASSEMBLY
67690
10.INSTALL GLIDE DOOR LOWER TRIM ASSEMBLY