A861E AUTOMATIC TRANSMISSION / TRANSAXLE SHIFT SOLENOID VALVE INSTALLATION
PROCEDURE

 83380A
1.INSTALL NO. 8 OIL PRESSURE SWITCH
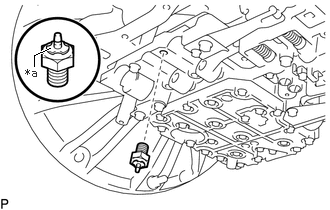
| *a | Rubber Cover |
Using a 17 mm deep socket wrench, install the No. 8 oil pressure switch.
- Torque:
- 4.4 N*m (45 kgf*cm, 39 in.*lbf)
- NOTICE:
- ·
Check that the rubber cover is attached.
·Do not damage the end of the No. 8 oil pressure switch.
83380A
2.INSTALL NO. 7 OIL PRESSURE SWITCH
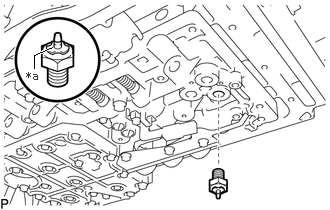
| *a | Rubber Cover |
Using a 17 mm deep socket wrench, install the No. 7 oil pressure switch.
- Torque:
- 8.5 N*m (87 kgf*cm, 75 in.*lbf)
- NOTICE:
- ·
Check that the rubber cover is attached.
·Do not damage the end of the No. 7 oil pressure switch.
83380A
3.INSTALL NO. 6 OIL PRESSURE SWITCH
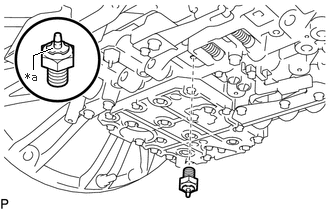
| *a | Rubber Cover |
Using a 17 mm deep socket wrench, install the No. 6 oil pressure switch.
- Torque:
- 4.4 N*m (45 kgf*cm, 39 in.*lbf)
- NOTICE:
- ·
Check that the rubber cover is attached.
·Do not damage the end of the No. 6 oil pressure switch.
83380A
4.INSTALL NO. 3 OIL PRESSURE SWITCH
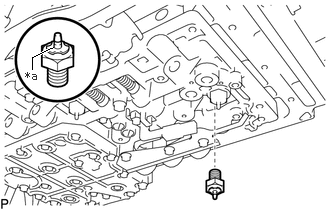
| *a | Rubber Cover |
Using a 17 mm deep socket wrench, install the No. 3 oil pressure switch.
- Torque:
- 4.4 N*m (45 kgf*cm, 39 in.*lbf)
- NOTICE:
- ·
Check that the rubber cover is attached.
·Do not damage the end of the No. 3 oil pressure switch.
83380A
5.INSTALL NO. 2 OIL PRESSURE SWITCH
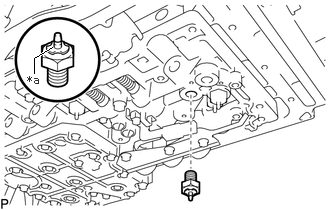
| *a | Rubber Cover |
Using a 17 mm deep socket wrench, install the No. 2 oil pressure switch.
- Torque:
- 8.5 N*m (87 kgf*cm, 75 in.*lbf)
- NOTICE:
- ·
Check that the rubber cover is attached.
·Do not damage the end of the No. 2 oil pressure switch.
83380A
6.INSTALL NO. 1 OIL PRESSURE SWITCH
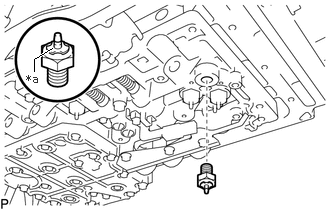
| *a | Rubber Cover |
Using a 17 mm deep socket wrench, install the No. 1 oil pressure switch.
- Torque:
- 8.5 N*m (87 kgf*cm, 75 in.*lbf)
- NOTICE:
- ·
Check that the rubber cover is attached.
·Do not damage the end of the No. 1 oil pressure switch.
7.INSTALL SHIFT SOLENOID VALVE S4
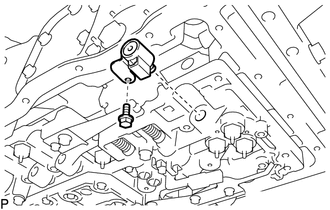
Install the shift solenoid valve S4 with the bolt.
- Torque:
- 10 N*m (102 kgf*cm, 7 ft.*lbf)
8.INSTALL SHIFT SOLENOID VALVE S3
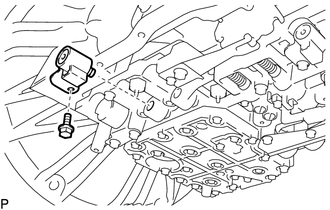
Install the shift solenoid valve S3 with the bolt.
- Torque:
- 10 N*m (102 kgf*cm, 7 ft.*lbf)
35240F
9.INSTALL SHIFT SOLENOID VALVE S2
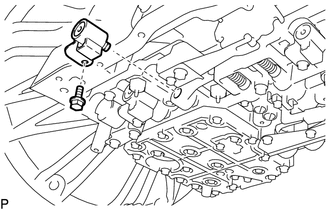
Install the shift solenoid valve S2 with the bolt.
- Torque:
- 10 N*m (102 kgf*cm, 7 ft.*lbf)
35240E
10.INSTALL SHIFT SOLENOID VALVE S1
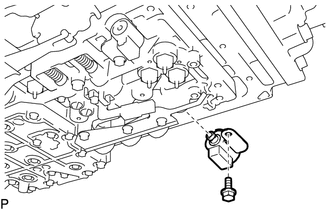
Install the shift solenoid valve S1 with the bolt.
- Torque:
- 10 N*m (102 kgf*cm, 7 ft.*lbf)
11.INSTALL TRANSMISSION WIRE