RM24M0E
_51
Engine / Hybrid System
_059541
2AZ-FE ENGINE CONTROL
_0291785
CRANKSHAFT POSITION SENSOR
A
2AZ-FE ENGINE CONTROL CRANKSHAFT POSITION SENSOR REMOVAL
CAUTION / NOTICE / HINT
- HINT:
-
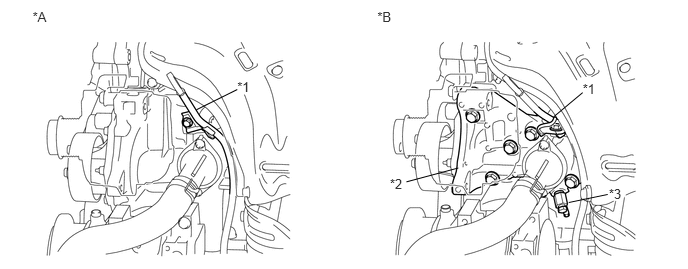
Check whether the engine is TMC made or not by referring to the following illustration.
 3.93,0.096 4.173,0.285 0.243,0.189 10 *B 0.339,0.096 0.588,0.285 0.249,0.189 10 *A 2.471,0.822 2.640,0.977 0.169,0.154 10 *1 2.471,0.932 2.045,1.143 false 6.069,0.84 6.239,0.994 0.169,0.154 10 *1 6.069,0.964 5.767,1.216 false 4.061,1.835 4.230,1.989 0.169,0.154 10 *2 6.342,1.937 6.511,2.092 0.169,0.154 10 *3 4.233,1.894 4.774,1.749 false 6.33,2.025 5.924,2.109 false
Text in Illustration *A for TMC Made Engine *B except TMC Made Engine *1 Engine Oil Level Dipstick Guide *2 Water Inlet Housing *3 Water Inlet Housing Drain Cock Assembly - -
PROCEDURE

 27020
1.REMOVE GENERATOR ASSEMBLY
a.
Remove the generator from the vehicle (see page Engine / Hybrid System>2AZ-FE CHARGING>GENERATOR>REMOVAL).
11301K
2.REMOVE CRANK POSITION SENSOR (for TMC Made Engine)
a.
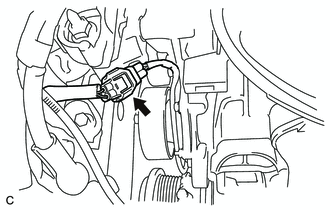
Disconnect the crank position sensor connector.
b.
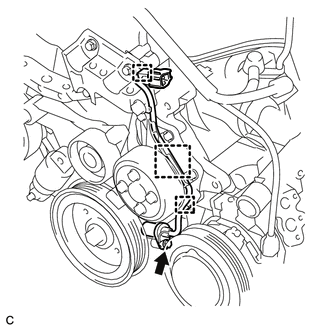
Disconnect the connector from the connector bracket.
c.
Disconnect the 2 wire harness clamps.
d.
Remove the bolt and crank position sensor.
11301K
3.REMOVE CRANK POSITION SENSOR (except TMC Made Engine)
a.
Disconnect the crank position sensor connector.
b.
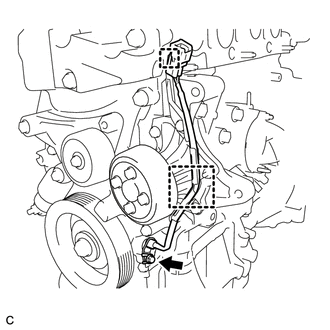
Disconnect the connector from the connector bracket.
c.
Disconnect the wire harness clamp.
d.
Remove the bolt and crank position sensor.