SEAT REAR NO. 1 SEAT ASSEMBLY(for Captain Seat Type) DISASSEMBLY
PROCEDURE

 72526C
1.REMOVE NO. 2 RECLINING ADJUSTER RELEASE HANDLE LH
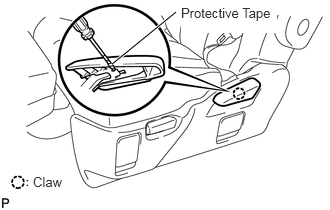
Using a screwdriver wrapped with protective tape, disengage the claw and remove the No. 2 reclining adjuster release handle LH as shown in the illustration.
72526B
2.REMOVE NO. 1 RECLINING ADJUSTER RELEASE HANDLE LH
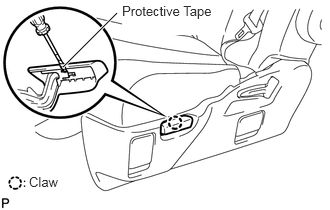
Using a screwdriver wrapped with protective tape, disengage the claw and remove the No. 1 reclining adjuster release handle LH as shown in the illustration.
71876D
3.REMOVE RECLINING ADJUSTER OUTSIDE COVER LH
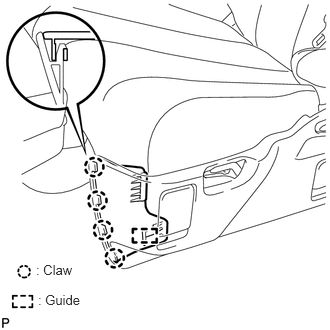
Disengage the 4 claws.
Disengage the guide and remove the reclining adjuster outside cover LH.
71834A
4.REMOVE NO. 1 REAR SEAT RECLINING COVER LH
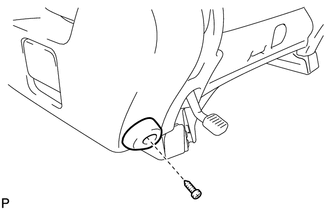
Remove the screw and rear seat cushion.
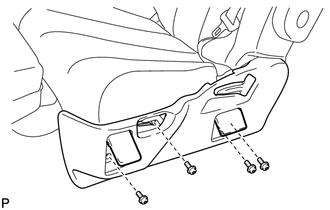
Remove the 4 screws.
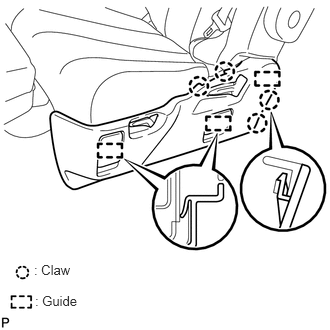
Disengage the 4 claws and 3 guides.
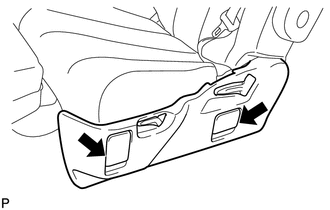
Disconnect the 2 cables and remove the No. 1 rear seat reclining cover LH.
71834B
5.REMOVE NO. 2 REAR SEAT RECLINING COVER LH
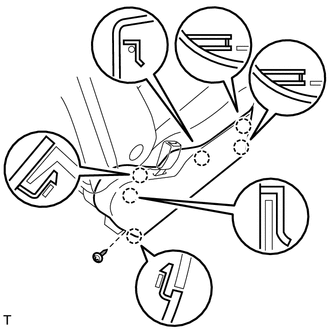
Remove the screw.
Using a screwdriver, detach the 6 claws and remove the reclining cover.
- HINT:
-
Tape the screwdriver tip before use.
6.REMOVE REAR SEAT LEG REST ASSEMBLY LH
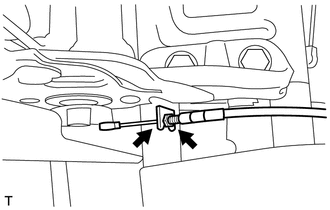
Loosen the 2 nuts and disconnect the cable.
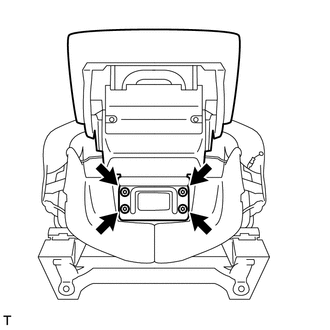
Remove the 4 bolts and leg rest.
71877C
7.REMOVE REAR SEAT ARMREST HOLE COVER LH
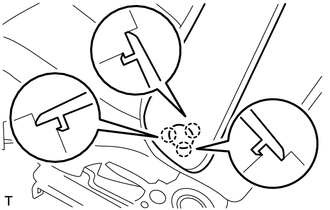
Using a screwdriver, detach the 3 claws and remove the armrest hole cover.
- HINT:
-
Tape the screwdriver tip before use.
72840
8.REMOVE REAR NO. 1 SEAT ARMREST ASSEMBLY LH
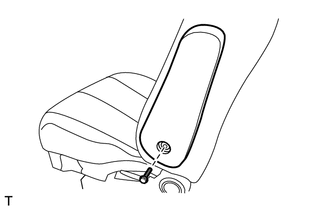
Remove the bolt and armrest.
71877B
9.REMOVE REAR SEAT ARMREST HOLE COVER RH
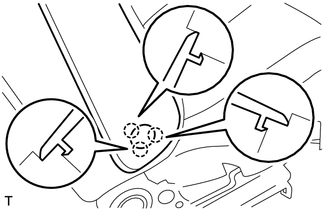
Using a screwdriver, detach the 3 claws and remove the armrest hole cover.
- HINT:
-
Tape the screwdriver tip before use.
72830J
10.REMOVE REAR NO. 1 SEAT ARMREST ASSEMBLY RH
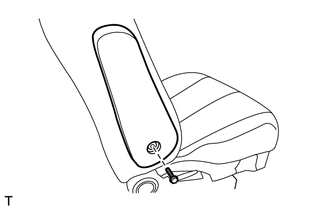
Remove the bolt and armrest.
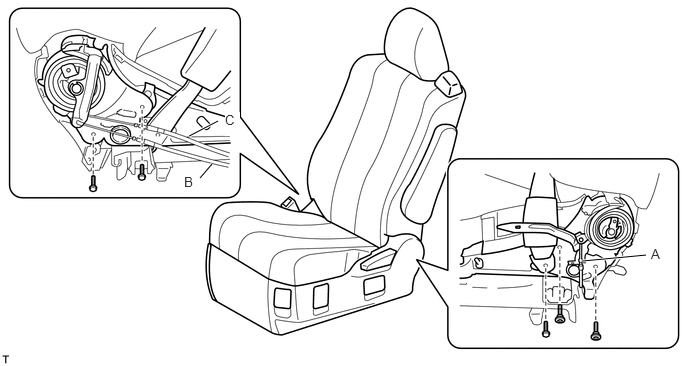
11.REMOVE REAR NO. 1 SEATBACK ASSEMBLY LH
for LH Side:
Disconnect cable A.
Remove the bolt.
Using a (T55) "TORX" socket wrench, remove the 2 bolts.
for RH Side:
Disconnect cable B and cable C.
Remove the 2 bolts.
Remove the seatback assembly.
72667
12.REMOVE REAR SEATBACK LOCK BEZEL UPPER
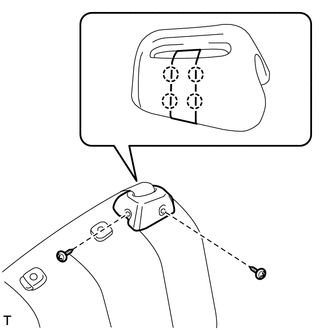
Using a screwdriver, detach the 4 claws and remove the seat belt hole cover.
- HINT:
-
Tape the screwdriver tip before use.
Remove the 2 screws and rear seatback lock bezel upper.
79014
13.REMOVE NO. 1 SEATBACK COVER ASSEMBLY LH
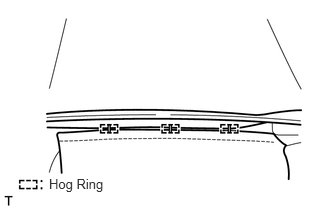
Fold back the seatback cover and remove the 3 hog rings.
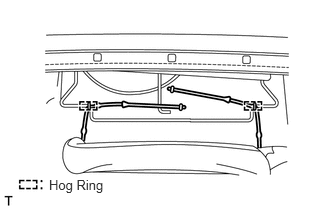
Remove the 2 hog rings and detach the fastening rubber.
Open the fastening tape and turn up the seatback cover.
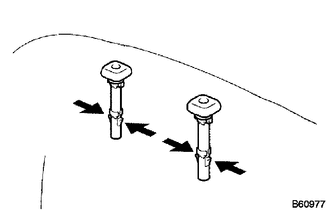
Detach the 4 claws and remove the 2 headrest supports.
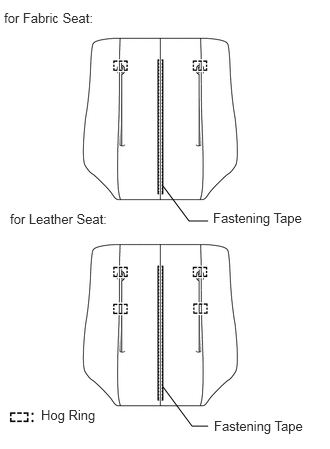
for Fabric Seat:
Remove the 2 hog rings and open the fastening tape.
Then remove the seatback cover from the seatback pad.
for Leather Seat:
Remove the 4 hog rings and open the fastening tape.
Then remove the seatback cover from the seatback pad.
71695A
14.REMOVE REAR SEAT PROTECTOR NO. 1
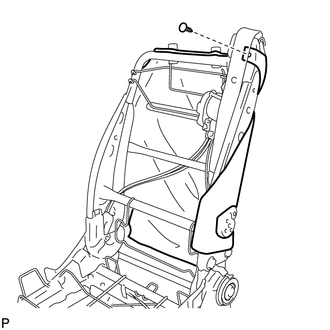
Using a clip remover, remove the clip and seat protector.
73320A
15.REMOVE NO. 1 SEAT 3 POINT TYPE BELT ASSEMBLY LH
71876C
16.REMOVE RECLINING ADJUSTER INSIDE COVER LH
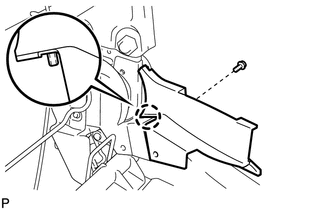
for Outer:
Remove the screw.
Detach the claw and remove the reclining adjuster inside cover LH.
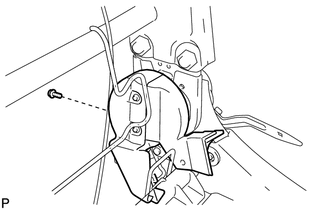
for Inner:
Remove the screw and reclining adjuster inside cover LH.
72554A
17.REMOVE RECLINING COVER PROTECTOR LH
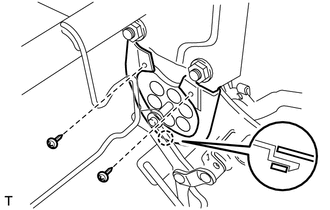
Remove the 2 screws.
Detach the claw and remove the reclining cover protector.
72553A
18.REMOVE RECLINING COVER PROTECTOR RH
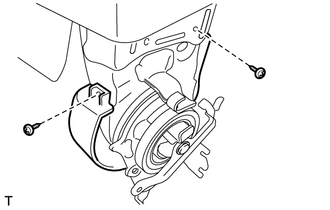
Remove the 2 screws.
Remove the reclining cover protector.
71875A
19.REMOVE RECLINING ADJUSTER INSIDE COVER RH
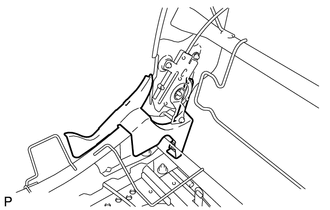
Remove the reclining adjuster inside cover RH.
73380C
20.REMOVE REAR NO. 1 SEAT INNER BELT ASSEMBLY
79959B
21.REMOVE REAR SEAT LEG COVER LH
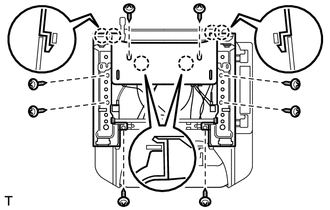
Remove the 3 screws, detach the 2 claws and remove the rear No. 6 seat leg side cover.
Remove the 3 screws, detach the 2 claws and remove the rear No. 5 seat leg side cover.
Remove the 2 screws.
Detach the 2 claws and remove the rear seat leg cover.
76974E
22.REMOVE REAR UNDER COVER
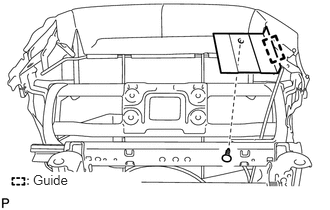
Using a clip remover, remove the clip.
Disengage the guide and remove the rear under cover.
79012
23.REMOVE NO. 1 SEAT CUSHION COVER ASSEMBLY LH
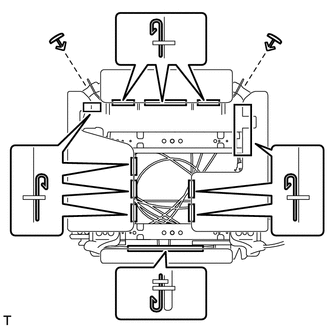
Using a clip remover, remove the 2 clips and hooks.
Remove the No. 1 seat cushion cover assembly.
71512S
24.REMOVE NO. 1 SEAT CUSHION PAD LH
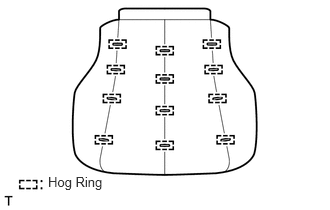
Remove the 12 hog rings.
Remove the No. 1 seat cushion pad LH.
71499B
25.REMOVE SEAT CUSHION SPRING DAMPER
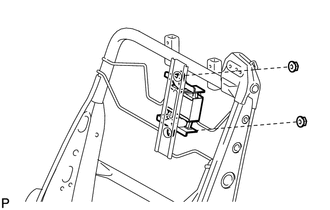
Remove the 2 nuts and seat cushion spring damper.
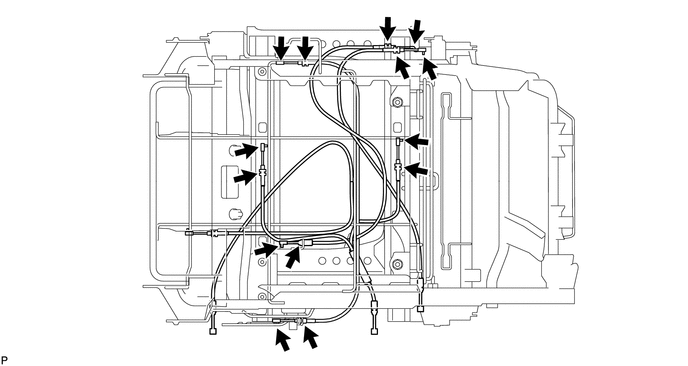
26.REMOVE REAR SEAT TRACK CONTROL CABLE
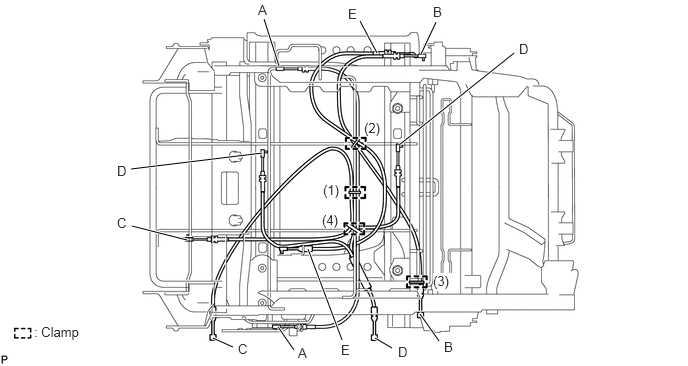
Remove the 4 clamps.
- HINT:
-
The installation position of each clamp in relation to the cables is as shown in the table below.
Cable Component Function Clamping Position Tape Color Detail A SEAT TRACK CONTROL CABLE ASSEMBLY for longitudinal slide function (1) Pink Clamp used to install cable A and cable C to the seat (2) Clamp used to install cable A, cable B and cable E to the seat spring (4) Clamp used to install cable A, cable C and cable D to the seat spring B RECLINING ADJUSTING CABLE ASSEMBLY LH for recline function (2) Blue Clamp used to install cable A, cable B and cable E to the seat spring (3) Identification tape not applied Clamp used to install cable B to the rear side seat pipe C LEGREST LOCK CONTROL CABLE ASSEMBLY for ottoman function (1) Pink Clamp used to install cable A and cable C to the seat D SEAT TRACK CONTROL CABLE ASSEMBLY for lateral slide function (4) Blue Clamp used to install cable A, cable C and cable D to the seat spring E SEAT TRACK CONTROL CABLE ASSEMBLY for walk-in function (2) Blue Clamp used to install cable A, cable B and cable E to the seat spring
Disconnect the cable ends as shown in the illustration and remove the 3 seat track control cable assemblies, reclining adjusting cable assembly RH and legrest lock control cable.
- HINT:
-
Label the cables as necessary in order to indicate their respective installation positions.