EXTERIOR FRONT PILLAR UPPER COVER INSTALLATION
CAUTION / NOTICE / HINT
- NOTICE:
- ·
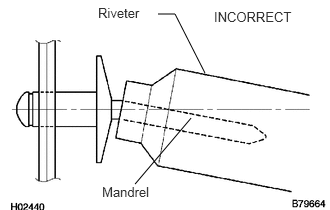 1.406,1.917 1.99,1.229 false 2.135,0.76 1.823,0.146 1.823,0.146 1.646,0.146 false 2.229,0.094 3.094,0.271 0.865,0.177 10 false INCORRECT 1.021,0.052 1.542,0.229 0.521,0.177 10 false Riveter 1.063,1.917 1.635,2.073 0.573,0.156 10 false Mandrel
Do not pry the rivet with the riveter, as this will cause damage to the riveter and mandrel.
·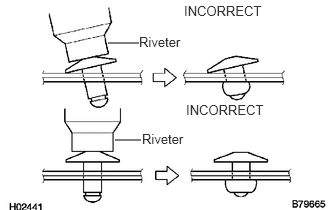 1.125,0.448 1.448,0.448 false 1.198,1.458 1.469,1.458 false 1.917,0.031 2.802,0.208 0.885,0.177 10 false INCORRECT 1.448,0.354 1.927,0.521 0.479,0.167 10 false Riveter 1.938,1.063 2.823,1.24 0.885,0.177 10 false INCORRECT 1.479,1.365 1.958,1.531 0.479,0.167 10 false Riveter
Confirm that the rivets are seated properly against the pillar.
·Do not tilt the riveter when installing the rivet to the pillar.
·Do not leave any space between the rivet head and pillar.
·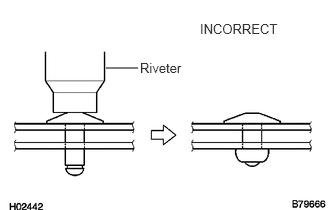 1.104,0.708 1.438,0.708 false 1.458,0.625 1.917,0.792 0.458,0.167 10 false Riveter 2.083,0.219 2.979,0.365 0.896,0.146 10 false INCORRECT
Do not leave any space between the speaker and door. Firmly hold together the 2 items while installing the pillar.
PROCEDURE

 75545B
1.INSTALL NO. 4 WINDSHIELD OUTSIDE MOULDING CLIP
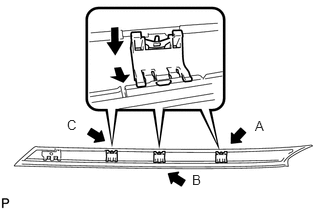
Attach the 3 clips.
| A | Green |
| B | Yellow |
| C | Purple |
75545B
2.INSTALL NO. 1 WINDSHIELD OUTSIDE MOULDING CLIP
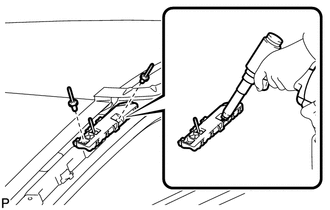
Using an air riveter or hand riveter, install the clip with 2 new rivets.
75545B
3.INSTALL NO. 2 WINDSHIELD OUTSIDE MOULDING CLIP
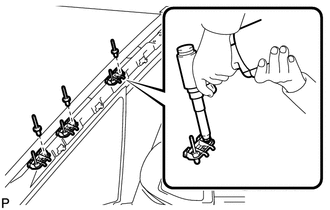
Using an air riveter or hand riveter, install the 3 clips with 6 new rivets.
75545B
4.INSTALL NO. 3 WINDSHIELD OUTSIDE MOULDING CLIP
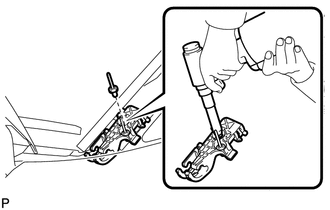
Using an air riveter or hand riveter, install the clip with a new rivet.
75534
5.INSTALL WINDSHIELD MOULDING OUTSIDE
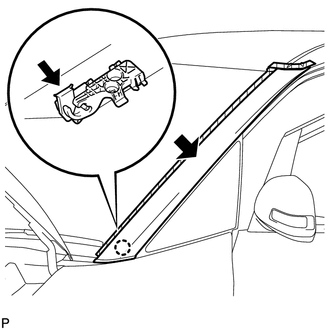
Move the moulding in the direction of the arrow shown in the illustration to insert the moulding's pin into the clip.
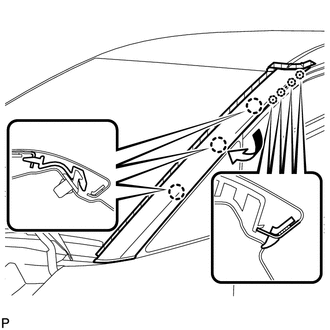
Attach the 7 claws to install the moulding.