EXTERIOR SIDE MUDGUARD(for Sport Package) REMOVAL
CAUTION / NOTICE / HINT
- HINT:
- ·
Use the same procedure for the RH side and LH side.
·The following procedure is for the LH side.
PROCEDURE

 76902B
1.REMOVE FENDER PANEL MUDGUARD SUB-ASSEMBLY
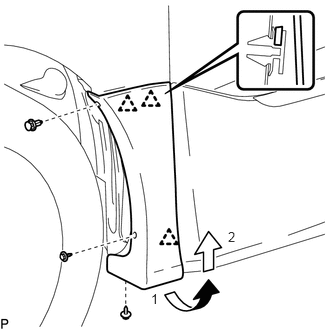
Remove the 2 screws and clip.
Disengage the 3 clips to remove the fender panel mudguard sub-assembly as indicated by the arrows, in the order shown in the illustration.
- NOTICE:
-
If there is any damage, replace the clip with a new one.
- HINT:
-
The 3 clips will remain attached to the vehicle.
76904A
2.REMOVE FRONT DOOR MUDGUARD SUB-ASSEMBLY
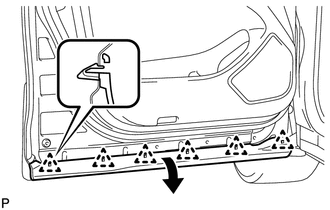
Disengage the 6 clips as shown in the illustration.
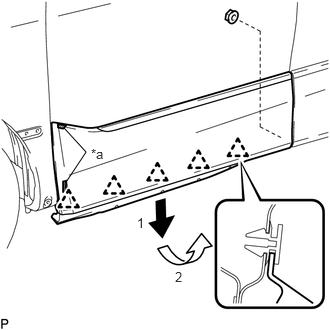
Remove the nut.
| *a | Double-sided Tape |
Separate the double-sided tape and disengage the 5 clips to remove the front door mudguard sub-assembly as indicated by the arrows, in the order shown in the illustration.
- NOTICE:
- ·
Be careful not to deform the front door mudguard sub-assembly.
·If there is any damage, replace the clip with a new one.
- HINT:
-
The 5 clips will remain attached to the vehicle.
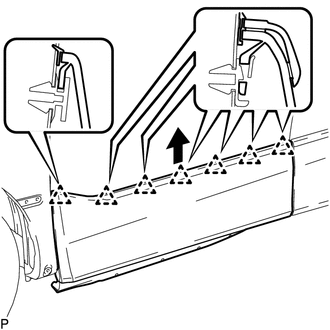
Disengage the 7 clips to remove the front door mudguard sub-assembly as shown in the illustration.
- NOTICE:
-
If there is any damage, replace the clip with a new one.
- HINT:
-
The 7 clips will remain attached to the vehicle.
76906C
3.REMOVE SLIDE DOOR MUDGUARD SUB-ASSEMBLY
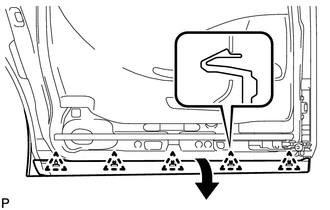
Disengage the 5 clips as shown in the illustration.
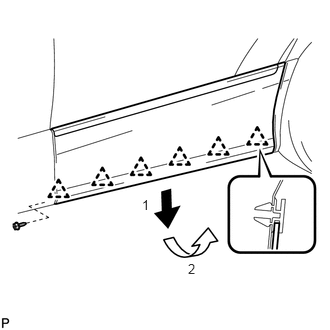
Remove the screw.
Disengage the 6 clips to remove the slide door mudguard sub-assembly as indicated by the arrows, in the order shown in the illustration.
- NOTICE:
- ·
Be careful not to deform the slide door mudguard sub-assembly.
·If there is any damage, replace the clip with a new one.
- HINT:
-
The 6 clips will remain attached to the vehicle.
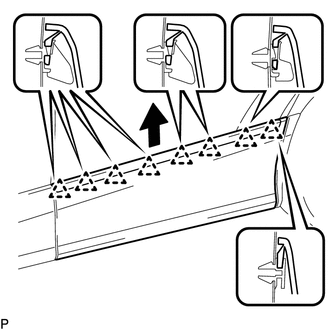
Disengage the 8 clips to remove the slide door mudguard sub-assembly as shown in the illustration.
- NOTICE:
-
If there is any damage, replace the clip with a new one.
- HINT:
-
The 8 clips will remain attached to the vehicle.
76932A
4.REMOVE NO. 1 SIDE MUDGUARD BRACKET
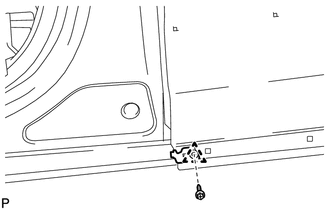
Remove the screw.
Disengage the clip to remove the No. 1 side mudguard bracket.
76908
5.REMOVE QUARTER PANEL MUDGUARD SUB-ASSEMBLY
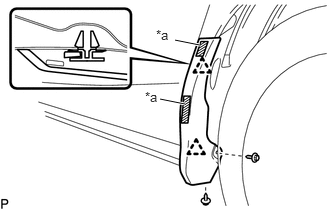
Remove the 2 screws.
| *a | Double-sided Tape |
Separate the double-sided tape and disengage the 2 clips to remove the quarter panel mudguard sub-assembly.
- NOTICE:
-
If there is any damage, replace the clip with a new one.
- HINT:
-
The 2 clips will remain attached to the vehicle.
76923
6.REMOVE SIDE MUDGUARD RETAINER
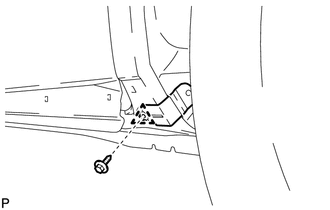
Remove the screw.
Disengage the clip to remove the side mudguard retainer.
76926E
7.REMOVE FRONT SIDE MUDGUARD PROTECTOR
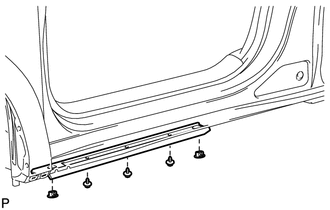
Remove the 2 side panel retainers.
Remove the 3 screws and front side mudguard protector.