SLIDING ROOF SLIDING ROOF HOUSING REASSEMBLY
PROCEDURE

 63306
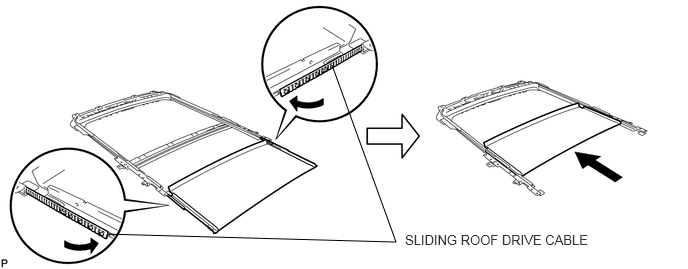
1.INSTALL SUNSHADE TRIM SUB-ASSEMBLY (for Rear Side)
Connect the sliding roof drive cable to the sunshade trim.
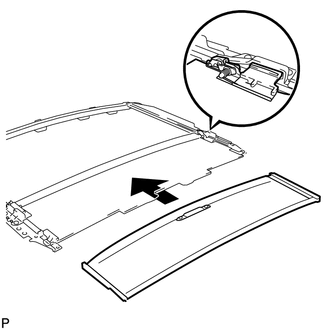
Slide the sunshade trim in the direction of the arrow shown in the illustration to install it to the sliding roof housing.
- NOTICE:
-
Do not bend or twist the sliding roof drive cable as it will damage the cable.
63303
2.INSTALL NO. 2 SUNSHADE TRIM SUB-ASSEMBLY
Slide the tips of the sunshade trim rails to the cutouts of the sliding roof housing shown in the illustration.
Slide the No. 2 sunshade trim toward the rear of the vehicle and insert each guide B to the left and right sides.
Slide the No. 2 sunshade trim toward the front of the vehicle, insert each guide A to the left and right sides and install the No. 2 sunshade trim.
Using a T20 "TORX" driver, install the sliding roof sunshade guide front RH with the 2 "TORX" screws.
- Torque:
- 4.0 N*m (41 kgf*cm, 35 in.*lbf)
- HINT:
-
Use the procedure above for the LH side.
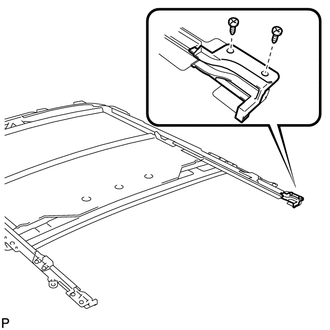
Using a T20 "TORX" driver, install the sliding roof sunshade guide rear RH with the 2 screws.
- Torque:
- 4.0 N*m (41 kgf*cm, 35 in.*lbf)
- HINT:
-
Use the procedure above for the LH side.
63260A
3.INSTALL SLIDING ROOF DRIVE GEAR SUB-ASSEMBLY
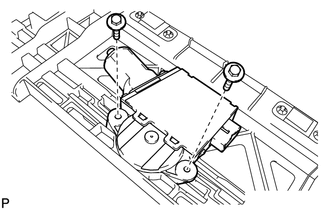
Install the drive gear with the 2 bolts.
- Torque:
- 5.4 N*m (55 kgf*cm, 48 in.*lbf)
63306
4.INSTALL SUNSHADE TRIM SUB-ASSEMBLY (for Front Side)
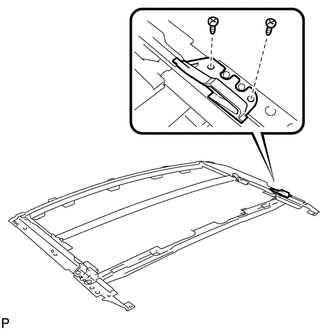
Using a T20 "TORX" driver, install the tilt roof sunshade guide front RH with the 2 screws.
- Torque:
- 4.0 N*m (41 kgf*cm, 35 in.*lbf)
- HINT:
-
Use the procedure above for the LH side.
Slide the No. 2 sunshade trim to its rearmost position.
Slide the sunshade trim to install it to the tilt roof housing.
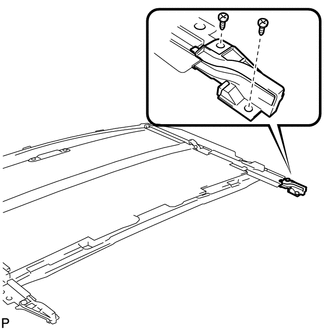
Using a T20 "TORX" driver, install the tilt sunshade guide rear RH with the 2 screws.
- Torque:
- 4.0 N*m (41 kgf*cm, 35 in.*lbf)
- HINT:
-
Use the procedure above for the LH side.
63215G
5.INSTALL MOON ROOF FRONT MOULDING
If reusing the No. 2 roof window glass RH:
Clean the No. 2 roof window glass RH.
Remove the double-sided tape from the No. 2 roof window glass RH.
Wipe off any tape adhesive residue with cleaner.
Remove the peeling paper from the double-sided tape on the moulding surface.
- HINT:
-
After removing the peeling paper, keep the exposed adhesive free from foreign matter.
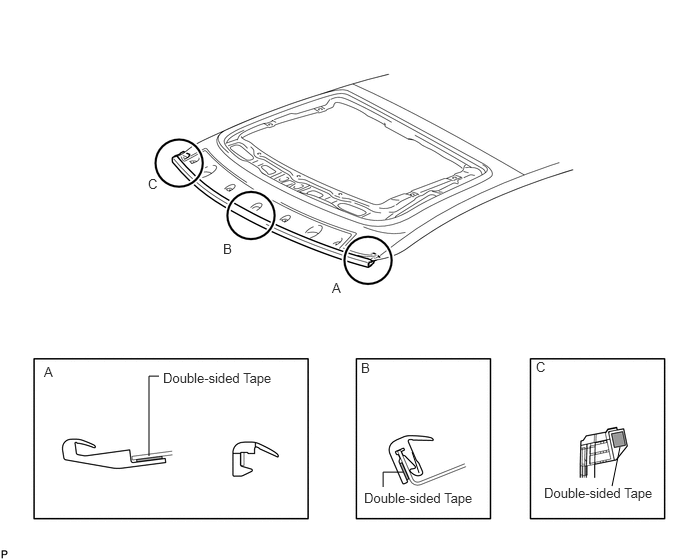
Install the 2 mouldings to the No. 2 roof window glass RH as shown in the illustration.
63619
6.INSTALL TILT ROOF PANEL COVER
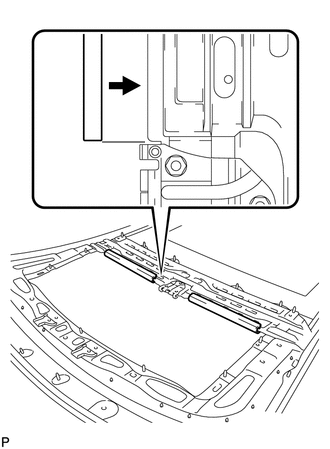
Install the 2 covers as shown in the illustration.
63282B
7.INSTALL TILT ROOF LOCK STRIKER
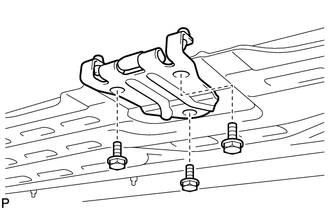
Install the roof lock striker with the 3 bolts.
- Torque:
- 5.4 N*m (55 kgf*cm, 48 in.*lbf)