INSTALLATION
Removal / installation · Vehicles built Jul 2007 – Oct 2010
Versions by build date: Jul 2007 – Oct 2010 from Nov 2010
| 1.
INSTALL COMBINATION METER ASSEMBLY |
 |
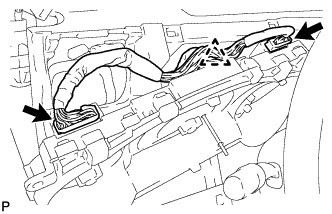
- Connect the 2 connectors and the clamp.
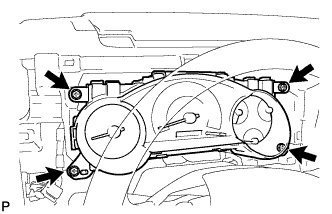
- Install the combination meter assembly with the 4 screws.
-
Torque:
- 7.0 N*m{
71 kgf*cm
, 62 in.*lbf
}
| 2.
INSTALL INSTRUMENT CLUSTER FINISH PANEL
|
|
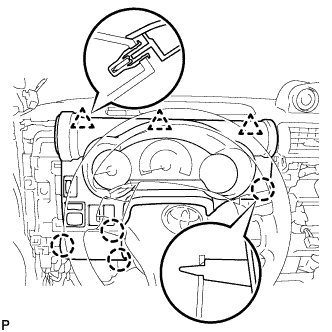
Connect the connectors.
Engage the 3 clips and 4 claws and install the instrument cluster lower finish panel.
| 3.
INSTALL LOWER INSTRUMENT PANEL FINISH PANEL SUB-ASSEMBLY LH
|
|
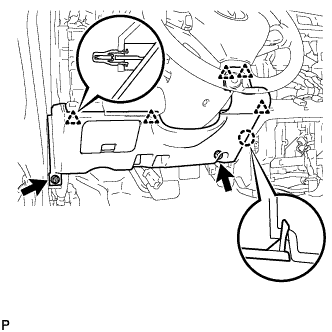
- Engage the 5 clips and claw and install the lower instrument panel finish panel.
Install the 2 <F> bolts.
| 4.
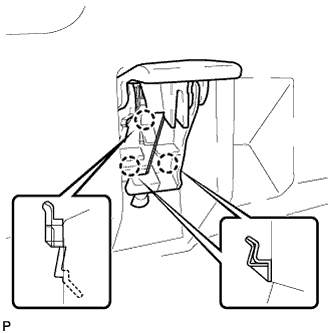
INSTALL HOOD LOCK CONTROL LEVER SUB-ASSEMBLY
|
|
- Engage the 3 claws and install the hood lock control lever.
| 5.
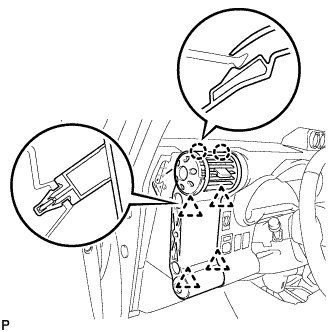
INSTALL NO. 1 INSTRUMENT PANEL REGISTER ASSEMBLY
|
|
- Engage the 4 clips and 2 claws and install the instrument panel register.
| 6.
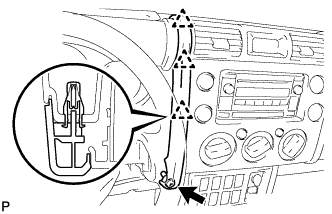
INSTALL INSTRUMENT PANEL GARNISH LH
|
|
- Engage the 3 clips and install the instrument panel garnish.
Install 2 <H> screws.
| 7.
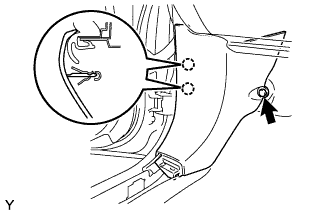
INSTALL COWL SIDE TRIM BOARD LH |
|
Engage the 2 claws and install the cowl side trim board.
Install the clip.
| 8.
INSTALL FOOTREST CLIP
|
|
- HINT:
- Use the same procedure for both sides.
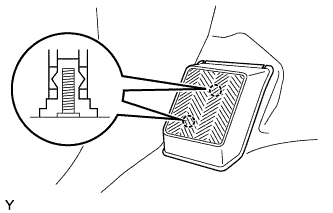
Engage the 2 claws and install the footrest clip.
| 9.
INSTALL FRONT FLOOR FOOTREST
|
|
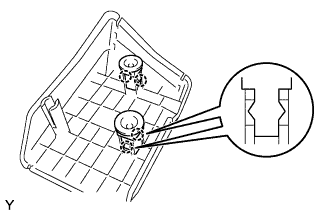
- Engage the 2 studs and install the front floor footrest.
| 10.
INSTALL FRONT DOOR SCUFF PLATE LH |
|
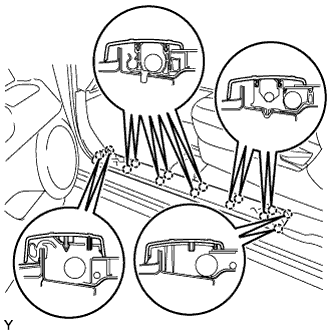
Engage the 14 claws and install the door scuff plate.
| 11.
CONNECT CABLE TO NEGATIVE BATTERY TERMINAL |
|
-
Torque:
- 3.9 N*m{
40 kgf*cm
, 35 in.*lbf
}