REMOVAL
Removal / installation · Vehicles built Nov 2010 – Jul 2012
Versions by build date: Jul 2007 – Oct 2010 Nov 2010 – Jul 2012 from Aug 2012
| 1.
PRECAUTION |
 |
- CAUTION:
- Read "PRECAUTION" thoroughly before servicing (Click here).
| 2.
DISCONNECT CABLE FROM NEGATIVE BATTERY TERMINAL |
|
- CAUTION:
- Wait for at least 90 seconds after disconnecting the cable to prevent the airbag from working.
| 3.
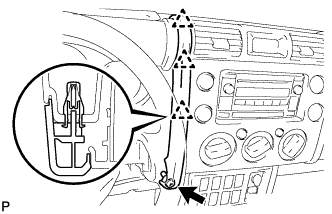
REMOVE INSTRUMENT PANEL GARNISH LH
|
|
- Remove screw <G>.
Disengage the 3 clips and remove the instrument panel garnish.
- NOTICE:
- Pull the instrument panel garnish up at an angle of 45° to remove it.
- Do not damage the surface of the instrument panel when removing it.
| 4.
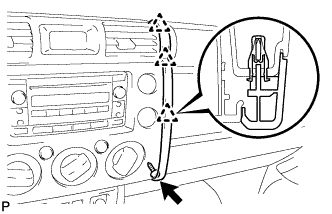
REMOVE INSTRUMENT PANEL GARNISH RH
|
|
- Remove screw <G>.
Disengage the 3 clips and remove the instrument panel garnish.
- NOTICE:
- Pull the instrument panel garnish up at an angle of 45° to remove it.
- Do not damage the surface of the instrument panel when removing it.
| 5.
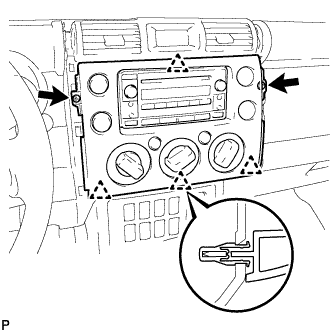
REMOVE INTEGRATION CONTROL AND PANEL ASSEMBLY
|
|
- Remove the 2 screws.
Disengage the 4 clips and remove the integration control panel assembly.
Disconnect the 3 connectors.
| 6.
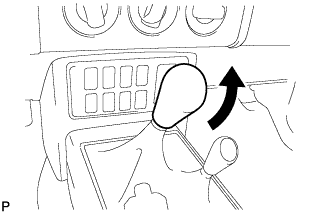
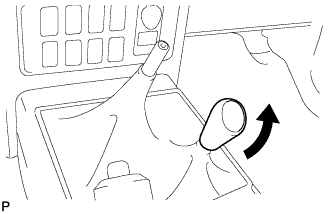
REMOVE SHIFT LEVER KNOB SUB-ASSEMBLY (for Manual Transaxle)
|
|
- Remove the shift lever knob.
| 7.
REMOVE SHIFT LEVER KNOB SUB-ASSEMBLY
|
|
- Remove the shift lever knob.
| 8.
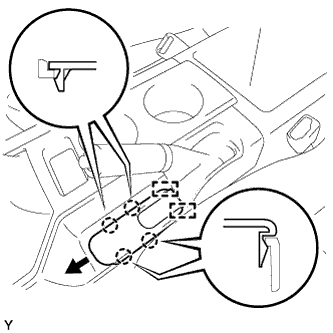
REMOVE PARKING BRAKE HOLE COVER SUB-ASSEMBLY
|
|
- Disengage the 4 claws.
Slide the parking brake hole cover toward the front of the vehicle, disengage the 2 guides and remove the parking brake hole cover.
| 9.
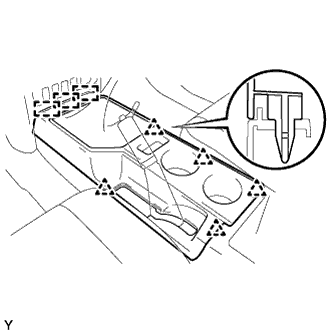
REMOVE CONSOLE UPPER REAR PANEL SUB-ASSEMBLY
|
|
- Shift the shift lever into the N position.
Disengage the 5 clips and 3 guides and remove the console upper rear panel.
| 10.
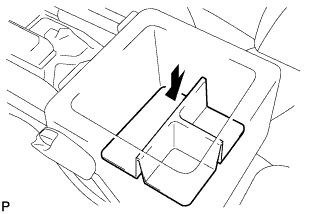
REMOVE BOX BOTTOM MAT
|
|
- Remove the box bottom mat.
| 11.
REMOVE FRONT CONSOLE BOX
|
|
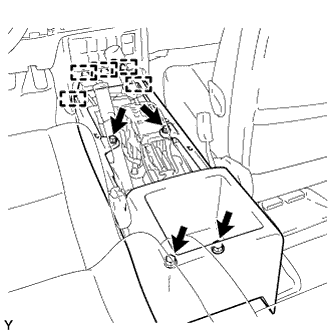
- Remove the 4 <H> bolts.
Disengage the 5 guides and remove the console box.
| 12.
REMOVE CONSOLE UPPER PANEL NO.1 GARNISH
|
|
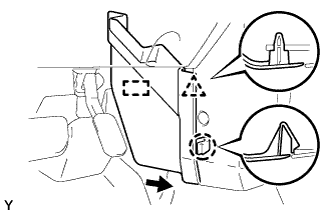
- Disengage claw and the clip.
Slide the console upper panel garnish toward the rear of the vehicle, disengage the guide and remove the console upper panel garnish.
| 13.
REMOVE INSTRUMENT LOWER COVER SUB-ASSEMBLY
|
|
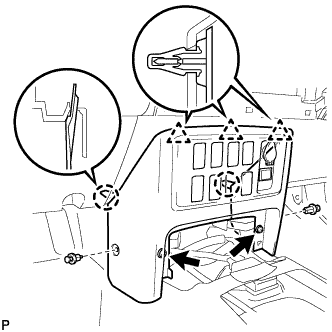
- Remove the 2 clips and 2 <E> bolts.
Disengage the 3 clips and 2 claws and remove the instrument lower cover.
| 14.
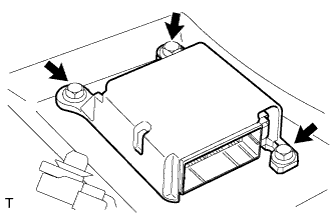
REMOVE CENTER AIRBAG SENSOR ASSEMBLY |
|
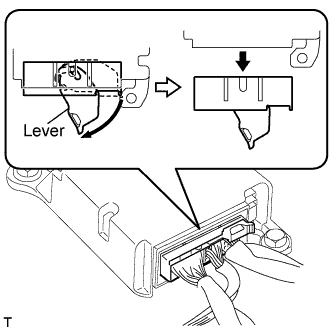
- Disconnect the holder (with connectors) from the center airbag sensor assembly.
- Remove 3 bolts and the center airbag sensor assembly.