2011-2016 FJ Cruiser · Service Manual HEATER & AIR CONDITIONING SYSTEM

REMOVAL

Removal / installation · Vehicles built Jul 2007 – Jul 2009

Versions by build date: Jul 2007 – Jul 2009 Aug 2009 – Oct 2010 Nov 2010 – Jul 2012 Aug 2012 – Jul 2013 from Aug 2013

CAUTION:
Some of these service operations affect the SRS airbag system. Read the precautionary notices concerning the SRS airbag system before servicing (Click here).

HINT:
Use the same procedure for both the RH and LH sides.


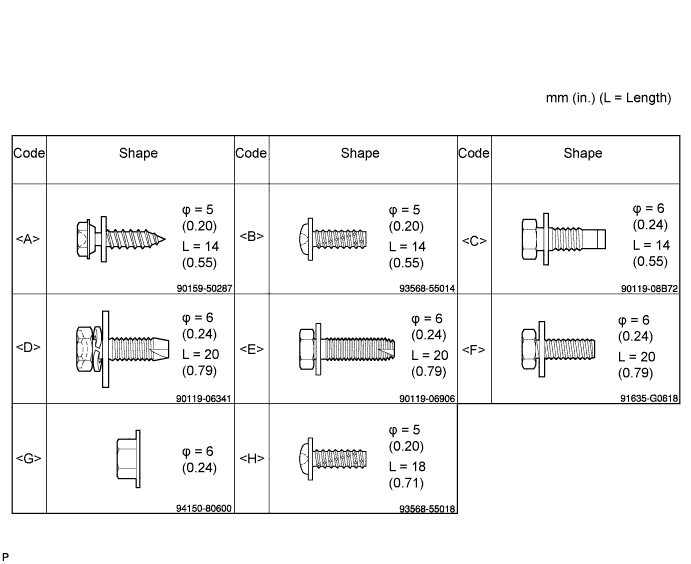
1. BOLTS, SCREWS AND NUTS TABLE

HINT:
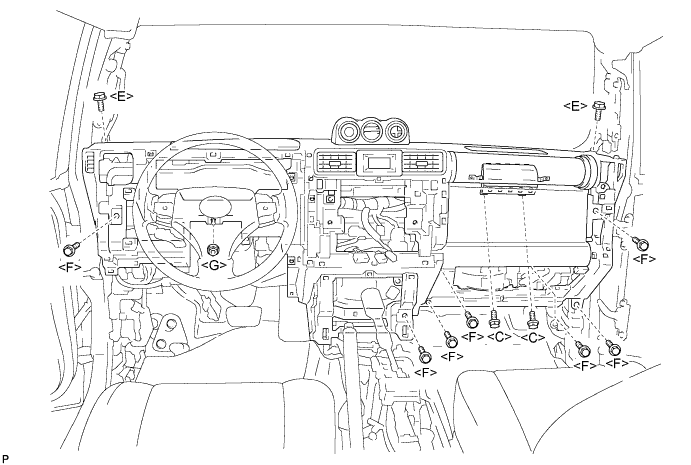
All bolts, screws and nuts relevant to installing and removing the instrument panel are shown, along with their alphabetic codes, in the table below.


B133850E01

2. DISCONNECT CABLE FROM NEGATIVE BATTERY TERMINAL
Wait for at least 90 seconds after disconnecting the cable to prevent the airbag from working.

3. DISCHARGE REFRIGERANT FROM REFRIGERATION SYSTEM
  1. Start up the engine.

  1. Switch A/C ON.

  1. Turn the blower switch to ON.

  1. Operate the cooler compressor with an engine speed of approximately 1,000 rpm for 5 to 6 minutes to circulate the refrigerant and collect the remaining compressor oil from each component, in the cooler compressor.

  1. Stop the engine.

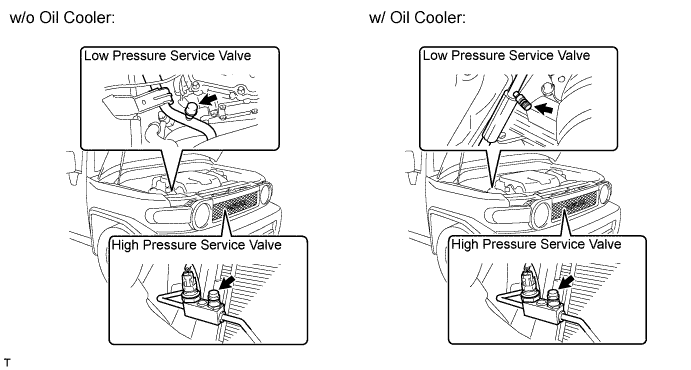
  1. Remove the caps from the service valves on the refrigerant line.

    I104027E01

  1. Connect the refrigerant recovery unit.

  1. Recover the refrigerant from the air conditioning system using a refrigerant recovery unit.

    NOTICE:
    Use the refrigerant recovery unit in accordance with the manufacturer's instruction manual.


4. DRAIN ENGINE COOLANT

A070279E01

CAUTION:
To avoid the danger of being burned, do not remove the radiator cap while the engine and radiator are still hot. Thermal expansion will cause hot engine coolant and steam to blow out from the radiator.

  1. Remove the service hole cover from the engine under cover.

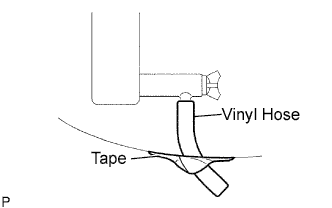
  1. Install a vinyl hose onto the drain on the radiator side.

  1. Fix the vinyl hose with tape.

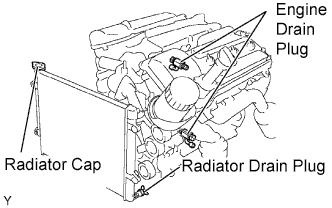
  1. A076320E02
    Loosen the 3 drain plugs on the engine and radiator, and drain the coolant.

  1. Remove the radiator cap.

  1. Drain the coolant from the reservoir tank.

  1. Tighten the 3 drain plugs.

    Torque:
    13 N*m{ 130 kgf*cm , 9 ft.*lbf } for the engine

  1. Remove the vinyl hose from the radiator.


5. REMOVE ROOF ANTENNA POLE SUB-ASSEMBLY

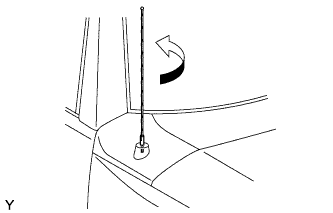
B135011
  1. Remove the radio antenna pole by turning it in the direction of the arrow shown in the illustration.


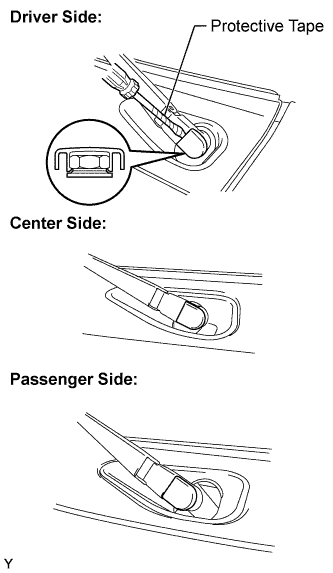
6. REMOVE WINDSHIELD WIPER ARM COVER

  1. E127858E01
    Using a screwdriver with its tip wrapped in protective tape, disengage the claw and remove the 3 front wiper arm cover.


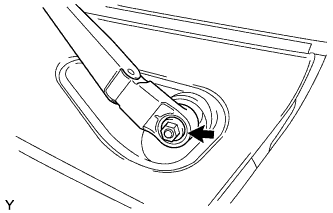
7. REMOVE FRONT WIPER ARM AND BLADE ASSEMBLY LH

  1. E127859
    Operate the wiper, then stop the windshield wiper motor in the automatic stop position.

  1. Remove the nut and front wiper arm.


8. REMOVE FRONT WIPER ARM AND BLADE ASSEMBLY RH (CENTER SIDE)

HINT:
Use the same procedure as for the LH side.


9. REMOVE FRONT WIPER ARM AND BLADE ASSEMBLY RH

HINT:
Use the same procedure as for the LH side.


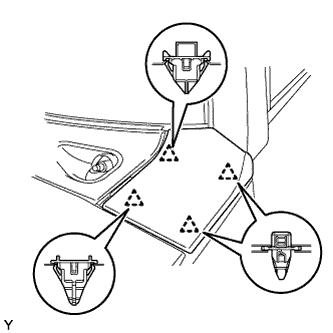
10. REMOVE FRONT FENDER SIDE PANEL UPPER LH

  1. B210065
    Disengage the 4 clips and remove the front fender side panel upper LH.

  1. Remove the 4 clips from the front fender side panel upper LH.


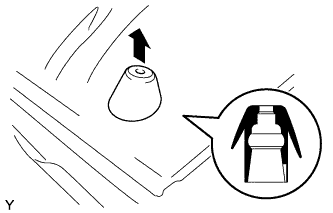
11. REMOVE ANTENNA ORNAMENT

  1. E127861E01
    Pull out the antenna ornament vertically.


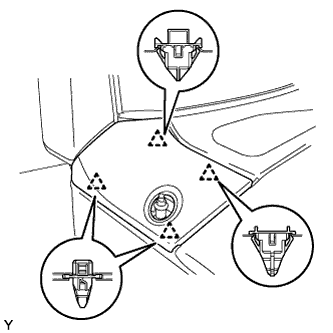
12. REMOVE FRONT FENDER SIDE PANEL UPPER RH

  1. B210064
    Disengage the 4 clips and remove the front fender side panel upper RH.

  1. Remove the 4 clips from the front fender side panel upper RH.


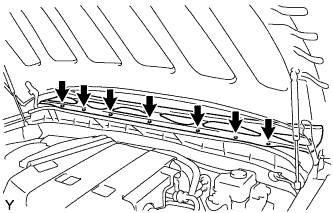
13. REMOVE COWL TOP VENTILATOR LOUVER ASSEMBLY

  1. E127863
    Disengage the 7 clips and remove the cowl top ventilator louver sub-assembly.


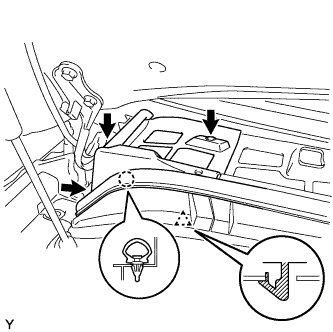
14. REMOVE COWL TOP VENTILATOR LOUVER RH

  1. E127864
    Disengage the clip and remove the hood to cowl top seal.

  1. Remove the 3 clips and the claw, and remove the cowl top ventilator louver RH.


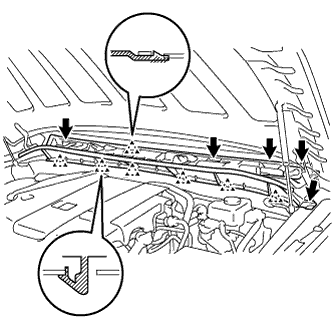
15. REMOVE COWL TOP VENTILATOR LOUVER LH

  1. E127865
    Remove the 5 clips.

  1. Disengage the 7 claws and remove the cowl top ventilator louver LH.


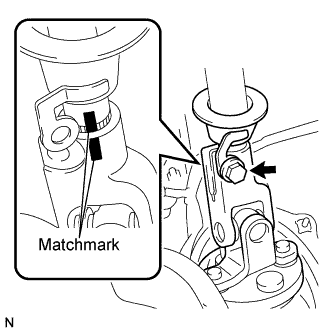
16. DISCONNECT COOLER REFRIGERANT SUCTION PIPE A

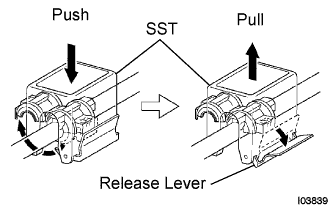
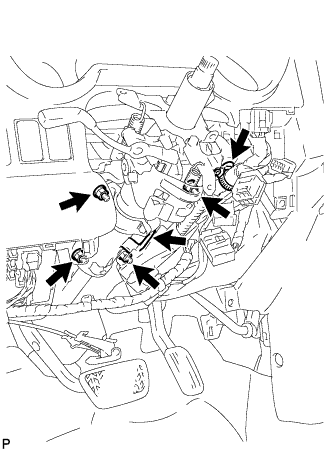
I003839E04
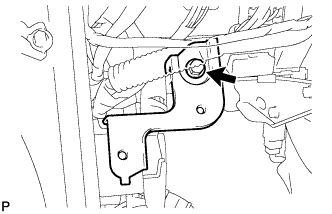
  1. Install SST onto the piping clamp.

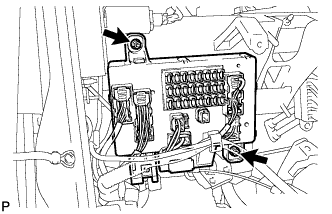
    SST
    09870-00015  

    HINT:
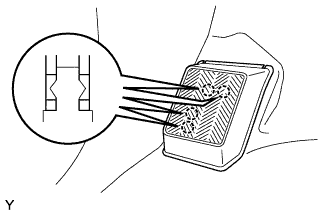
    Check the directions of the piping clamp and SST by referring to the illustration on the caution label.

  1. Push down SST and release the clamp lock.

    NOTICE:
    Do not deform the tube when pushing SST.

  1. Pull SST slightly, push the release lever, and then remove the piping clamp with SST.

  1. Disconnect the suction pipe.

    NOTICE:
    1. Do not use any tools when disconnecting the pipe.
    2. Seal the openings of the disconnected parts using vinyl tape to prevent moisture and foreign matter from entering.


17. DISCONNECT COOLER REFRIGERANT LIQUID PIPE A
SST
09870-00025  

HINT:
Disconnection procedure of the liquid pipe is the same as for the suction pipe.


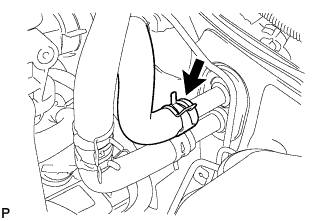
18. DISCONNECT HEATER WATER HOSE INLET

I102426
  1. Using pliers, grip the claw of the clip, slide the clip and disconnect the heater water inlet hose from the heater unit.


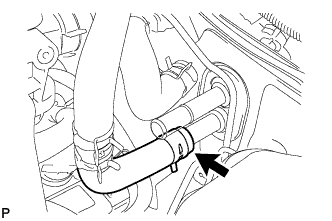
19. DISCONNECT HEATER WATER OUTLET HOSE A (FROM HEATER UNIT)

I102428
  1. Using pliers, grip the claw of the clip, slide the clip and disconnect the heater water outlet hose from the heater unit.


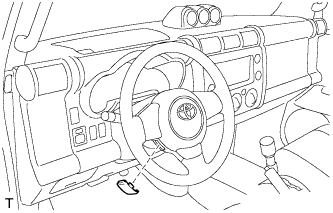
20. POSITION FRONT WHEELS FACING STRAIGHT AHEAD

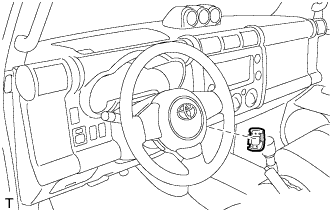
21. REMOVE LOWER NO. 3 STEERING WHEEL COVER

  1. C128195
    Using a thin-bladed screwdriver, remove steering wheel cover lower No.3.

    HINT:
    Tape up the screwdriver tip before use.


22. REMOVE LOWER NO. 2 STEERING WHEEL COVER

  1. C128196
    Using a thin-bladed screwdriver, remove steering wheel cover lower No.2.

    HINT:
    Tape up the screwdriver tip before use.


23. REMOVE STEERING PAD

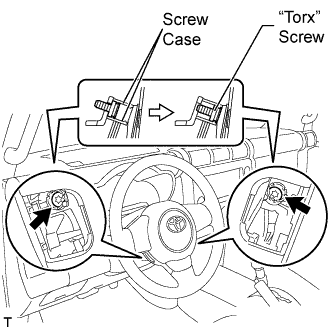
  1. C128197E01
    Using "Torx" socket wrench (T30), loosen the 2 "Torx" screws until the groove along the screw circumference catches on the screw case.

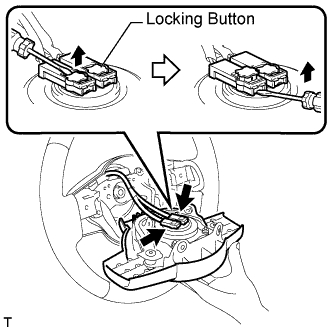
  1. C128193E01
    Pull the steering pad out of the steering wheel assembly and support the steering pad with one hand as shown in the illustration.

    NOTICE:
    When removing the steering pad, do not pull the airbag wire harness.

  1. Disconnect the horn connector.

  1. Disconnect the 2 connectors from the steering pad.

    NOTICE:
    When handling the airbag connector, take care not to damage the airbag wire harness.

  1. Remove the steering pad.


24. REMOVE STEERING WHEEL ASSEMBLY

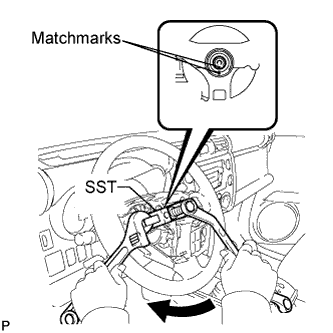
C133806E02
  1. Remove the steering wheel assembly set nut.

  1. Place matchmarks on the steering wheel assembly and main shaft assembly.

  1. Using SST, remove the steering wheel assembly.

    SST
    09950-50013   (09951-05010, 09952-05010, 09953-05020, 09954-05021)


25. REMOVE LOWER STEERING COLUMN COVER

C133807
  1. Remove the 3 screws.

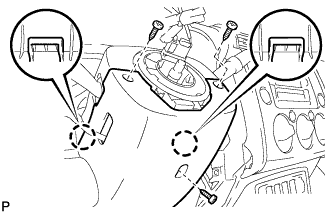
  1. Disengage the 2 claws to remove the lower steering column cover.


26. REMOVE UPPER STEERING COLUMN COVER

C133808
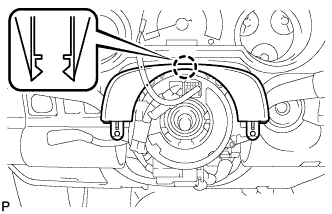
  1. Disengage the claw and then remove the upper steering column cover.


27. REMOVE COMBINATION SWITCH ASSEMBLY

C133809
  1. Disconnect all connectors from the combination switch assembly.

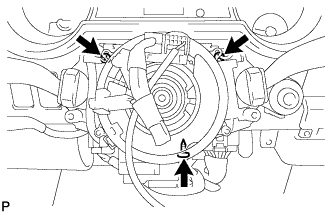
  1. Remove the 3 screws.


28. REMOVE FRONT DOOR SCUFF PLATE RH

  1. B130597
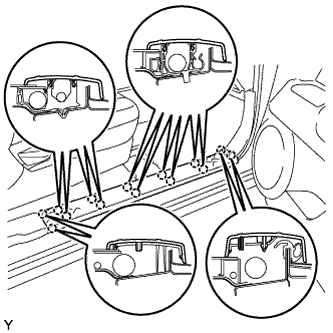
    Disengage the 14 claws and remove the front door scuff plate.


29. REMOVE FRONT DOOR SCUFF PLATE LH

HINT:
Use the same procedure as for the RH side.


30. REMOVE FRONT FLOOR FOOTREST

  1. B130586
    Disengage the 4 claws and remove the front floor footrest.


31. REMOVE FOOTREST CLIP

  1. B130587
    Remove the 2 footrest clips.


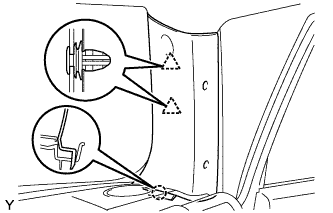
32. REMOVE COWL SIDE TRIM BOARD RH

  1. B130599
    Remove the clip.

  1. Disengage the 2 claws and remove the cowl side trim board.


33. REMOVE COWL SIDE TRIM BOARD LH

HINT:
Use the same procedure as for the RH side.


34. REMOVE FRONT DOOR OPENING TRIM WEATHERSTRIP RH
  1. Separate the front door opening trim weatherstrip LH.


35. REMOVE FRONT DOOR OPENING TRIM WEATHERSTRIP RH
  1. Separate the front door opening trim weatherstrip RH.


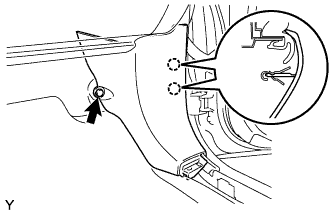
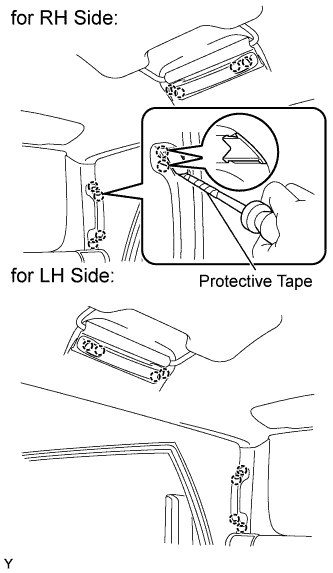
36. REMOVE ASSIST GRIP PLUG

B175647E01

HINT:
Use the same procedure to remove all the assist grip plugs.

  1. Using a screwdriver with its tip wrapped in protective tape, disengage the 2 claws and remove the assist grip plug.


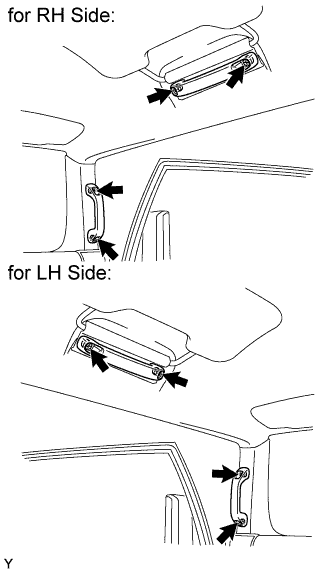
37. REMOVE ASSIST GRIP ASSEMBLY

B175648E01

HINT:
Use the same procedure to remove all the assist grips.

  1. Remove the 2 screws and the assist grip.


38. REMOVE FRONT PILLAR GARNISH RH

  1. B130608
    Disengage the 2 clips and the claw and remove the front pillar garnish.


39. REMOVE FRONT PILLAR GARNISH LH

HINT:
Use the same procedure as for the RH side.


40. REMOVE INSTRUMENT PANEL GARNISH LH

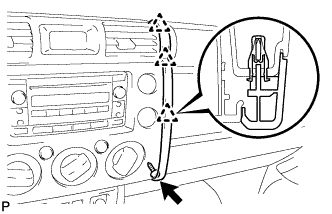
  1. B133886
    Remove screw <H>.

  1. Disengage the 3 clips and remove the instrument panel garnish.

    NOTICE:
    1. Pull the instrument panel garnish up at an angle of 45° to remove it.
    2. Do not damage the surface of the instrument panel when removing it.


41. REMOVE INSTRUMENT PANEL GARNISH RH

  1. B133887
    Remove screw <H>.

  1. Disengage the 3 clips and remove the instrument panel garnish.

    NOTICE:
    1. Pull the instrument panel garnish up at an angle of 45° to remove it.
    2. Do not damage the surface of the instrument panel when removing it.


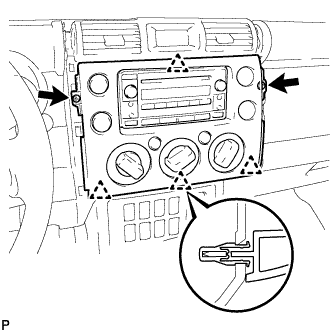
42. REMOVE INTEGRATION CONTROL AND PANEL ASSEMBLY

  1. B133888
    Remove the 2 <H> screws.

  1. Disengage the 4 clips and remove the integration control panel assembly.

  1. Disconnect the 3 connectors.


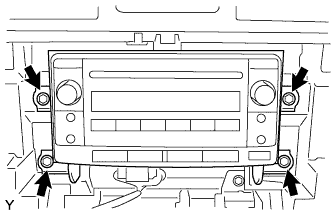
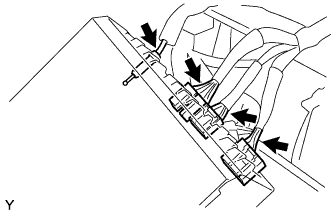
43. REMOVE RADIO RECEIVER ASSEMBLY

  1. B130575
    Remove the 4 bolts and the radio receiver.

  1. B130576
    Disconnect the plug, the head unit connector and the 2 radio connectors.


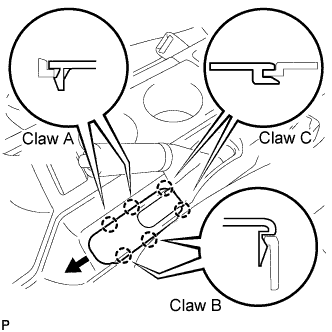
44. REMOVE PARKING BRAKE HOLE COVER SUB-ASSEMBLY

B133898E02
  1. Disengage the 2 A claws and 2 B claws.

  1. Slide the parking brake hole cover toward the front of the vehicle, disengage the 2 C claws and remove the parking brake hole cover.


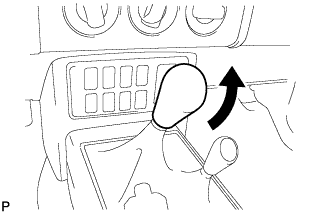
45. REMOVE SHIFT LEVER KNOB SUB-ASSEMBLY (for Manual Transmission)

  1. B133893
    Remove the shift lever knob.


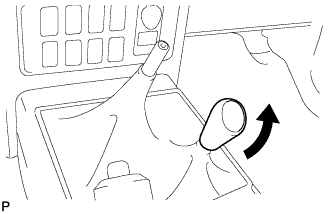
46. REMOVE SHIFT LEVER KNOB SUB-ASSEMBLY (for 4WD)

  1. B133895
    Remove the shift lever knob.


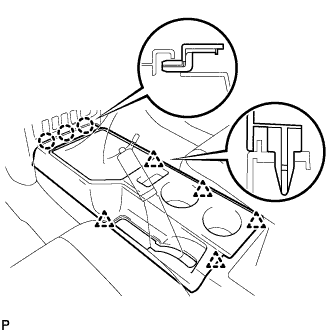
47. REMOVE CONSOLE UPPER REAR PANEL SUB-ASSEMBLY

  1. B133897
    Shift the shift lever into the N position.

  1. Disengage the 5 clips and 3 claws and remove the console upper rear panel.


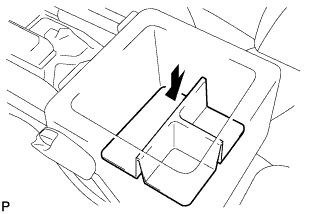
48. REMOVE BOX BOTTOM MAT

  1. B133899
    Remove the box bottom mat.


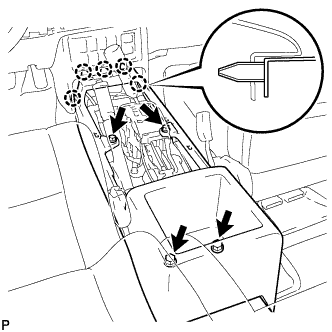
49. REMOVE FRONT CONSOLE BOX

  1. B133851
    Remove the 4 <D> bolts.

  1. Disengage the 5 claws and remove the console box.


50. REMOVE CONSOLE UPPER PANEL NO. 1 GARNISH

  1. B133886
    Remove screw <H>.

  1. Disengage the 3 clips and remove the instrument panel garnish.

    NOTICE:
    1. Pull the instrument panel garnish up at an angle of 45° to remove it.
    2. Do not damage the surface of the instrument panel when removing it.


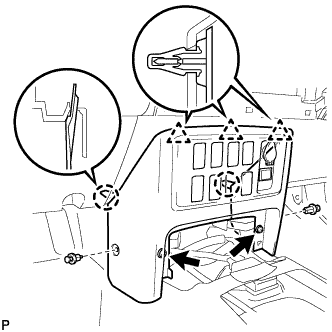
51. REMOVE INSTRUMENT LOWER COVER SUB-ASSEMBLY

  1. B133852
    Remove the 2 clips and 2 <F> bolts.

  1. Disengage the 3 clips and 2 claws and remove the instrument lower cover.


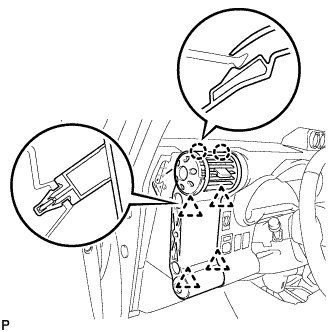
52. REMOVE NO. 1 INSTRUMENT PANEL REGISTER ASSEMBLY

  1. B133853
    Disengage the 4 clips and 2 claws and remove the instrument panel register.

    NOTICE:
    1. To avoid breakage of the register, remove the instrument panel register with the shut damper of the register open.
    2. Pull the instrument panel register up diagonally to remove it.


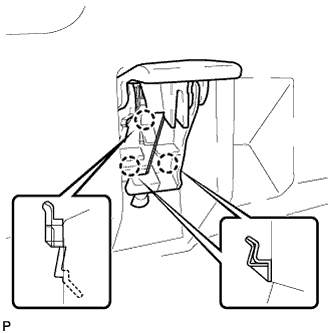
53. SEPARATE HOOD LOCK CONTROL LEVER SUB-ASSEMBLY

  1. B133859
    Disengage the 3 claws and separate the hood lock control lever.


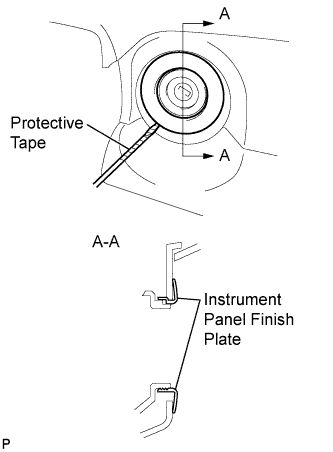
54. REMOVE INSTRUMENT PANEL FINISH PLATE

E149562E01
  1. Using a screwdriver with its tip wrapped in protective tape, remove the instrument panel finish plate.


55. REMOVE LOWER INSTRUMENT PANEL FINISH PANEL SUB-ASSEMBLY LH

  1. B133860
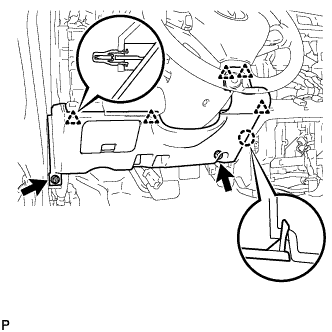
    Remove the 2 <F> bolts.

  1. Disengage the 5 clips and claw and remove the lower instrument panel finish panel.


56. REMOVE LOWER INSTRUMENT PANEL LH

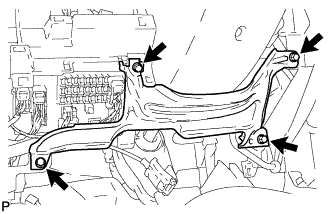
  1. B133864
    Remove the 4 <F> bolts and remove the lower instrument panel.


57. REMOVE INSTRUMENT CLUSTER FINISH PANEL

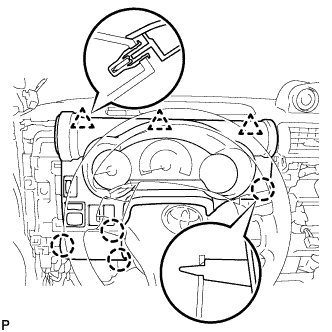
  1. B133861
    Disengage the 3 clips and the 4 claws and remove the instrument cluster finish panel.

  1. Disconnect the connectors.


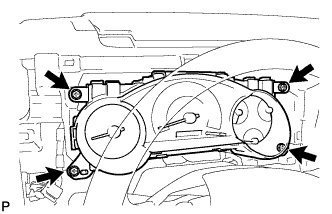
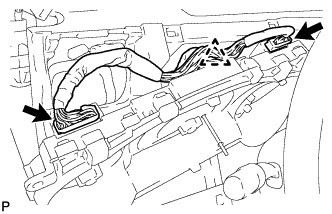
58. REMOVE COMBINATION METER ASSEMBLY

  1. B133862
    Remove the 4 screws.

  1. B133863
    Disconnect the 2 connectors and clamp and remove the combination meter.


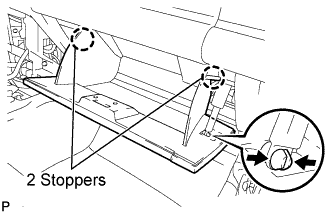
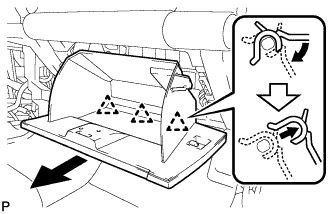
59. REMOVE GLOVE COMPARTMENT DOOR ASSEMBLY

  1. B133854E01
    Disengage the claw and separate the glove compartment door stoppers from the glove compartment door.

  1. Slightly flex the upper part of the glove compartment door assembly to release the 2 stoppers and open the glove compartment door until it becomes horizontal.

  1. B133855
    Pull the glove compartment door assembly toward the rear of the vehicle to release the 3 hinges and remove the glove compartment door assembly.

60. REMOVE INSTRUMENT PANEL LOWER FINISH PANEL SUB-ASSEMBLY RH

  1. B133857
    Remove screw <A>.

  1. Disengage the 2 clips and claw and remove the instrument panel lower finish panel.

  1. Separate the connectors from the instrument panel lower finish panel.


61. REMOVE NO. 2 INSTRUMENT PANEL REGISTER ASSEMBLY

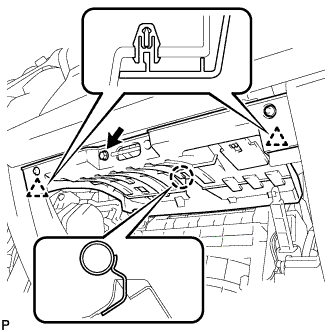
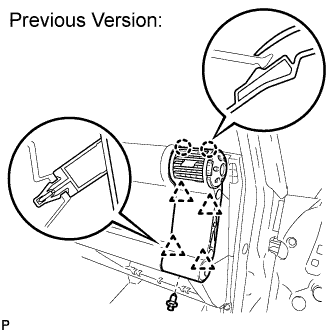
  1. B176533E01
    Remove the No. 2 instrument panel register assembly (Previous Version).

    1. Remove the clip.

    2. Disengage the 4 clips and 2 claws and remove the instrument panel register.

      NOTICE:
      1. To avoid breakage of the register, remove the instrument panel register with the shut damper of the register open.
      2. Pull the instrument panel register up diagonally to remove it.

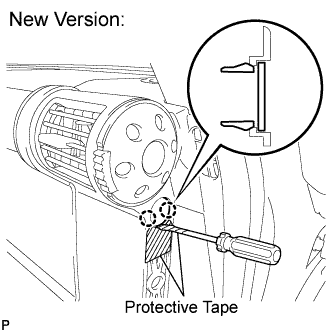
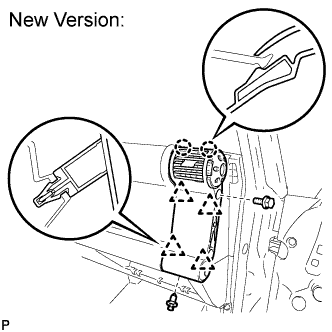
  1. B188205E01
    Remove the No. 2 instrument panel register assembly (New Version).

    1. Apply protective tape, as shown in the illustration.

    2. Using a thin-bladed screwdriver with its tip wrapped in protective tape, disengage the 2 claws and remove the instrument panel hole cover.

    3. B188206E01
      Remove the bolt and clip.

    4. Disengage the 4 clips and 2 claws and remove the instrument panel register.

      NOTICE:
      1. To avoid breakage of the register, remove the instrument panel register with the shut damper of the register open.
      2. Pull the instrument panel register up diagonally to remove it.


62. REMOVE NO. 2 INSTRUMENT PANEL SPEAKER PANEL SUB-ASSEMBLY

  1. B133865
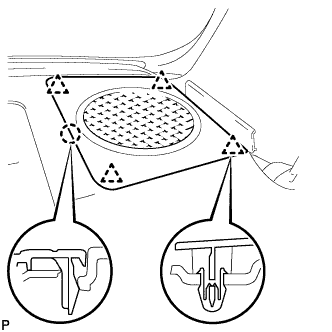
    Disengage the 4 clips and claw and remove the instrument panel speaker panel.


63. REMOVE NO. 1 INSTRUMENT PANEL SPEAKER PANEL SUB-ASSEMBLY

HINT:
Use the same procedure as for the RH side.


64. REMOVE FRONT NO. 2 SPEAKER ASSEMBLY

  1. B135131
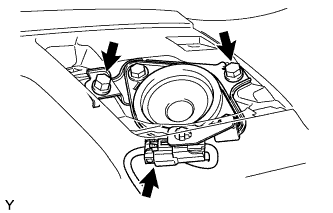
    Remove the 2 bolts and the front speaker bracket.

  1. Disconnect the speaker connector.


65. REMOVE ASSIST GRIP RETAINER RH

B133881
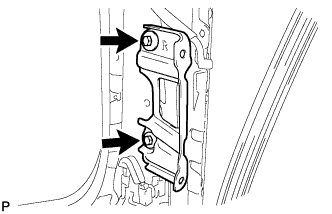
  1. Remove the 2 bolts and remove the assist grip retainer.


66. REMOVE ASSIST GRIP RETAINER LH

HINT:
Use the same procedure as for the RH side.


67. DISCONNECT PASSENGER AIRBAG CONNECTOR

B133890E02
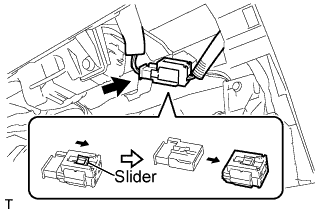
  1. Slide the slider and disconnect the passenger airbag connector.


68. REMOVE INSTRUMENT PANEL SUB-ASSEMBLY
  1. Disengage the clamps and disconnect the connectors.

  1. Remove the 2 <C> bolts, 2 <E> bolts, 7 <F> bolts and nut <G> and remove the instrument panel.

    B133866E01


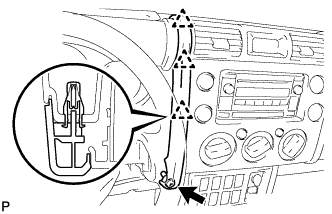
69. REMOVE INSTRUMENT PANEL FINISH PANEL END LH

  1. B133889
    Disengage the 3 claws and remove the instrument panel finish panel end.


70. REMOVE NO. 1 HEATER TO REGISTER DUCT

  1. I102430
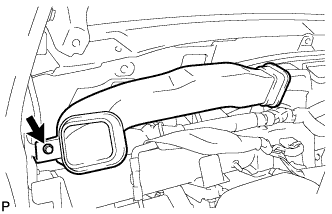
    Remove the screw and remove the heater to register duct.


71. REMOVE NO. 2 HEATER TO REGISTER DUCT

  1. I102431
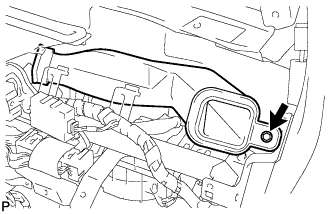
    Remove the screw and remove the heater to register duct.


72. REMOVE REAR NO. 1 AIR DUCT

  1. I102433
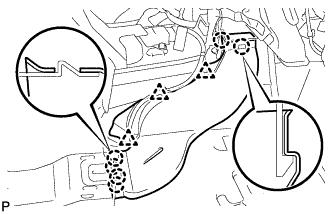
    Disengage the 6 claws and 3 clamps and remove the rear air duct.


73. REMOVE REAR NO. 2 AIR DUCT

  1. I102432
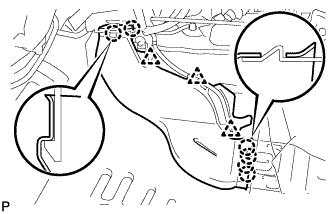
    Disengage the 6 claws and 3 clamps and remove the rear air duct.


74. REMOVE NO. 1 AIR DUCT

  1. I102434
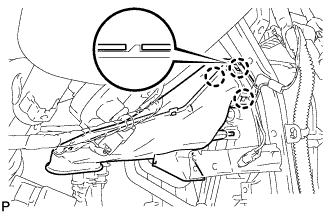
    Disengage the 3 claws and remove the air duct.


75. REMOVE NO. 2 AIR DUCT

  1. I102435
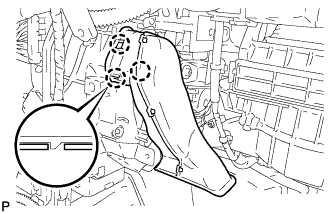
    Disengage the 3 claws and remove the air duct.


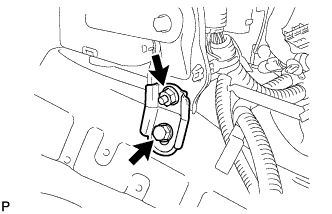
76. REMOVE NO. 1 INSTRUMENT PANEL BRACE MOUNTING BRACKET

I102436
  1. for LH side:

    1. Remove the bolt and nut and remove the instrument panel brace mounting bracket.

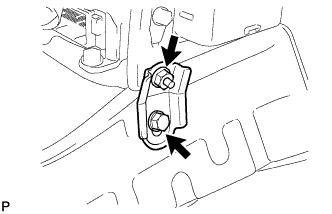
  1. I102437
    for RH side:

    1. Remove the bolt and nut and remove the instrument panel brace mounting bracket.


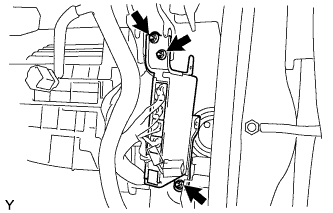
77. REMOVE ECM

A126397
  1. Disconnect the 5 connectors.

  1. Remove the 3 nuts, then remove the ECM.


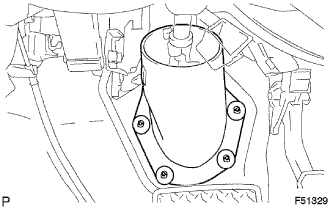
78. REMOVE STEERING COLUMN HOLE COVER

F051329
  1. Disengage the 4 clips and remove the steering column hole cover.


79. SEPARATE STEERING INTERMEDIATE SHAFT ASSEMBLY

I102502E01
  1. Remove the bolt and separate the steering shaft thrust stopper from the steering intermediate shaft assembly.
  1. Mark matchmarks on the steering column assembly and steering intermediate shaft.

  1. Pull the intermediate shaft assembly and steering shaft thrust stopper out of the steering column assembly.

80. REMOVE STEERING COLUMN ASSEMBLY

C133810E01
  1. Disconnect the connectors and wire harness clamps.

  1. Remove the 4 nuts, then remove the steering column assembly from the instrument panel reinforcement assembly.

81. REMOVE INSTRUMENT PANEL SIDE BRACKET
  1. I102438
    Remove the bolt and remove the instrument panel side bracket.


82. SEPARATE MAIN BODY ECU (DRIVER SIDE J/B)

  1. I102439
    Remove the 2 nuts and remove the driver side junction block.


83. REMOVE COOLER UNIT DRAIN HOSE

  1. I102468
    Disconnect the cooler unit drain hose.


84. REMOVE INSTRUMENT PANEL REINFORCEMENT

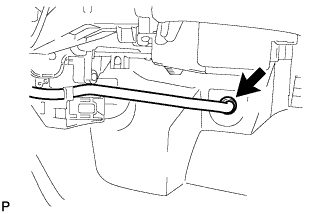
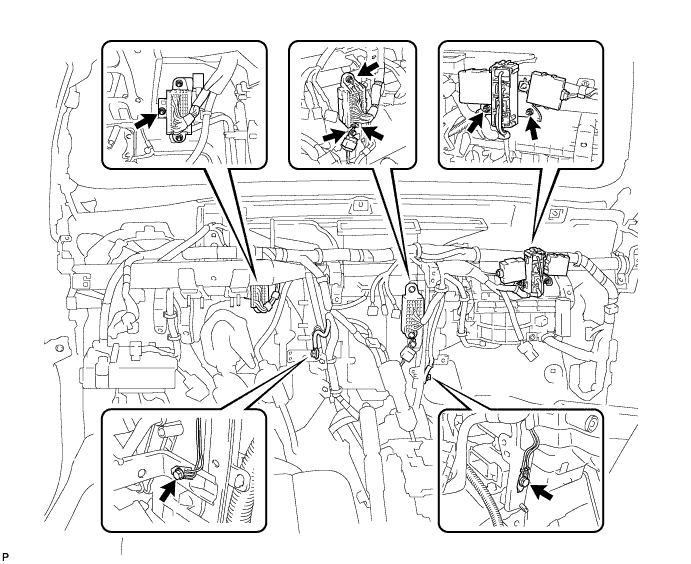
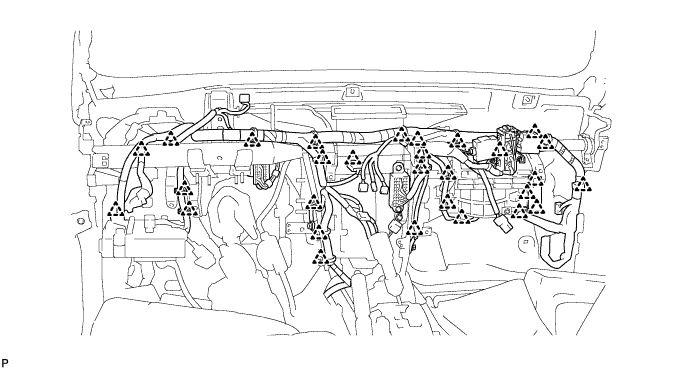
  1. Remove the 3 bolts and 5 nuts and disconnect the wire harness.

    I102440

  1. Disconnect the connectors.

  1. Disengage the clamps.

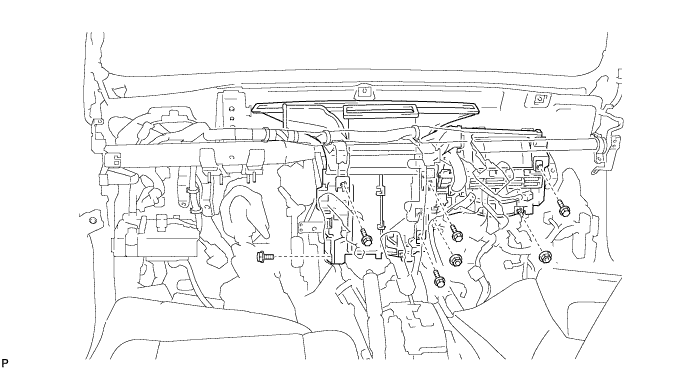
    I102441

  1. Remove the 5 bolts and the 2 nuts.

    I102442

  1. Remove the 2 caps and the 7 bolts.

    I102443

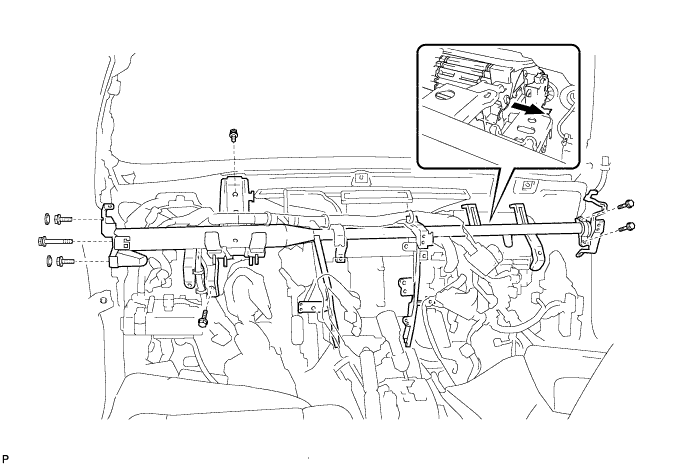
  1. Disengage the reinforcement hook of the air conditioning unit, and remove the reinforcement.

  1. Remove the air conditioning unit.


85. REMOVE AIR CONDITIONING UNIT ASSEMBLY

  1. I102445
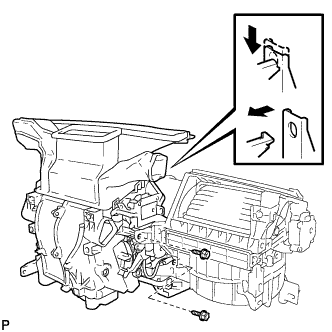
    Remove the 2 screws.

  1. Remove the air conditioning unit as shown in the illustration.


86. REMOVE HEATER TO REGISTER DUCT ASSEMBLY

  1. I102449
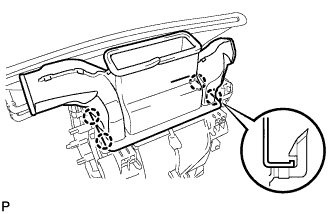
    Disengage the 4 claws and remove the heater to register duct.


87. REMOVE LOWER DEFROSTER NOZZLE ASSEMBLY

  1. I102450
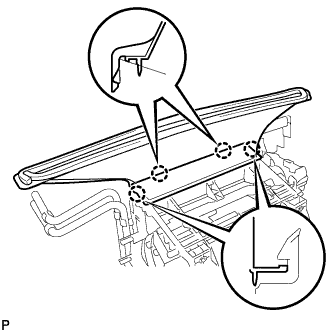
    Disengage the 4 claws and remove the lower defroster nozzle.

← COMPONENTS (from Nov 2010)REMOVAL (Aug 2009 – Oct 2010) →