REMOVAL
Removal / installation · Vehicles built Aug 2012 – Jul 2014
Versions by build date: Jul 2007 – Oct 2010 Nov 2010 – Jul 2012 Aug 2012 – Jul 2014 from Aug 2014
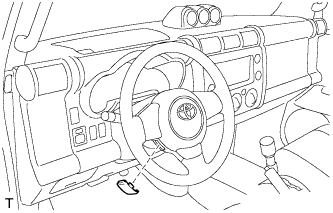
| 1.
PLACE FRONT WHEELS FACING STRAIGHT AHEAD |
|
| 2.
DISCONNECT CABLE FROM NEGATIVE BATTERY TERMINAL |
 |
- CAUTION:
- Wait at least 90 seconds after disconnecting the cable from the negative (-) battery terminal to disable the SRS system.
| 3.
REMOVE FRONT DOOR SCUFF PLATE LH
|
|
- HINT:
- Use the same procedure as for the RH side.
| 4.
REMOVE COWL SIDE TRIM BOARD LH
|
|
- HINT:
- Use the same procedure as for the RH side.
| 5.
SEPARATE FRONT DOOR OPENING TRIM WEATHERSTRIP LH
|
|
Separate the front door opening trim weatherstrip LH.
| 6.
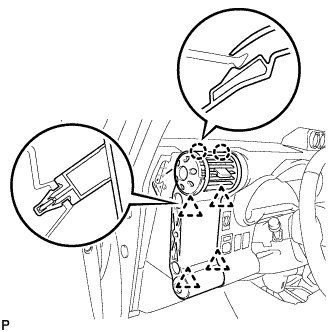
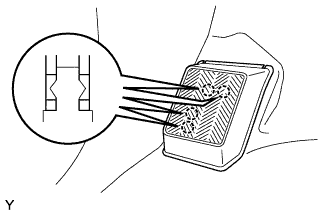
REMOVE NO. 1 INSTRUMENT PANEL REGISTER ASSEMBLY
|
|
- Disengage the 4 clips and 2 claws and remove the instrument panel register.
- NOTICE:
- To avoid breakage of the register, remove the instrument panel register with the shut damper of the register open.
- Pull the instrument panel register up diagonally to remove it.
| 7.
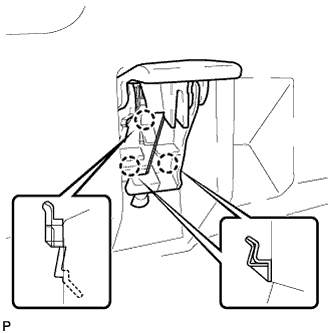
SEPARATE HOOD LOCK CONTROL LEVER SUB-ASSEMBLY
|
|
- Disengage the 3 claws and separate the hood lock control lever.
| 8.
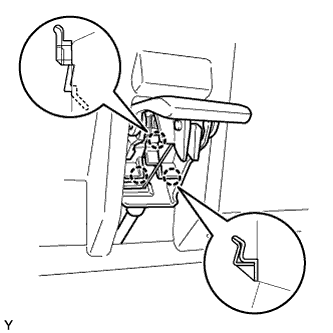
SEPARATE FUEL LID LOCK OPEN LEVER SUB-ASSEMBLY (for RHD)
|
|
- Disengage the 3 claws and separate the fuel lid lock open lever.
| 9.
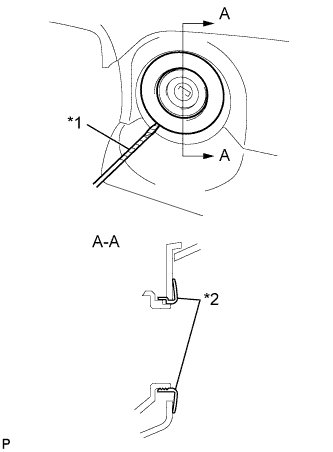
REMOVE INSTRUMENT PANEL FINISH PLATE
|
|
- Using a screwdriver with its tip wrapped in protective tape, remove the instrument panel finish plate.
Text in Illustration
*1
|
Protective Tape
|
*2
|
Instrument Panel Finish Plate
|
| 10.
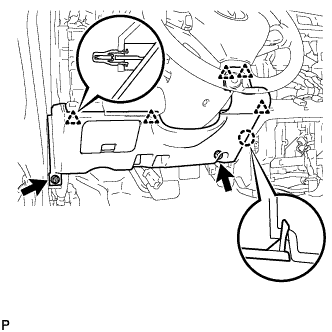
REMOVE LOWER INSTRUMENT PANEL FINISH PANEL (for LHD)
|
|
- Remove the 2 <E> bolts.
Disengage the 5 clips and claw and remove the lower instrument panel finish panel.
| 11.
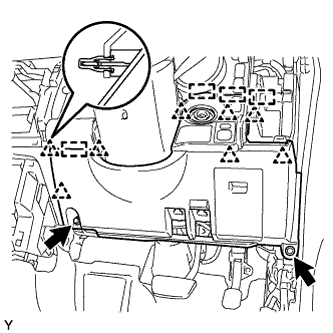
REMOVE LOWER INSTRUMENT PANEL FINISH PANEL (for RHD)
|
|
- Remove the 2 <E> bolts.
Disengage the 8 clips and 4 guides.
Disconnect the connectors and remove the lower instrument panel finish panel.
| 12.
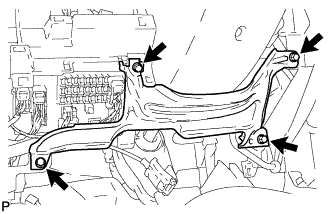
REMOVE LOWER INSTRUMENT PANEL LH (for LHD)
|
|
- Remove the 4 <E> bolts and the lower instrument panel.
| 13.
REMOVE FRONT FLOOR FOOTREST (for LHD)
|
|
- Disengage the 4 claws and remove the front floor footrest.
| 14.
REMOVE NO. 1 AIR DUCT (for LHD)
|
|
- Disengage the 3 claws and remove the air duct.
| 15.
REMOVE NO. 1 AIR DUCT (for RHD)
|
|
- Remove the screw.
Disengage the 2 claws and remove the air duct.
| 16.
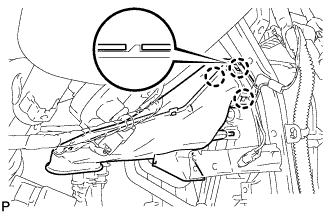
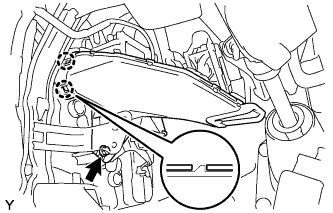
REMOVE STEERING COLUMN HOLE COVER |
|
Disengage the 4 clips and remove the steering column hole cover.
| 17.
REMOVE LOWER NO. 3 STEERING WHEEL COVER
|
|
- Using a thin-bladed screwdriver, remove steering wheel cover lower No.3.
- HINT:
- Tape up the screwdriver tip before use.
| 18.
REMOVE LOWER NO. 2 STEERING WHEEL COVER
|
|
- Using a thin-bladed screwdriver, remove steering wheel cover lower No.2.
- HINT:
- Tape up the screwdriver tip before use.
| 19.
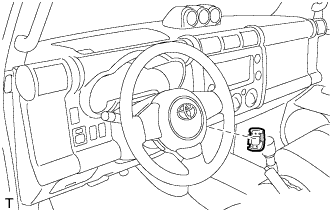
REMOVE STEERING PAD
|
|
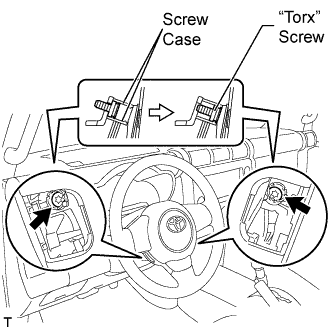
- Using "Torx" socket wrench (T30), loosen the 2 "Torx" screws until the groove along the screw circumference catches on the screw case.
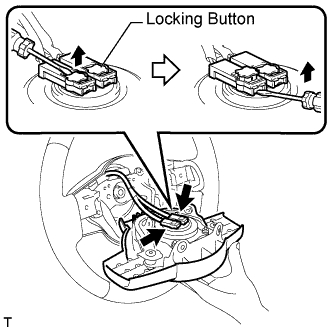
- Pull the steering pad out of the steering wheel assembly and support the steering pad with one hand as shown in the illustration.
- NOTICE:
- When removing the steering pad, do not pull the airbag wire harness.
Disconnect the horn connector.
Disconnect the 2 connectors from the steering pad.
- NOTICE:
- When handling the airbag connector, take care not to damage the airbag wire harness.
Remove the steering pad.
| 20.
REMOVE STEERING WHEEL ASSEMBLY |
|
Text in Illustration
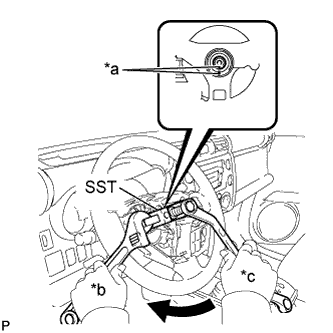
*a
|
Matchmark
|
*b
|
Hold
|
*c
|
Turn
|
Remove the steering wheel assembly set nut.
Put matchmarks on the steering wheel assembly and the main shaft assembly.
Using SST, remove the steering wheel assembly.
- SST
- 09950-50013
(09951-05010, 09952-05010, 09953-05020, 09954-05021)
- NOTICE:
- Apply a small amount of grease to the threads and tip of SST (center bolt) before use.
| 21.
REMOVE LOWER STEERING COLUMN COVER |
|
Remove the 3 screws.
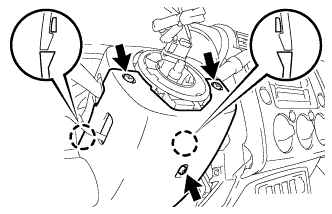
Disengage the 2 claws and remove the lower steering column cover.
| 22.
REMOVE UPPER STEERING COLUMN COVER |
|
Disengage the claw and remove the upper steering column cover.
| 23.
REMOVE COMBINATION SWITCH ASSEMBLY |
|
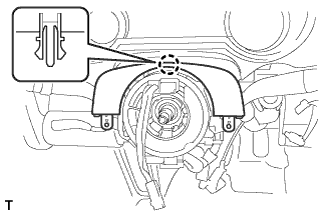
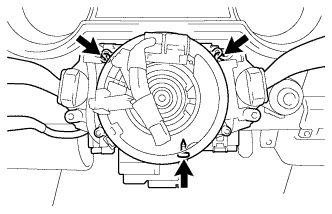
Disconnect all connectors from the combination switch assembly.
Remove the 3 screws and the combination switch assembly.
| 24.
REMOVE FRONT WHEEL LH |
|
| 25.
REMOVE FRONT FENDER SPLASH SHIELD REAR LH
|
|
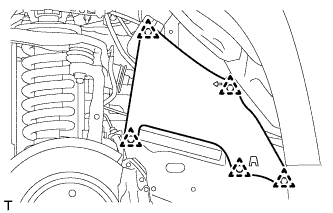
Remove the 5 clips and frame seal.
| 26.
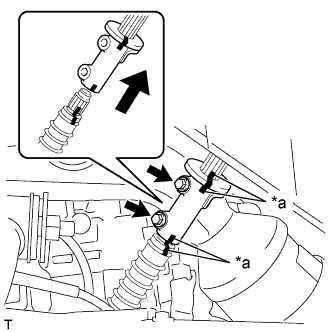
REMOVE STEERING SLIDING YOKE |
|
Put matchmarks on the steering sliding yoke, No. 2 steering intermediate shaft sub-assembly and steering intermediate shaft assembly.
Text in Illustration
*a
|
Matchmark
|
Remove the 2 bolts from the steering sliding yoke.
Slide the steering sliding yoke up and separate it from the No. 2 steering intermediate shaft sub-assembly.
Pull down the steering sliding yoke from the steering intermediate shaft assembly to remove.
| 27.
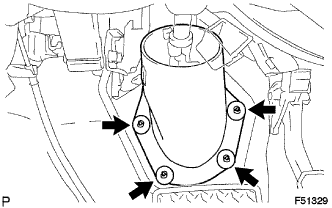
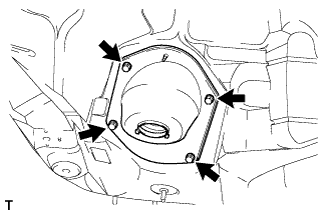
REMOVE NO. 1 STEERING COLUMN HOLE COVER SUB-ASSEMBLY |
|
Remove the 4 bolts and the No. 1 steering column hole cover sub-assembly.
| 28.
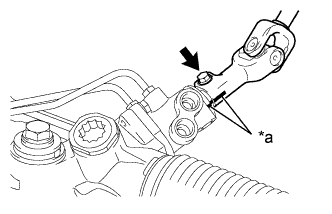
REMOVE NO. 2 STEERING INTERMEDIATE SHAFT SUB-ASSEMBLY |
|
Put matchmarks on the No. 2 steering intermediate shaft sub-assembly and the power steering link.
Text in Illustration
*a
|
Matchmark
|
Remove the bolt and the No. 2 steering intermediate shaft sub-assembly from the power steering link.
| 29.
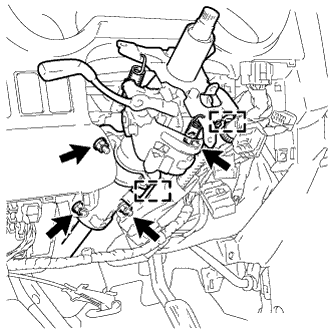
REMOVE STEERING COLUMN ASSEMBLY |
|
Disconnect all connectors and disengage the 2 wire harness clamps from the steering column assembly.
Remove the 4 nuts and the steering column assembly from the instrument panel reinforcement assembly.