INSTALLATION
Removal / installation · Vehicles built Jul 2007 – Jul 2009
Versions by build date: Jul 2007 – Jul 2009 Aug 2009 – Jul 2014 from Aug 2014
| 1. INSTALL FUEL PRESSURE REGULATOR ASSEMBLY |

Install the vacuum hose.
Apply a light coat of spindle oil or gasoline to a new O-ring and install it onto the fuel pressure regulator.
Install the fuel pressure regulator with the 2 bolts.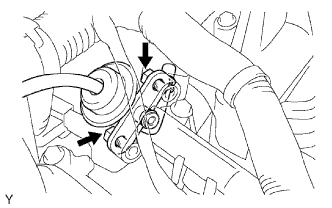

- Torque:
- 9.0 N*m{ 92 kgf*cm , 80 in.*lbf }
| 2. CONNECT NO. 2 FUEL PIPE SUB-ASSEMBLY |
Push the tube connector into the pipe until the tube connector makes a "click" sound.
- NOTICE:
- Check if there is any damage or foreign objects on the connected part of the fuel pipe.
- After connecting, check that the pipe and connector are securely connected by pulling them.
- Check if there is any damage or foreign objects on the connected part of the fuel pipe.
Install the fuel pipe clamp.
| 3. INSTALL AIR CLEANER ASSEMBLY |
Install the air cleaner onto the throttle body.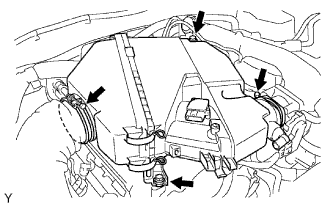
Connect the air cleaner hose to the air cleaner.
Install the air cleaner with the 2 bolts.
- Torque:
- 8.0 N*m{ 82 kgf*cm , 71 in.*lbf }
Connect the mass air flow meter connector.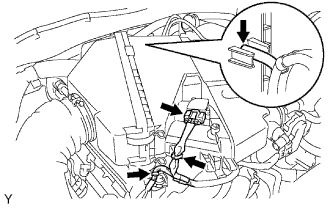
Engage the 2 wire harness clamps.
Connect the vacuum hose.
Connect the No. 2 ventilation hose.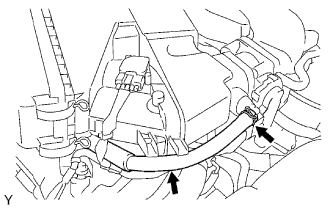
| 4. INSPECT FOR FUEL LEAK |
Connect the Techstream to the DLC3.
Turn the ignition switch ON.
- NOTICE:
- Do not start the engine.
Turn the Techstream ON.
Select the following menu items: Powertrain / Engine and ECT / Active Test / Activate the Fuel Pump Speed Control / ON.
Check that there is no leakage from the fuel system.
| 5. INSTALL V-BANK COVER |
Install the V-bank cover with the 2 nuts.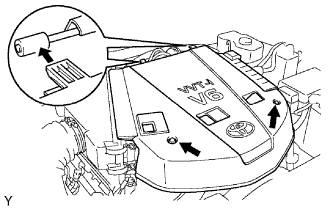
- Torque:
- 7.5 N*m{ 76 kgf*cm , 66 in.*lbf }