INSTALLATION
Removal / installation · Vehicles built Aug 2009 – Jul 2014
Versions by build date: Jul 2007 – Jul 2009 Aug 2009 – Jul 2014 from Aug 2014
| 1. INSTALL FUEL PRESSURE REGULATOR ASSEMBLY |

Apply a light coat of spindle oil or gasoline to a new O-ring and install it onto the fuel pressure regulator.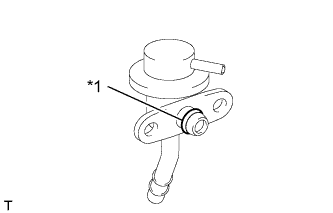

Text in Illustration *1
New O-Ring
Install the fuel pressure regulator with the 2 bolts.
- Torque:
- 9.0 N*m{ 92 kgf*cm , 80 in.*lbf }
Connect the vacuum hose.
| 2. CONNECT NO. 2 FUEL PIPE SUB-ASSEMBLY |
Connect the No. 2 fuel pipe sub-assembly (Click here).
- NOTICE:
- Check that there are no scratches or foreign objects on the connecting part.
- If the pipe is difficult to push into the connector, apply a small amount of clean engine oil to the tip of the pipe and reinsert it.
- After connecting, check that the pipe and connector are securely connected by pulling on them.
- Check that there are no scratches or foreign objects on the connecting part.
| 3. INSTALL INTAKE AIR SURGE TANK |
Install the intake air surge tank (Click here).
| 4. INSPECT FOR FUEL LEAK |
Connect the intelligent tester to the DLC3.
Turn the ignition switch to ON.
- NOTICE:
- Do not start the engine.
Turn the intelligent tester ON.
Enter the following menus: Powertrain / Engine and ECT / Active Test / Control the Fuel Pump Speed / ON.
Check fuel pump operation.
Check for pressure in the fuel inlet tube from the fuel line. Check that the sound of fuel flowing in the fuel tank can be heard.
If there is no sound, check the integration relay, fuel pump, ECM and wiring connector.