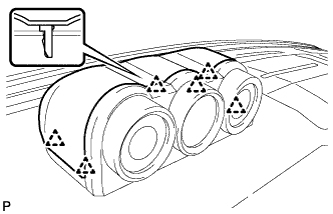
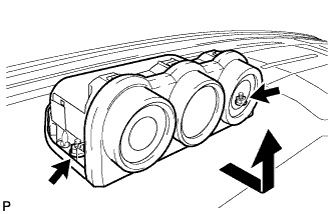
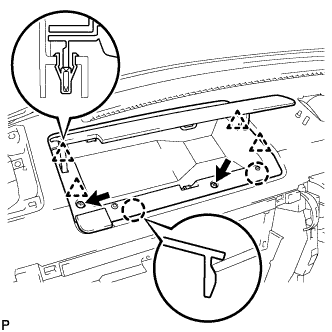
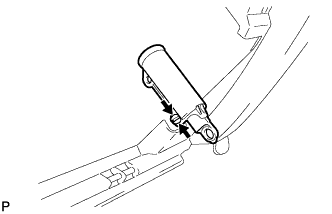
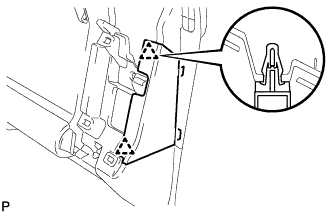
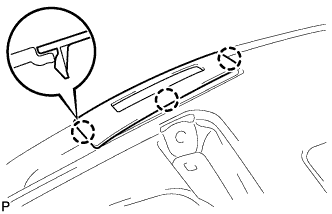
Some of these service operations affect the SRS airbag system. Read the precautionary notices concerning the SRS airbag system before servicing (Click here).
HINT:
Use the same procedure for both the RH and LH sides.
1.
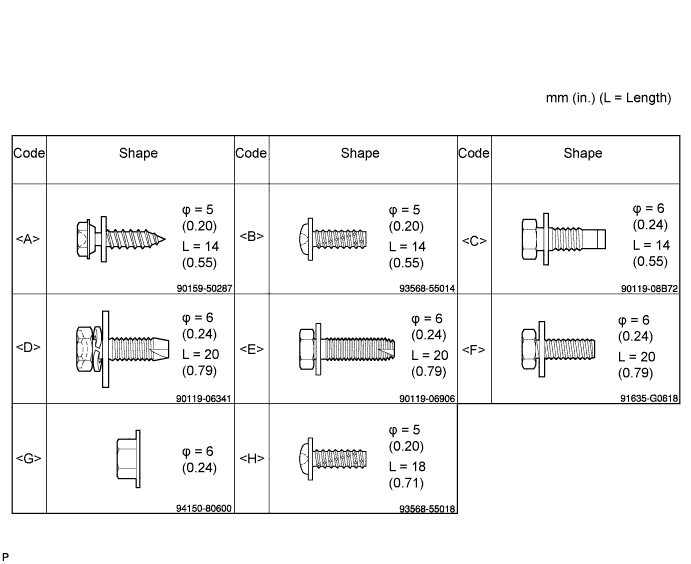
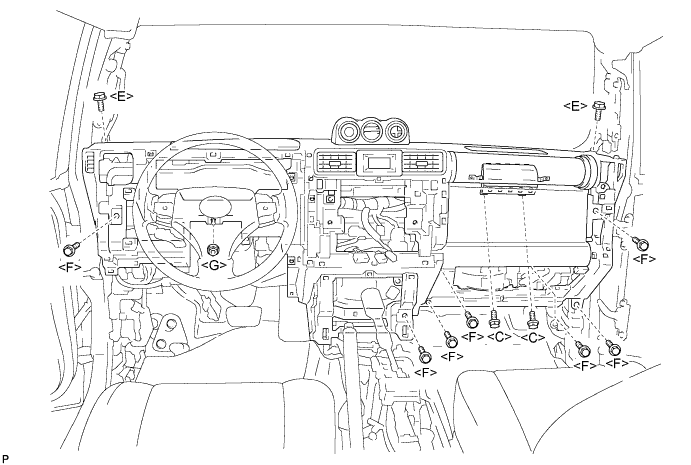
BOLTS, SCREWS AND NUTS TABLE
HINT:
All bolts, screws and nuts relevant to installing and removing the instrument panel are shown, along with their alphabetic codes, in the table below.
2.
DISCONNECT CABLE FROM NEGATIVE BATTERY TERMINAL
Wait for at least 90 seconds after disconnecting the cable to prevent the airbag from working.
3.
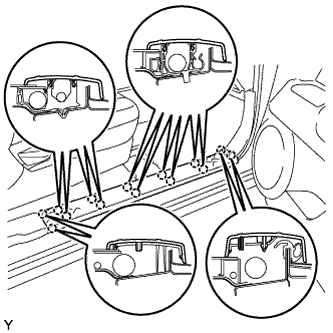
REMOVE FRONT DOOR SCUFF PLATE RH
Disengage the 14 claws and remove the front door scuff plate.
4.
REMOVE FRONT DOOR SCUFF PLATE LH
HINT:
Use the same procedure as for the RH side.
5.
REMOVE FRONT FLOOR FOOTREST
Disengage the 4 claws and remove the front floor footrest.
6.
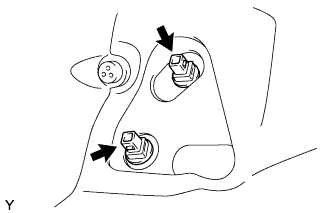
REMOVE FOOTREST CLIP
Remove the 2 footrest clips.
7.
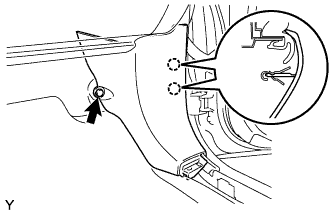
REMOVE COWL SIDE TRIM BOARD RH
Remove the clip.
Disengage the 2 claws and remove the cowl side trim board.
8.
REMOVE COWL SIDE TRIM BOARD LH
HINT:
Use the same procedure as for the RH side.
9.
SEPARATE FRONT DOOR OPENING TRIM WEATHERSTRIP LH
Separate the front door opening trim weatherstrip LH.
10.
SEPARATE FRONT DOOR OPENING TRIM WEATHERSTRIP RH
Separate the front door opening trim weatherstrip RH.
11.
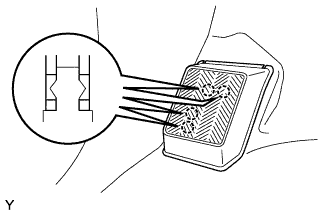
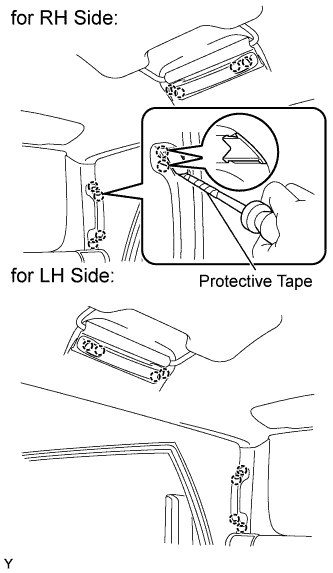
REMOVE ASSIST GRIP PLUG
HINT:
Use the same procedure to remove all the assist grip plugs.
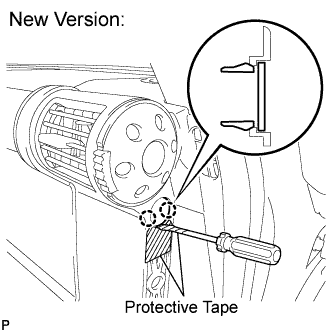
Using a screwdriver with its tip wrapped in protective tape, disengage the 2 claws and remove the assist grip plug.
12.
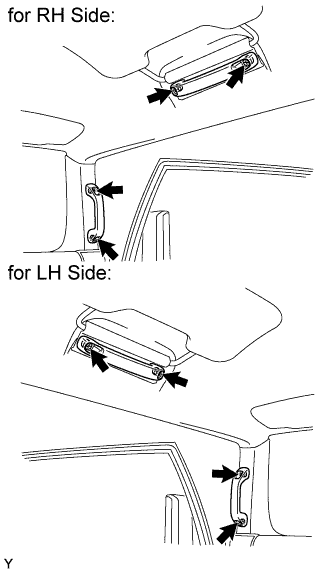
REMOVE ASSIST GRIP ASSEMBLY
HINT:
Use the same procedure to remove all the assist grips.
Remove the 2 screws and the assist grip.
13.
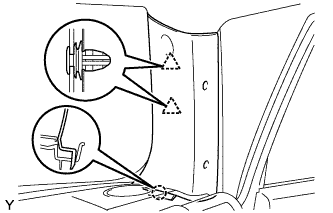
REMOVE FRONT PILLAR GARNISH RH
Disengage the 2 clips and the claw and remove the front pillar garnish.
14.
REMOVE FRONT PILLAR GARNISH LH
HINT:
Use the same procedure as for the RH side.
15.
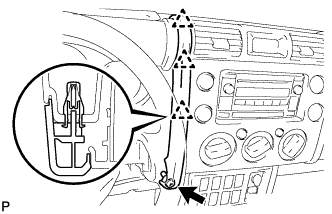
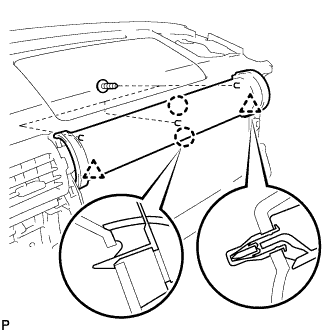
REMOVE INSTRUMENT PANEL GARNISH LH
Remove screw <H>.
Disengage the 3 clips and remove the instrument panel garnish.
NOTICE:
Pull the instrument panel garnish up at an angle of 45° to remove it.
Do not damage the surface of the instrument panel when removing it.
16.
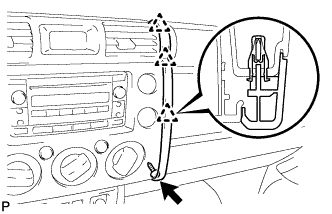
REMOVE INSTRUMENT PANEL GARNISH RH
Remove screw <H>.
Disengage the 3 clips and remove the instrument panel garnish.
NOTICE:
Pull the instrument panel garnish up at an angle of 45° to remove it.
Do not damage the surface of the instrument panel when removing it.
17.
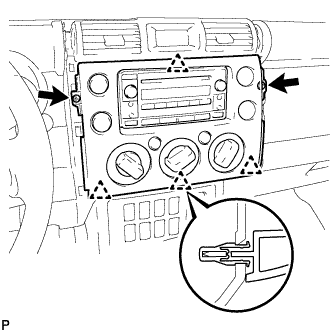
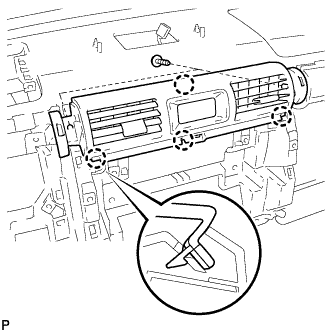
REMOVE INTEGRATION CONTROL AND PANEL ASSEMBLY
Remove the 2 <H> screws.
Disengage the 4 clips and remove the integration control panel assembly.
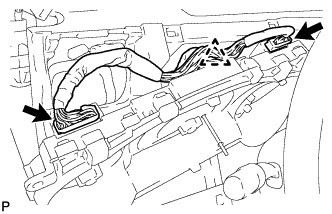
Disconnect the 3 connectors.
18.
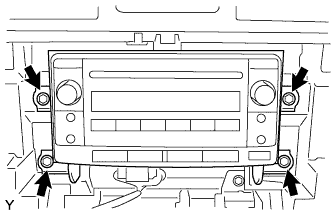
REMOVE RADIO RECEIVER ASSEMBLY
Remove the 4 bolts and the radio receiver.
Disconnect the plug, the head unit connector and the 2 radio connectors.
19.
REMOVE PARKING BRAKE HOLE COVER SUB-ASSEMBLY
Disengage the 2 A claws and 2 B claws.
Slide the parking brake hole cover toward the front of the vehicle, disengage the 2 C claws and remove the parking brake hole cover.
20.
REMOVE SHIFT LEVER KNOB SUB-ASSEMBLY (for Manual Transmission)
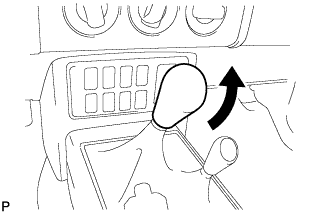
Remove the shift lever knob.
21.
REMOVE SHIFT LEVER KNOB SUB-ASSEMBLY (for 4WD)
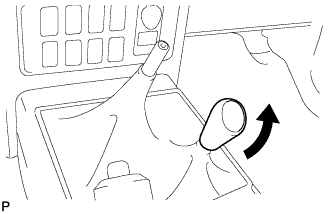
Remove the shift lever knob.
22.
REMOVE CONSOLE UPPER REAR PANEL SUB-ASSEMBLY
Shift the shift lever into the N position.
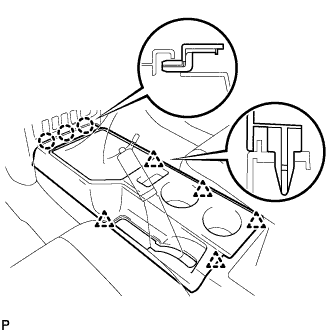
Disengage the 5 clips and 3 claws and remove the console upper rear panel.
23.
REMOVE BOX BOTTOM MAT
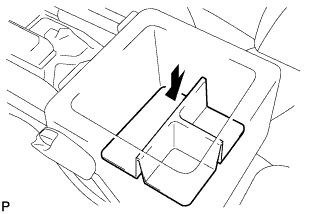
Remove the box bottom mat.
24.
REMOVE FRONT CONSOLE BOX
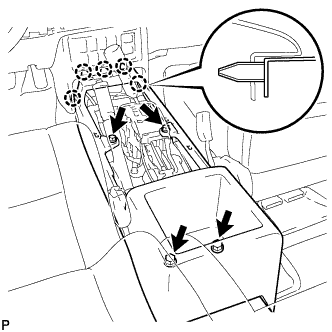
Remove the 4 <D> bolts.
Disengage the 5 claws and remove the console box.
25.
REMOVE CONSOLE UPPER PANEL NO. 1 GARNISH
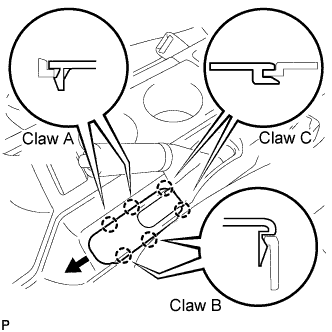
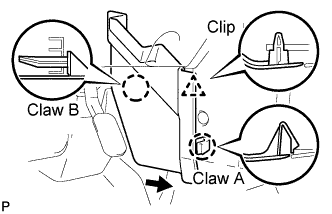
Disengage claw A and the clip.
Slide the console upper panel garnish toward the rear of the vehicle, disengage the claw B and remove the console upper panel garnish.
26.
REMOVE INSTRUMENT LOWER COVER SUB-ASSEMBLY
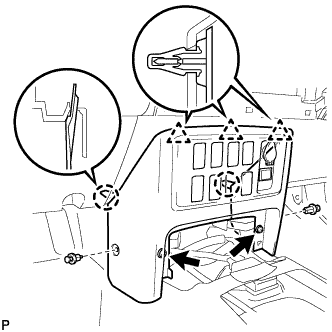
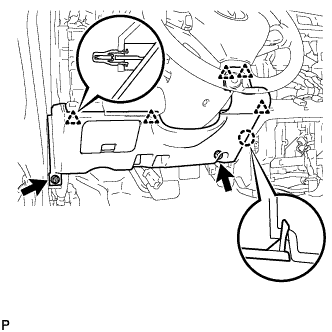
Remove the 2 clips and 2 <F> bolts.
Disengage the 3 clips and 2 claws and remove the instrument lower cover.
Disengage the 5 clips and claw and remove the lower instrument panel finish panel.
31.
REMOVE LOWER INSTRUMENT PANEL LH
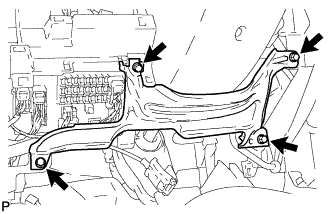
Remove the 4 <F> bolts and remove the lower instrument panel.
32.
REMOVE INSTRUMENT CLUSTER FINISH PANEL
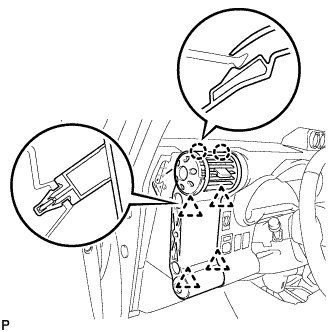
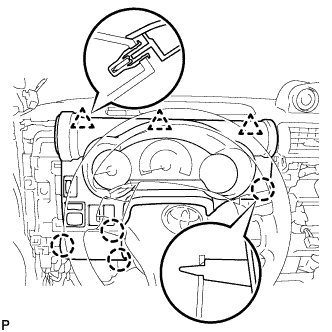
Disengage the 3 clips and the 4 claws and remove the instrument cluster finish panel.
Disconnect the connectors.
33.
REMOVE COMBINATION METER ASSEMBLY
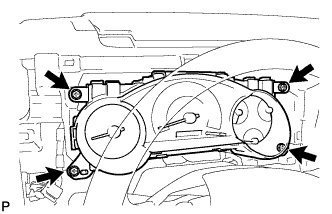
Remove the 4 screws.
Disconnect the 2 connectors and clamp and remove the combination meter.
34.
REMOVE GLOVE COMPARTMENT DOOR ASSEMBLY
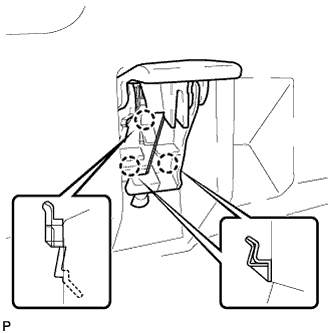
Disengage the claw and separate the glove compartment door stoppers from the glove compartment door.
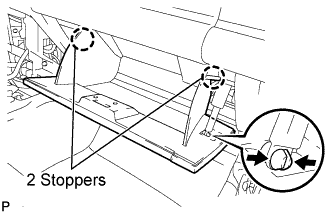
Slightly flex the upper part of the glove compartment door assembly to release the 2 stoppers and open the glove compartment door until it becomes horizontal.
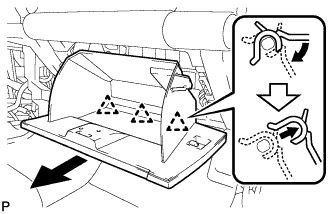
Pull the glove compartment door assembly toward the rear of the vehicle to release the 3 hinges and remove the glove compartment door assembly.
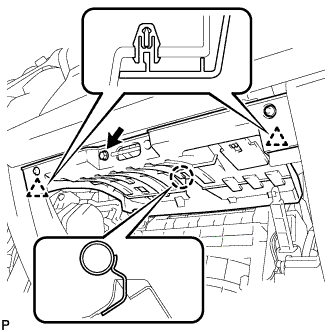
Disengage the 2 clips and 2 claws and remove the instrument cluster finish panel.
49.
REMOVE INSTRUMENT CLUSTER CENTER FINISH PANEL SUB-ASSEMBLY
Remove the 2 <B> screws.
Disengage the 4 claws and remove the instrument cluster center finish panel.
50.
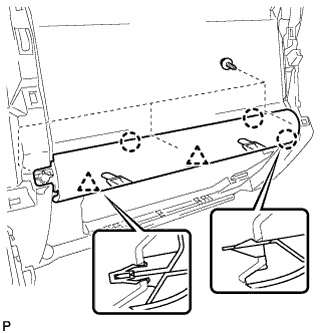
REMOVE INSTRUMENT CLUSTER LOWER CENTER FINISH PANEL SUB-ASSEMBLY
Remove the 3 <B> screws.
Disengage the 2 clips and 3 claws and remove the instrument cluster lower center finish panel.
51.
REMOVE NO. 1 SIDE DEFROSTER NOZZLE DUCT
Remove screw <B>.
Disengage the 2 claws and remove the side defroster nozzle duct.
52.
REMOVE NO. 2 SIDE DEFROSTER NOZZLE DUCT
Remove screw <B>.
Disengage the 2 claws and remove the side defroster nozzle duct.
53.
REMOVE DEFROSTER NOZZLE ASSEMBLY
Remove the 5 <B> screws.
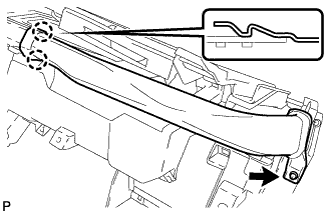
Disengage the 9 claws and remove the defroster nozzle.
54.
REMOVE NO. 3 HEATER TO REGISTER DUCT
Remove the 2 <B> screws and remove the heater to register duct.
55.
REMOVE NO. 2 INSTRUMENT PANEL WIRE
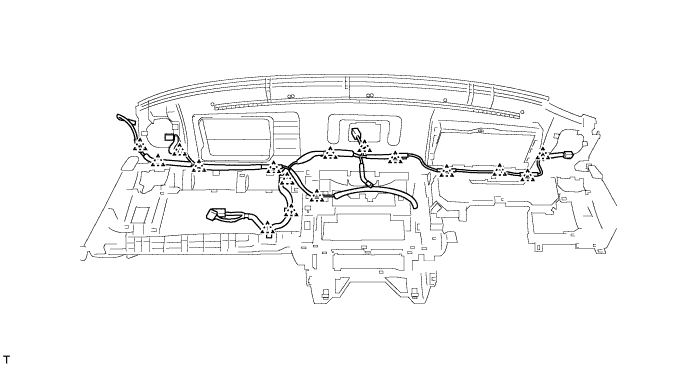
Disengage the 16 clamps and remove the instrument panel wire.
56.
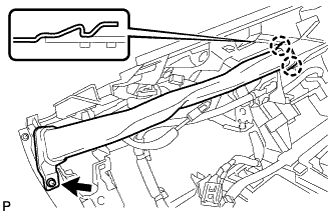
REMOVE FRONT PASSENGER AIRBAG ASSEMBLY
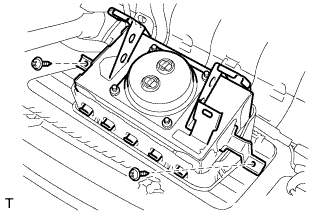
Remove the 2 screws.
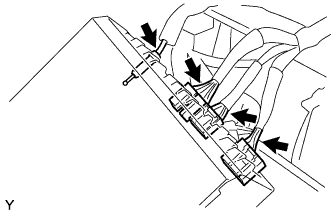
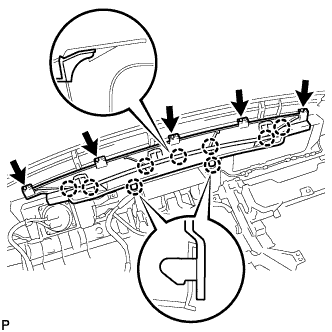
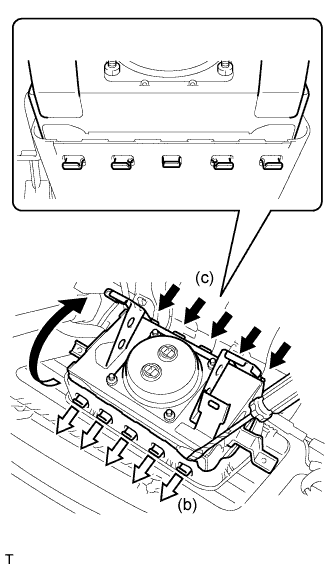
Using a screwdriver (with its tip wrapped in protective tape), disengage the 5 hooks from the instrument panel and turn the front passenger airbag assembly in the direction indicated by the arrow shown in the illustration.
Disengage the 5 hooks and remove the front passenger airbag assembly from the instrument panel.
57.
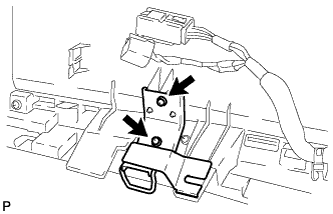
REMOVE INSTRUMENT PANEL CENTER BRACKET SUB-ASSEMBLY
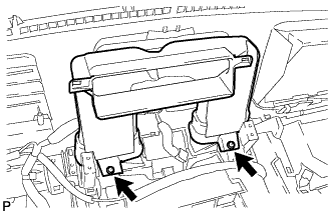
Remove the 2 <B> screws and remove the instrument panel center bracket.
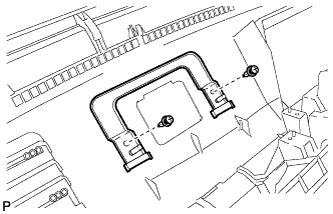
58.
REMOVE ACCESSORY METER BRACKET
Remove the 2 clips and remove the accessory meter bracket.
59.
REMOVE LOWER INSTRUMENT PANEL SUB-ASSEMBLY RH
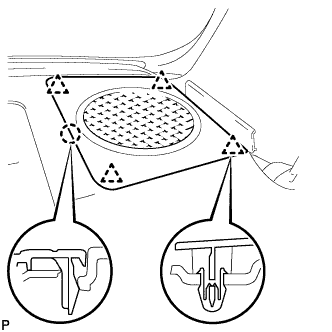
Disengage the 2 clips and remove the lower instrument panel.
60.
REMOVE LOWER INSTRUMENT PANEL SUB-ASSEMBLY LH
HINT:
Use the same procedure as for the RH side.
61.
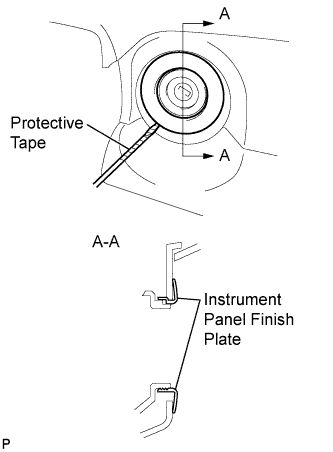
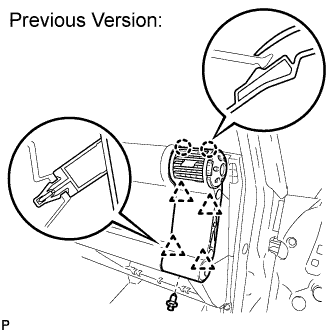
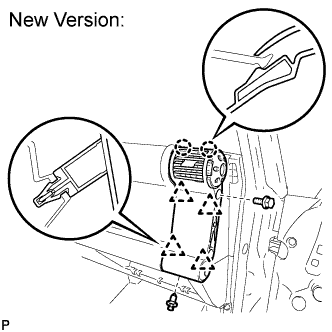
REMOVE INSTRUMENT PANEL FINISH PANEL END LH
Disengage the 3 claws and remove the instrument panel finish panel end.