REMOVAL
Removal / installation · Vehicles built from Aug 2012
Versions by build date: Jul 2007 – Oct 2010 Nov 2010 – Jul 2012 from Aug 2012
| 1.
DRAIN BRAKE FLUID |
 |
- NOTICE:
- Immediately wash off any brake fluid that comes into contact with a painted surface.
| 2.
REMOVE FRONT DOOR SCUFF PLATE
|
|
- HINT:
- Use the same procedure as for the RH side.
| 3.
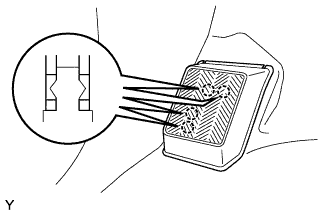
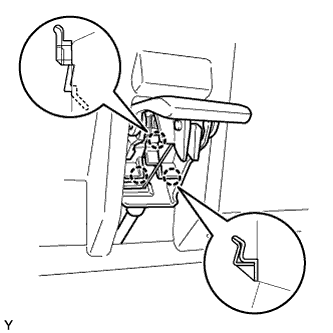
REMOVE FRONT FLOOR FOOTREST (for LHD)
|
|
- Disengage the 4 claws and remove the front floor footrest.
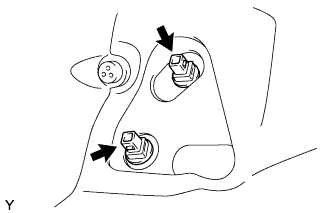
| 4.
REMOVE FOOTREST CLIP (for LHD)
|
|
- Remove the 2 footrest clips.
| 5.
REMOVE COWL SIDE TRIM BOARD
|
|
- HINT:
- Use the same procedure as for the RH side.
| 6.
SEPARATE FRONT DOOR OPENING TRIM WEATHERSTRIP
|
|
Separate the front door opening trim weatherstrip LH.
| 7.
REMOVE NO. 1 INSTRUMENT PANEL REGISTER ASSEMBLY
|
|
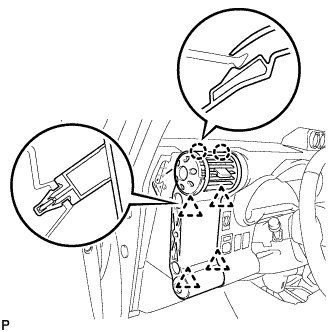
- Disengage the 4 clips and 2 claws and remove the instrument panel register.
- NOTICE:
- To avoid breakage of the register, remove the instrument panel register with the shut damper of the register open.
- Pull the instrument panel register up diagonally to remove it.
| 8.
SEPARATE HOOD LOCK CONTROL LEVER SUB-ASSEMBLY
|
|
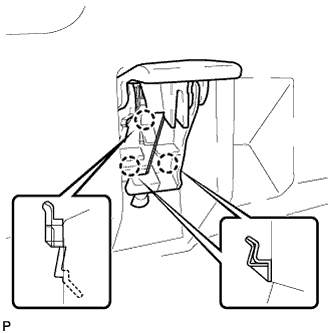
- Disengage the 3 claws and separate the hood lock control lever.
| 9.
SEPARATE FUEL LID LOCK OPEN LEVER SUB-ASSEMBLY (for RHD)
|
|
- Disengage the 3 claws and separate the fuel lid lock open lever.
| 10.
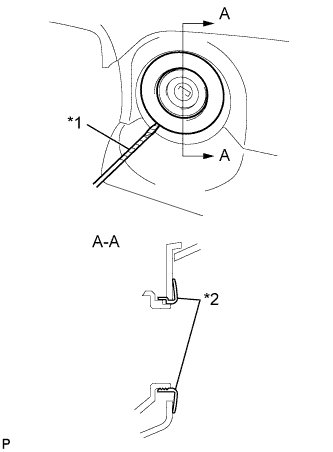
REMOVE INSTRUMENT PANEL FINISH PLATE
|
|
- Using a screwdriver with its tip wrapped in protective tape, remove the instrument panel finish plate.
Text in Illustration
*1
|
Protective Tape
|
*2
|
Instrument Panel Finish Plate
|
| 11.
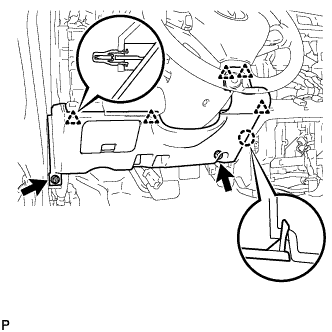
REMOVE LOWER INSTRUMENT PANEL FINISH PANEL (for LHD)
|
|
- Remove the 2 <E> bolts.
Disengage the 5 clips and claw and remove the lower instrument panel finish panel.
| 12.
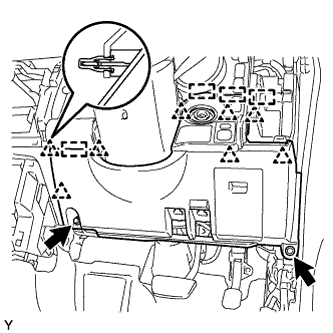
REMOVE LOWER INSTRUMENT PANEL FINISH PANEL (for RHD)
|
|
- Remove the 2 <E> bolts.
Disengage the 8 clips and 4 guides.
Disconnect the connectors and remove the lower instrument panel finish panel.
| 13.
REMOVE STOP LIGHT SWITCH |
|
Disconnect the stop light switch connector from the stop light switch.
Turn the stop light switch counterclockwise and remove the stop light switch.
| 14.
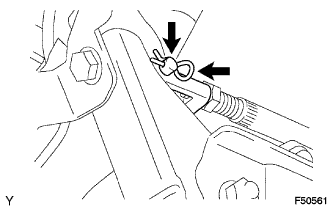
SEPARATE MASTER CYLINDER PUSH ROD CLEVIS |
|
Remove the clip and push rod pin and separate the push rod clevis.
| 15.
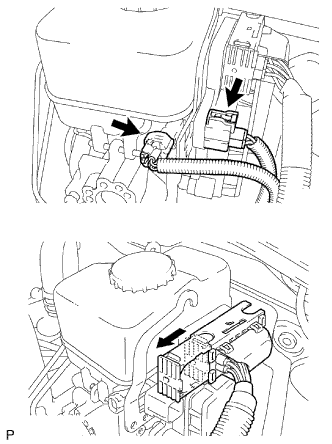
REMOVE HYDRAULIC BRAKE BOOSTER (for LHD)
|
|
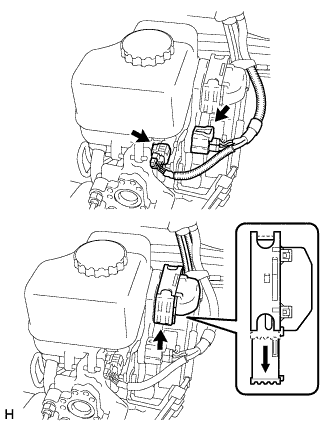
Disconnect the 3 connectors from the hydraulic brake booster.
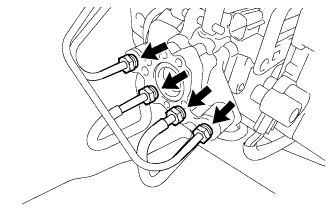
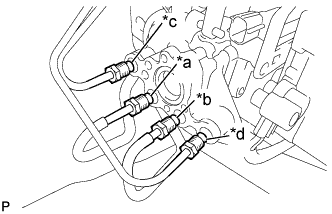
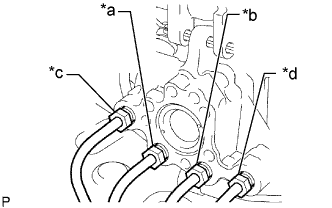
- Using a union nut wrench 10 mm, disconnect the 4 brake tubes from the hydraulic brake booster.
- Use tags or labels to identify the place to reconnect each line.
Text in Illustration
*a
|
To front wheel cylinder RH
|
*b
|
To front wheel cylinder LH
|
*c
|
To rear wheel cylinder RH
|
*d
|
To rear wheel cylinder LH
|
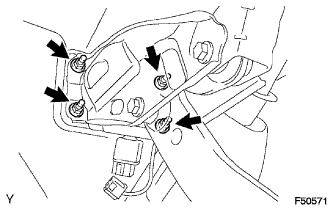
- Remove the 4 nuts and pull out the hydraulic brake booster.
Remove the gasket from the hydraulic brake booster.
| 16.
REMOVE HYDRAULIC BRAKE BOOSTER (for RHD)
|
|
Disconnect the 3 connectors from the hydraulic brake booster.
- Use tags or labels to identify the place to reconnect each line.
Text in Illustration
*a
|
To front wheel cylinder RH
|
*b
|
To front wheel cylinder LH
|
*c
|
To rear wheel cylinder RH
|
*d
|
To rear wheel cylinder LH
|
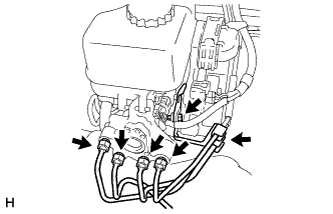
- Using a union nut wrench 10 mm, disconnect the 4 brake tubes from the hydraulic brake booster.
Remove the bolt and the brake tube clamp from the hydraulic brake booster assembly.
Remove the brake tube clamp from the brake tube.
- Remove the 4 nuts and pull out the hydraulic brake booster.
Remove the gasket from the hydraulic brake booster.
| 17.
REMOVE BRAKE PEDAL SUPPORT ASSEMBLY |
|
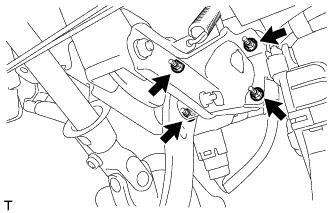
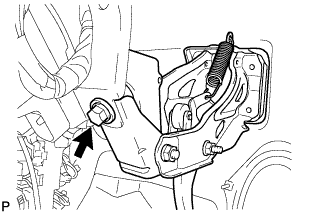
Remove the bolt and the brake pedal support.
| 18.
REMOVE BRAKE PEDAL RETURN SPRING |
|
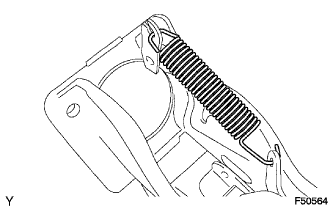
Remove the return spring from the brake pedal support and brake pedal.
| 19.
REMOVE STOP LIGHT SWITCH MOUNTING ADJUSTER |
|
Remove the stop light switch mounting adjuster from the brake pedal support.
| 20.
REMOVE BRAKE PEDAL PAD |
|
Remove the brake pedal pad from the brake pedal.