ON-VEHICLE INSPECTION
Inspection · Vehicles built Jul 2007 – Oct 2010
Versions by build date: Jul 2007 – Oct 2010 from Nov 2010
| INSPECT AND ADJUST BRAKE PEDAL |

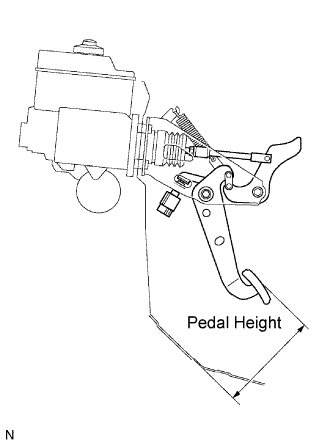  |
Inspect the brake pedal height.
- Pedal height from dash panel:
- 168.7 to 178.7 mm (6.642 to 7.035 in.)
Adjust the brake pedal height.
Disconnect the connector from the stop light switch.
Turn the stop light switch counterclockwise, and remove the stop light switch.
Remove the hydraulic brake booster (Click here).
Loosen the clevis lock nut.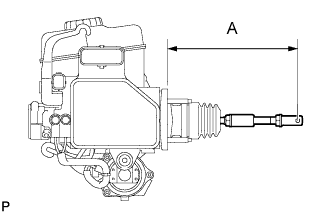
Adjust the rod operating adapter length by turning the pedal push rod clevis.
- Rod operating adapter length A:
- 201.7 to 202.7 mm (7.941 to 7.980 in.)
Tighten the clevis lock nut.
- Torque:
- 26 N*m{ 260 kgf*cm , 19 ft.*lbf }
Install the hydraulic brake booster (Click here).
Insert the stop light switch into the adjuster until it just touches the brake pedal.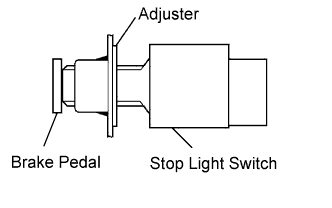
- NOTICE:
- Do not depress the brake pedal.
Make a quarter turn clockwise to install the stop light switch.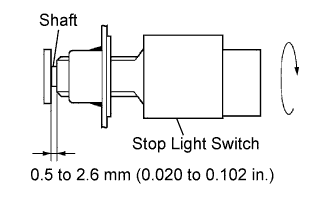
- NOTICE:
- Do not depress the brake pedal.
- HINT:
- The turning torque for installing the stop light switch:
- Torque:
- 1.5 N*m{ 15 kgf*cm , 13 in.*lbf } or less
Check the stop light switch clearance.
- Stop light switch clearance:
- 0.5 to 2.6 mm (0.020 to 0.102 in.)
Connect the connector to the stop light switch.
Inspect the brake pedal free play.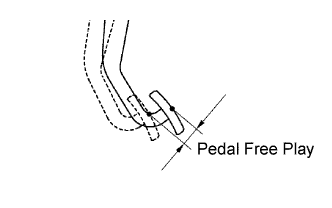
Stop the engine and depress the brake pedal several times until there is no vacuum left in the booster.
Push in the pedal until the beginning of the resistance is felt. Measure the distance as shown.
- Pedal free play:
- 1.0 to 6.0 mm (0.039 to 0.236 in.)
Inspect the brake pedal reserve distance.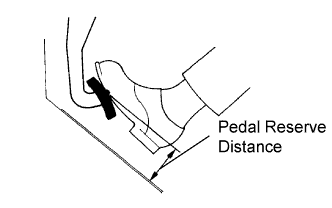
Release the parking brake pedal.
With the engine running, depress the pedal and measure the pedal reserve distance as shown.- Pedal reserve distance from asphalt sheet at 490 N (50 kgf, 110.2 lbf):
- More than 56 mm (2.20 in.)