INSTALLATION
Removal / installation · Vehicles built Jul 2007 – Jul 2009
Versions by build date: Jul 2007 – Jul 2009 Aug 2009 – Oct 2010 Nov 2010 – Jul 2014 from Aug 2014
| 1. INSTALL VANE PUMP |

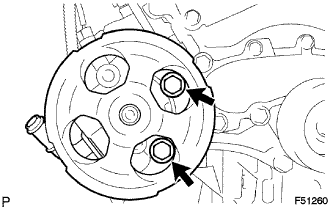  |
Install the vane pump assembly with the 2 bolts.
- Torque:
- 43 N*m{ 438 kgf*cm , 32 ft.*lbf }
Install the wire harness clamp bracket with the bolt.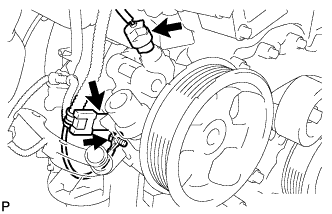
- Torque:
- 8.0 N*m{ 82 kgf*cm , 71 in.*lbf }
Connect the oil pressure switch connector.
- NOTICE:
- Make sure that no oil adheres to the connector.
| 2. CONNECT PRESSURE FEED TUBE ASSEMBLY |
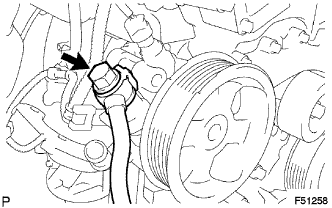 |
Install a new gasket onto the pressure feed tube.
Install the pressure feed tube with the union bolt.
- Torque:
- 51 N*m{ 520 kgf*cm , 38 ft.*lbf }
| 3. CONNECT NO. 1 OIL RESERVOIR TO PUMP HOSE |
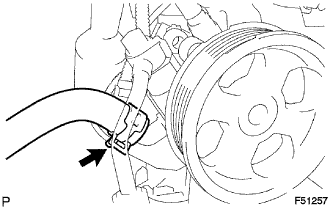 |
Connect the No. 1 oil reservoir to pump hose with the clip.
| 4. INSTALL FAN & GENERATOR V BELT |
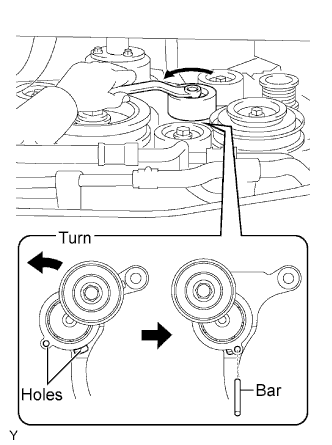 |
While turning the belt tensioner counterclockwise, align the holes as shown, and then insert a bar of 6 mm (0.24 in.) into the holes to fix the belt tensioner.
Install the V-ribbed belt.
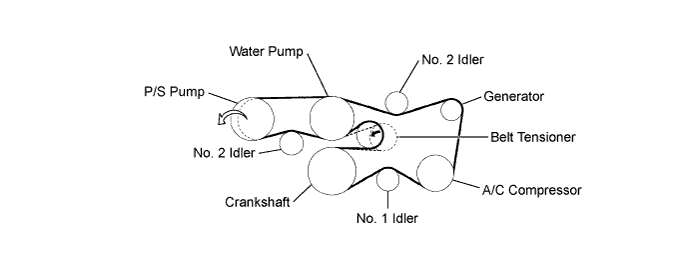
While turning the belt tensioner counterclockwise, remove the bar.
If it is hard to install the V-ribbed belt, perform the following procedure:
Put the V-ribbed belt on all parts except the P/S pump, as shown in the illustration.
While releasing the belt tension by turning the belt tensioner counterclockwise, put the V-ribbed belt on the P/S pump.
| 5. CONNECT CABLE TO NEGATIVE BATTERY TERMINAL |
- Torque:
- 3.9 N*m{ 40 kgf*cm , 35 in.*lbf }
| 6. ADD POWER STEERING FLUID |
| 7. BLEED POWER STEERING FLUID |
Check the fluid level.
Jack up the front of the vehicle and support it with stands.
Turn the steering wheel.
With the engine stopped, turn the wheel slowly from lock to lock several times.
Lower the vehicle.
Start the engine.
Run the engine at idle for a few minutes.
Turn the steering wheel.
With the engine idling, turn the wheel to the left or right full lock position and keep it there for 2 to 3 seconds. Then turn the wheel to the opposite full lock position and keep it there for 2 to 3 seconds (step A).
Repeat step A several times.
Stop the engine.
Check for foaming or emulsification.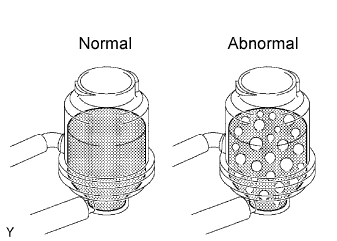
Especially, if the system has to be bled twice because of foaming or emulsification, check for fluid leakage in the system.
Check the fluid level.
| 8. CHECK FOR POWER STEERING FLUID LEAKAGE |
| 9. INSTALL NO. 1 ENGINE UNDER COVER SUB-ASSEMBLY |
Install the No. 1 engine under cover with the 4 bolts.
- Torque:
- 29 N*m{ 296 kgf*cm , 21 ft.*lbf }