INSTALLATION
Removal / installation · Vehicles built from Aug 2011
Versions by build date: Jul 2007 – Jul 2011 from Aug 2011
| 1.
INSTALL FRONT WIPER MOTOR |
 |
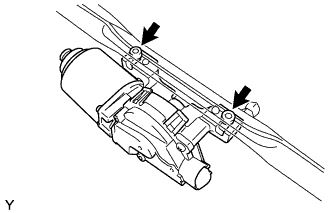
- Install the front wiper motor.
Using "Torx" socket wrench T30, tighten the 2 bolts.
-
Torque:
- 7.5 N*m{
76 kgf*cm
, 66 in.*lbf
}
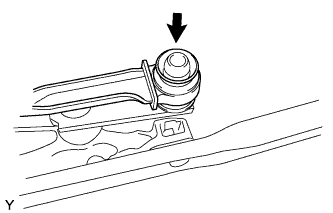
- Apply DENSO No. 50 grease to the crank arm pivot of the front wiper motor.
Install the rod onto the crank arm pivot of the front wiper motor.
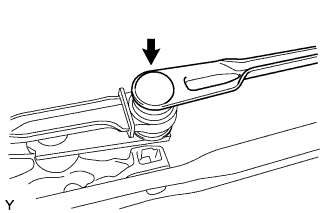
- Apply DENSO No. 50 grease to the crank arm pivot of the front wiper motor.
Install the rod onto the crank arm pivot of the front wiper motor.
| 2.
INSTALL FRONT WIPER MOTOR AND LINK |
|
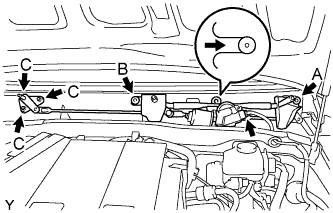
- Slide the wiper link as shown in the illustration and engage the rubber pin with the body.
Connect the connector.
Tighten bolt A.
Tighten bolt B.
Tighten 3 bolts C.
-
Torque:
- 7.0 N*m{
71 kgf*cm
, 61 in.*lbf
}
| 3.
INSTALL COWL TOP VENTILATOR LOUVER LH |
|
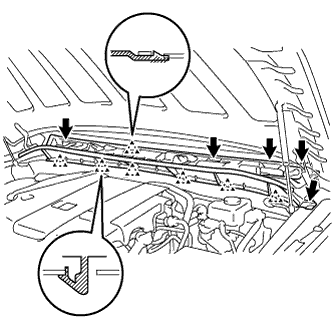
- Install the cowl top ventilator louver LH with the 5 clips and engage the 7 claws.
| 4.
INSTALL COWL TOP VENTILATOR LOUVER RH |
|
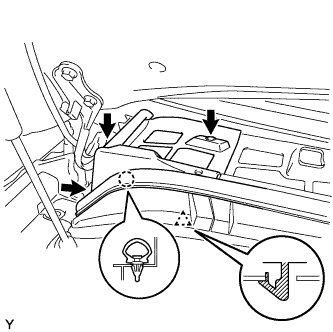
- Install the cowl top ventilator louver RH with the 3 clips and the claw.
Install the hood to cowl top seal with the clip.
| 5.
INSTALL COWL TOP VENTILATOR LOUVER SUB-ASSEMBLY |
|
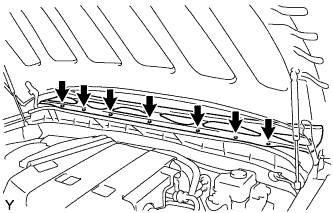
- Install the cowl top ventilator louver sub-assembly with the 7 clips.
| 6.
INSTALL FRONT FENDER SIDE PANEL UPPER LH |
|
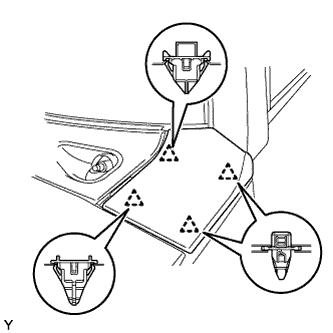
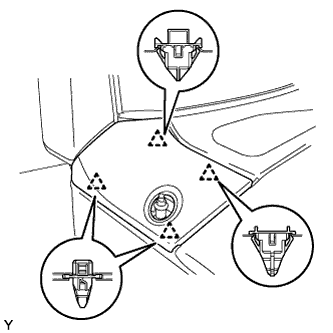
Install the 4 new clips on the front fender side panel upper LH.
- Engage the 4 clips and install the front fender side panel upper LH.
| 7.
INSTALL FRONT FENDER SIDE PANEL UPPER RH |
|
Install the 4 new clips on the front fender side panel upper RH.
- Engage the 4 clips and install the front fender side panel upper RH.
| 8.
INSTALL ANTENNA ORNAMENT |
|
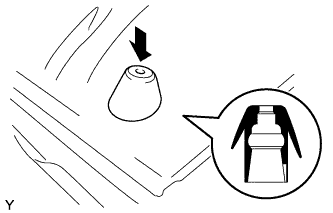
- Press in the antenna ornament in the direction shown in the illustration.
| 9.
INSTALL ROOF ANTENNA POLE SUB-ASSEMBLY
|
|
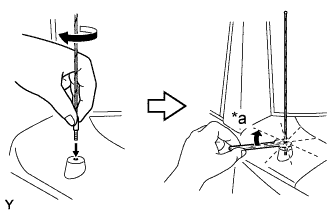
- Install the radio antenna pole sub-assembly by hand until fully seated.
Text in Illustration
*a
|
1/8 turn (20 to 45 degrees)
|
Using a 8 mm (5/16 inch) wrench, fully tighten the radio antenna pole about 1/8 turn (20 to 45 degrees) by turning it clockwise.
- NOTICE:
- Do not over tighten. Tighten with finger, not hand.
- Do not use pliers to tighten the radio antenna pole as it can leave marks on the radio antenna pole surface.
- The antenna pole cannot be hand tightened to the proper specification.
-
Torque:
- 3.3 N*m{
34 kgf*cm
, 29 in.*lbf
}
| 10.
INSTALL FRONT WIPER ARM AND BLADE ASSEMBLY LH |
|
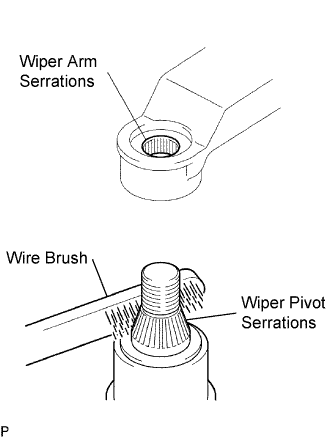
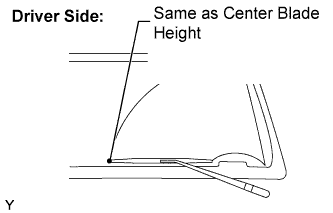
- Scrape any metal powder off the serrated part of the wiper arm with a round file or the equivalent (when reinstalling).
Clean the wiper pivot serrations with a wire brush.
Operate the wiper, then stop the windshield wiper motor in the automatic stop position.
- Align the blade tip with the mark on the windshield glass, as shown in the illustration.
Tighten the nut of the front wiper arm.
-
Torque:
- 25 N*m{
255 kgf*cm
, 18 ft.*lbf
}
| 11.
INSTALL FRONT WIPER ARM AND BLADE ASSEMBLY RH (CENTER SIDE) |
|
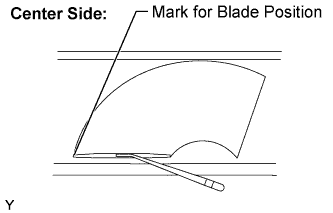
- Scrape any metal powder off the serrated part of the wiper arm with a round file or the equivalent (when reinstalling).
Clean the wiper pivot serrations with a wire brush.
Operate the wiper, then stop the windshield wiper motor in the automatic stop position.
- Align the blade tip with the mark on the windshield glass, as shown in the illustration.
Tighten the nut of the front wiper arm.
-
Torque:
- 25 N*m{
255 kgf*cm
, 18 ft.*lbf
}
| 12.
INSTALL FRONT WIPER ARM AND BLADE ASSEMBLY RH |
|
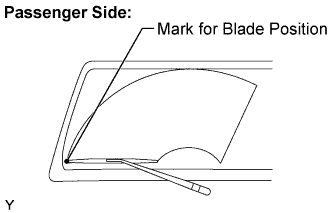
- Scrape any metal powder off the serrated part of the wiper arm with a round file or the equivalent (when reinstalling).
Clean the wiper pivot serrations with a wire brush.
Operate the wiper, then stop the windshield wiper motor in the automatic stop position.
- Align the blade tip with the mark on the windshield glass, as shown in the illustration.
Tighten the nut of the front wiper arm.
-
Torque:
- 25 N*m{
255 kgf*cm
, 18 ft.*lbf
}
| 13.
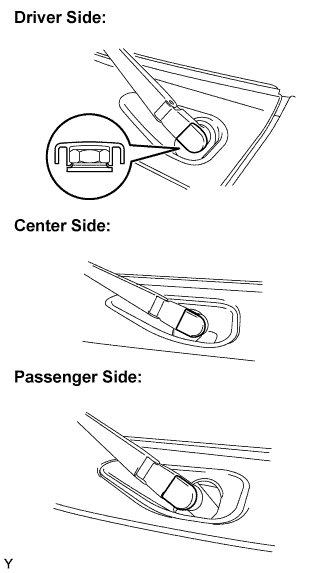
INSTALL WINDSHIELD WIPER ARM COVER |
|
- Engage the claw and install the 3 front wiper arm cover.