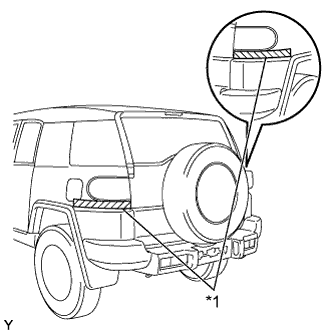
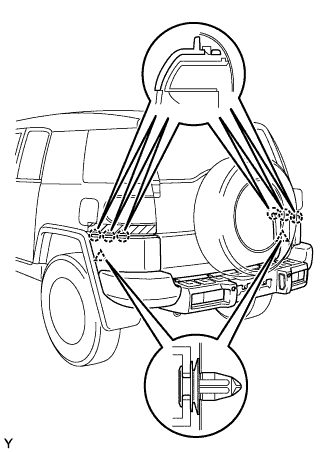
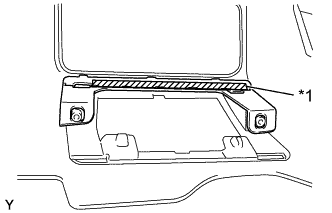
Apply protective tape as shown in the illustration.
Text in Illustration
*1
Protective Tape
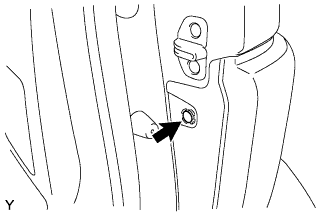
Remove the clip.
HINT:
Use the same procedure for the RH side and LH side.
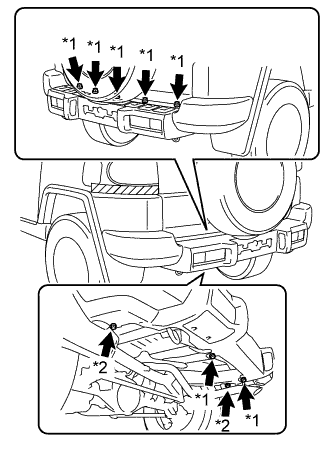
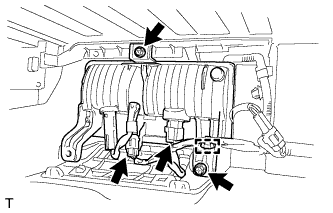
Remove the 7 bolts and the 2 screws.
Text in Illustration
*1
Bolt
*2
Screw
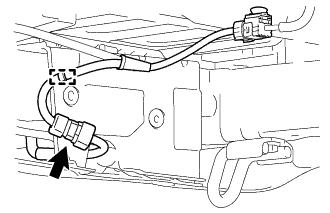
Disengage the wire harness clamp, and disconnect the connector.
Disengage the 6 claws and the 2 clips and remove the rear bumper cover.
2.
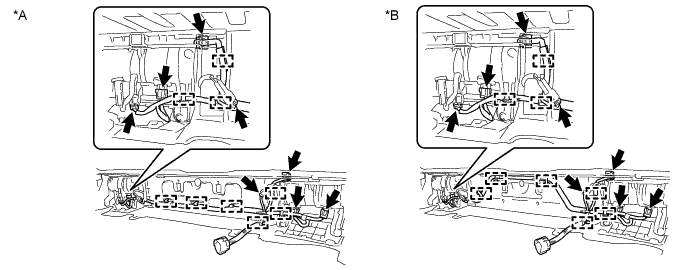
REMOVE NO. 8 FLOOR WIRE
Disconnect the connectors.
Text in Illustration
*A
for Type A
*B
for Type B
Disengage the clamps and remove the floor wire.
3.
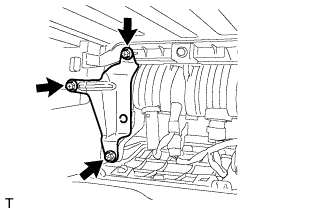
REMOVE REAR BUMPER SIDE RETAINER RH
Remove the 3 screws and rear bumper extension retainer.
4.
REMOVE REAR BUMPER SIDE RETAINER LH
HINT:
Use the same procedure as for the RH side.
5.
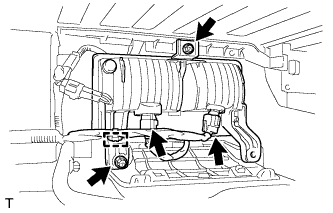
REMOVE REAR FOG LIGHT ASSEMBLY LH
Disconnect the 2 connectors and wire harness clamp.
Remove the 2 screws and rear fog light.
6.
REMOVE REAR FOG LIGHT ASSEMBLY RH
Disconnect the 2 connectors and wire harness clamp.
Remove the 2 screws and rear fog light.
7.
REMOVE REAR BUMPER EXTENSION MOULDING LH
Using an infrared light, heat the rear bumper extension mounting bracket.
Heating Temperature:
Item
Temperature
Rear Bumper Cover
40 to 60°C (104 to 140°F)
CAUTION:
Do not burn yourself on the hot rear bumper cover or with the infrared light.
NOTICE:
Do not heat the rear bumper cover excessively.
Remove any tape remaining on the rear bumper cover.
Pull the rear bumper extension mounting bracket toward you, and while peeling off the double-sided tape, remove the rear bumper extension mounting bracket.
Text in Illustration
*1
Double-sided Tape
8.
REMOVE REAR BUMPER EXTENSION MOULDING RH
HINT:
Use the same procedure as for the LH side.
9.
REMOVE ULTRASONIC SENSOR
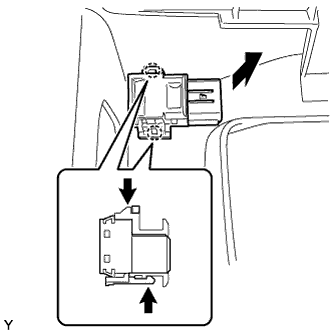
Disconnect the sensor connector.
While pushing down on the lever with a finger to release the claw, disengage the claw on the other side to remove the ultrasonic sensor.
HINT:
The types of the claws on the top and bottom of the sensor are different. Observe the claws carefully before attempting to remove the sensor.
10.
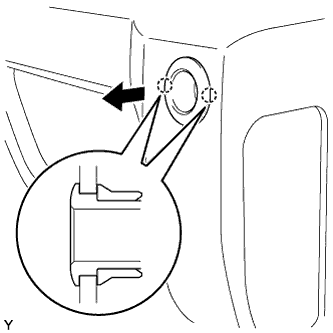
REMOVE ULTRASONIC SENSOR RETAINER
Disengage the 2 claws and remove the ultrasonic sensor retainer from the rear bumper.