REASSEMBLY
Removal / installation · Vehicles built from Aug 2014
Versions by build date: Jul 2007 – Jul 2014 from Aug 2014
| 1.
INSTALL FRONT VALANCE LOWER PANEL |
 |
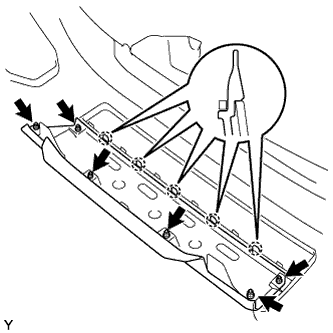
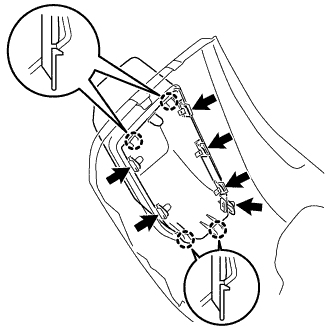
- Engage the 5 claws to install the front valance lower panel.
Install the 6 nuts.
-
Torque:
- 5.0 N*m{
51 kgf*cm
, 44 in.*lbf
}
| 2.
INSTALL RADIATOR LOWER GRILLE |
|
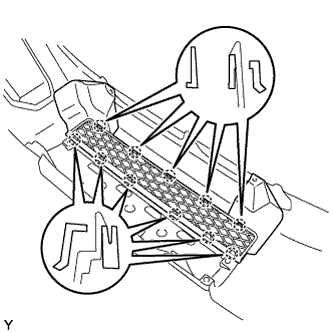
- Engage the 11 claws to install the radiator lower grille.
| 3.
INSTALL FOG LIGHT ASSEMBLY LH (w/ Fog Light)
|
|
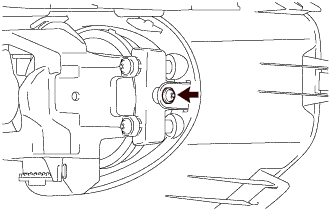
Install the fog light assembly to the front bumper side retainer.
Engage the 2 guides to install the fog light assembly with front bumper side retainer.
Install the 2 screws.
| 4.
INSTALL FOG LIGHT ASSEMBLY RH (w/ Fog Light) |
|
- HINT:
- Use the same procedure as for the LH side.
| 5.
INSTALL FRONT BUMPER HOLE COVER LH (w/ Fog Light) |
|
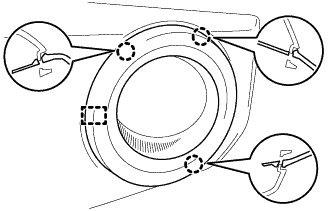
- Engage the guide and 3 claws to install the front bumper hole cover LH.
- Install the screw.
| 6.
INSTALL FRONT BUMPER HOLE COVER RH (w/ Fog Light) |
|
- HINT:
- Use the same procedure as for the LH side.
| 7.
INSTALL FRONT BUMPER PAD LH |
|
- Engage the 4 claws to install the front bumper pad LH.
Install the 6 retainers.
| 8.
INSTALL FRONT BUMPER PAD RH |
|
- HINT:
- Use the same procedure as for the LH side.
| 9.
INSTALL NO. 3 ENGINE ROOM WIRE |
|
Clean the attachment surface.
Using an infrared light, heat the adhesive remaining on the front bumper cover.
- CAUTION:
- Do not burn yourself with the heated front bumper cover reinforcement or infrared light.
Using a piece of cloth, rub the remaining adhesive off the front bumper cover.
Using a non-residue solvent, clean the attachment surface.
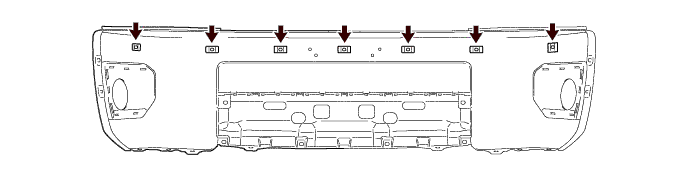
Install the 7 new ultrasonic sensor retainers.

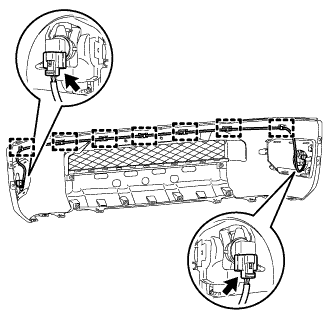
- Engage the 7 clamps to install the No. 3 engine room wire.