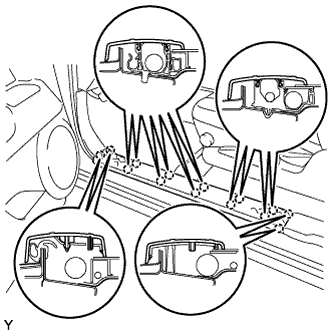
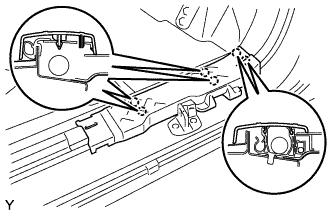
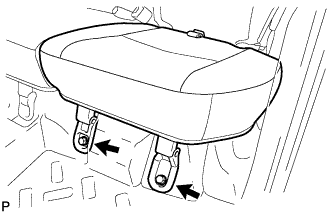
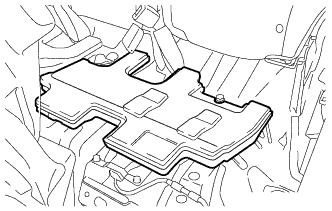
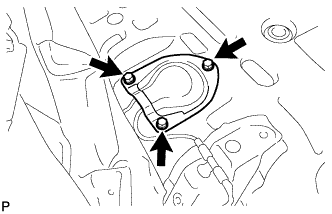
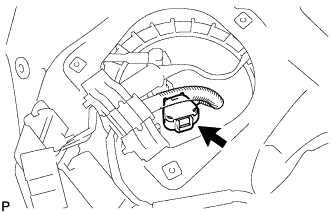
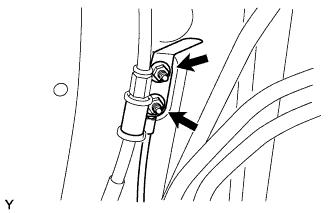
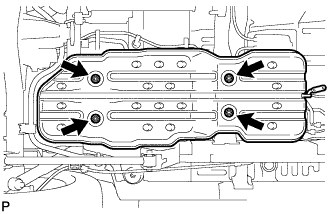
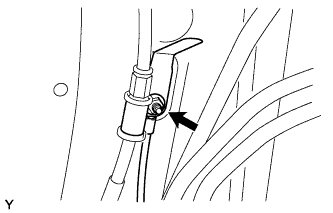
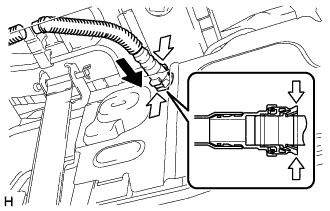
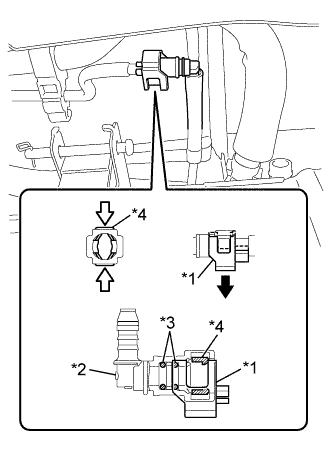
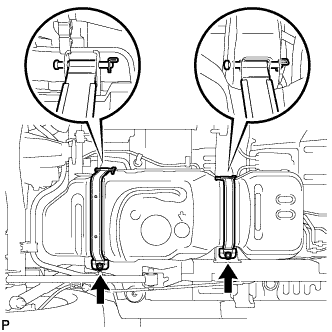
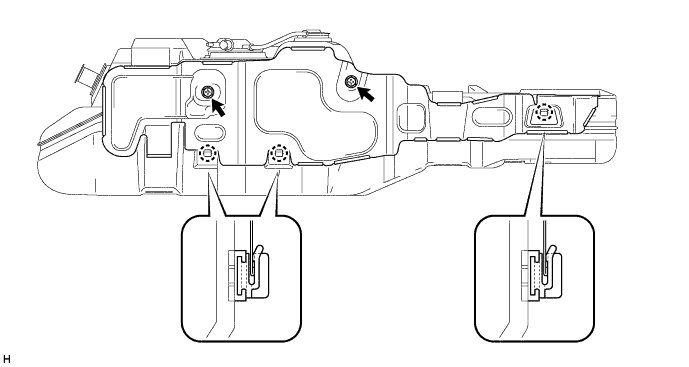
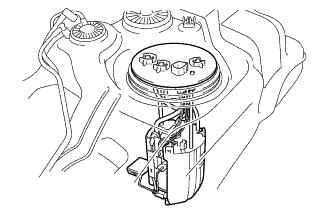
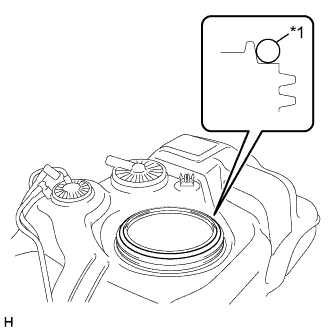
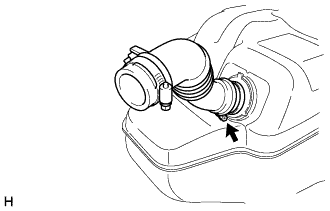
Remove the nut and the No. 1 fuel tank protector sub-assembly bracket from the vehicle.
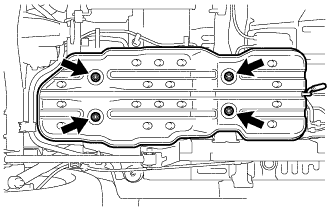
Remove the 4 nuts and the No. 1 fuel tank protector sub-assembly from the fuel tank assembly.
8.
DISCONNECT FUEL TANK MAIN TUBE SUB-ASSEMBLY
NOTICE:
Before disconnecting the fuel tank main tube sub-assembly connector, check for dirt or other foreign matter on the fuel tank main tube sub-assembly connector and the pipe, and clean them if necessary.
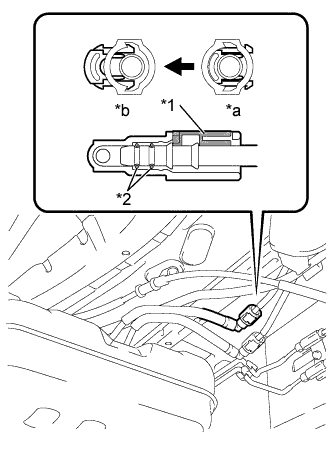
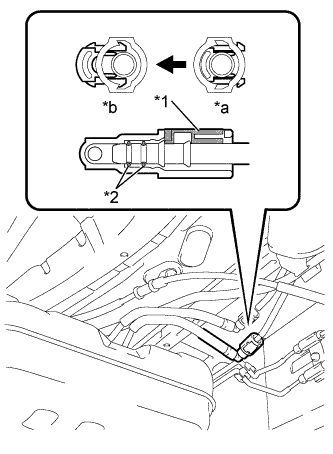
Pinch the retainer to disengage the lock claws and pull out the fuel tank main tube sub-assembly from the pipe.
Text in Illustration
*1
Retainer
*2
O-Ring
*a
Lock
*b
Unlock
NOTICE:
If the fuel tank main tube sub-assembly connector and pipe are stuck together, push in and pull out the fuel tank main tube sub-assembly connector while squeezing the pipe to release the connection, and then disconnect the fuel tank main tube sub-assembly connector.
Clean away any dirt or foreign matter from the fuel tank main tube sub-assembly connector before performing the operation.
The fuel tank main tube sub-assembly connector and pipe are sealed by O-ring, so be careful to prevent damage to and foreign matter sticking to the contact surfaces.
Do not use any tools.
After disconnecting the fuel tank main tube sub-assembly connector, check that there is no foreign matter on the seal surface of the pipe.
After disconnecting the fuel tank main tube sub-assembly, protect the contact surfaces by covering them with a plastic bag.
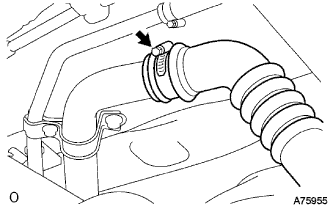
Loosen the hose clamp and disconnect the fuel tank to filler pipe hose from the fuel tank inlet pipe sub-assembly.
11.
DISCONNECT FUEL TANK RETURN TUBE
NOTICE:
Before disconnecting the fuel tank return tube connector, check for dirt or other foreign matter on the fuel tank return tube connector and the pipe, and clean them if necessary.
Pinch the retainer to disengage the lock claws and pull out the fuel tank return tube from the pipe.
Text in Illustration
*1
Retainer
*2
O-Ring
*a
Lock
*b
Unlock
NOTICE:
If the fuel tank return tube connector and pipe are stuck together, push in and pull out the fuel tank return tube connector while squeezing the pipe to release the connection, and then disconnect the fuel tank return tube connector.
Clean away any dirt or foreign matter from the fuel tank return tube connector before performing the operation.
The fuel tank return tube connector and pipe are sealed by O-ring, so be careful to prevent damage to and foreign matter sticking to the contact surfaces.
Do not use any tools.
After disconnecting the fuel tank return tube connector, check that there is no foreign matter on the seal surface of the pipe.
After disconnecting the fuel tank return tube, protect the contact surfaces by covering them with a plastic bag.
Do not bend or twist the tubes.
12.
DISCONNECT FUEL CUT-OFF TUBE (for Single Tank Type)
NOTICE:
Before disconnecting the fuel cut-off tube connector, check for dirt or other foreign matter on the fuel cut-off tube connector and the pipe, and clean them if necessary.
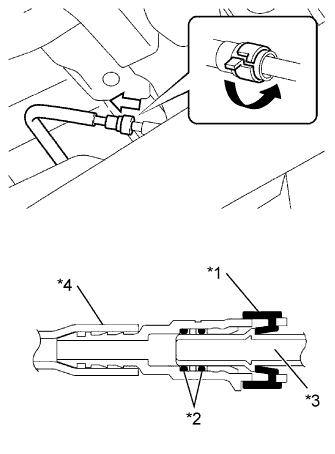
Turn the retainer to disengage the lock claws and pull out the fuel cut-off tube from the pipe.
Text in Illustration
*1
Retainer
*2
O-Ring
*3
Fuel Pipe
*4
Nylon Tube
Turn
Pull
NOTICE:
If the fuel cut-off tube connector and pipe are stuck together, push in and pull out the fuel cut-off tube connector while squeezing the pipe to release the connection, and then disconnect the fuel cut-off tube connector.
Clean away any dirt or foreign matter from the fuel cut-off tube connector before performing the operation.
The fuel cut-off tube connector and pipe are sealed by O-ring, so be careful to prevent damage to and foreign matter sticking to the contact surfaces.
Do not use any tools.
After disconnecting the fuel cut-off tube connector, check that there is no foreign matter on the seal surface of the pipe.
After disconnecting the fuel cut-off tube, protect the contact surfaces by covering them with a plastic bag.
Do not bend or twist the tubes.
13.
DISCONNECT FUEL CUT-OFF TUBE (for Double Tank Type)
NOTICE:
Before disconnecting the fuel cut-off tube connector, check for dirt or other foreign matter on the fuel cut-off tube connector and the pipe, and clean them if necessary.
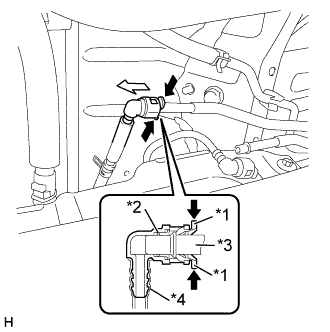
Pinch the retainer and pull out the fuel cut-off tube from the pipe.
Text in Illustration
*1
Retainer
*2
O-Ring
*3
Fuel Pipe
*4
Nylon Tube
Pinch
Pull
NOTICE:
If the fuel cut-off tube connector and pipe are stuck together, push in and pull out the fuel cut-off tube connector while squeezing the pipe to release the connection, and then disconnect the fuel cut-off tube connector.
Clean away any dirt or foreign matter from the fuel cut-off tube connector before performing the operation.
The fuel cut-off tube connector and pipe are sealed by O-ring, so be careful to prevent damage to and foreign matter sticking to the contact surfaces.
Do not use any tools.
After disconnecting the fuel cut-off tube connector, check that there is no foreign matter on the seal surface of the pipe.
After disconnecting the fuel cut-off tube, protect the contact surfaces by covering them with a plastic bag.
Do not bend or twist the tubes.
14.
DISCONNECT FUEL TANK EVAPORATION VENT TUBE SUB-ASSEMBLY (for Double Tank Type w/ Fuel Tank Evaporation Vent Tube Sub-assembly)
NOTICE:
Before disconnecting the fuel tank evaporation vent tube sub-assembly connector, check for dirt or other foreign matter on the fuel tank evaporation vent tube sub-assembly connector and the pipe, and clean them if necessary.
Pinch the retainer and pull out the fuel tank evaporation vent tube sub-assembly from the pipe.
Text in Illustration
*1
Retainer
*2
O-Ring
*3
Fuel Pipe
*4
Nylon Tube
Pinch
Pull
NOTICE:
If the fuel tank evaporation vent tube sub-assembly connector and pipe are stuck together, push in and pull out the fuel tank evaporation vent tube sub-assembly connector while squeezing the pipe to release the connection, and then disconnect the fuel tank evaporation vent tube sub-assembly connector.
Clean away any dirt or foreign matter from the fuel tank evaporation vent tube sub-assembly connector before performing the operation.
The fuel tank evaporation vent tube sub-assembly connector and pipe are sealed by O-ring, so be careful to prevent damage to and foreign matter sticking to the contact surfaces.
Do not use any tools.
After disconnecting the fuel tank evaporation vent tube sub-assembly connector, check that there is no foreign matter on the seal surface of the pipe.
After disconnecting the fuel tank evaporation vent tube sub-assembly, protect the contact surfaces by covering them with a plastic bag.
Do not bend or twist the tubes.
15.
DISCONNECT NO. 1 FUEL TANK BREATHER TUBE SUB-ASSEMBLY
NOTICE:
Before disconnecting the No. 1 fuel tank breather tube sub-assembly connector, check for dirt or other foreign matter on the No. 1 fuel tank breather tube sub-assembly connector and the pipe, and clean them if necessary.
Disconnect the No. 1 fuel tank breather tube sub-assembly from the fuel tank assembly.
Text in Illustration
Push
Pinch
Push the No. 1 fuel tank breather tube sub-assembly connector firmly.
Pinch portion A, as shown in the illustration.
Pull out the No. 1 fuel tank breather tube sub-assembly connector.
16.
DISCONNECT NO. 2 FUEL MAIN TUBE SUB-ASSEMBLY (for Double Tank Type)
NOTICE:
Before disconnecting the No. 2 fuel main tube sub-assembly connector, check for dirt or other foreign matter on the No. 2 fuel main tube sub-assembly connector and the pipe, and clean them if necessary.
Disengage the No. 2 fuel main tube sub-assembly connector cover.
Text in Illustration
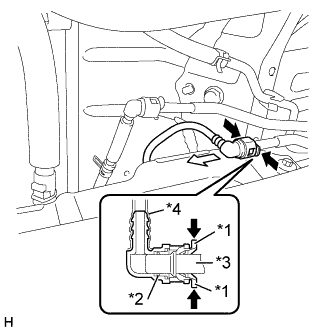
*1
Connector Cover
*2
Fuel Tube Connector
*3
O-ring
*4
Retainer
Pull
Pinch
Pinch the retainer by hand from both sides, and pull out the No. 2 fuel main tube connector from the pipe.
NOTICE:
If the fuel tank evaporation vent tube sub-assembly connector and pipe are stuck together, push in and pull out the fuel tank evaporation vent tube sub-assembly connector while squeezing the pipe to release the connection, and then disconnect the fuel tank evaporation vent tube sub-assembly connector.
Clean away any dirt or foreign matter from the fuel tank evaporation vent tube sub-assembly connector before performing the operation.
The fuel tank evaporation vent tube sub-assembly connector and pipe are sealed by O-ring, so be careful to prevent damage to and foreign matter sticking to the contact surfaces.
Do not use any tools.
After disconnecting the fuel tank evaporation vent tube sub-assembly connector, check that there is no foreign matter on the seal surface of the pipe.
After disconnecting the fuel tank evaporation vent tube sub-assembly, protect the contact surfaces by covering them with a plastic bag.
Do not bend or twist the tubes.
17.
REMOVE FUEL TANK ASSEMBLY
Set a transmission jack underneath the fuel tank assembly.
Remove the 2 bolts, 2 clips, 2 pins and the 2 fuel tank bands from the vehicle.
Remove the fuel tank assembly from the vehicle.
18.
REMOVE NO. 3 FUEL TANK PROTECTOR
Remove the 2 bolts from the No. 3 fuel tank protector.
Disengage the 3 claws and remove the No. 3 fuel tank protector from the fuel tank assembly.
19.
REMOVE FUEL TANK CUSHION
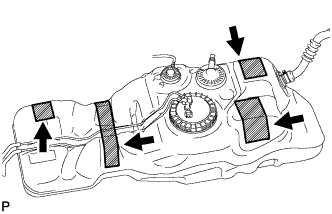
Remove the 4 fuel tank cushions from the fuel tank assembly.
20.
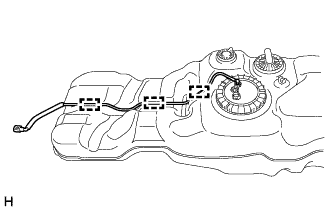
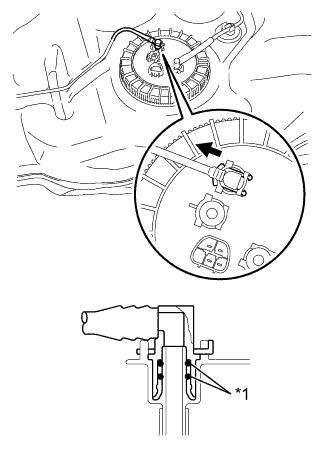
REMOVE FUEL TANK RETURN TUBE
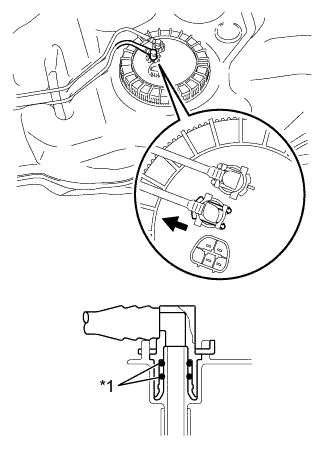
Remove the tube joint clip, and pull out the fuel tank return tube from the fuel suction tube with pump and gauge assembly.
Text in Illustration
*1
O-Ring
Pull
NOTICE:
If the fuel tank return tube connector and pipe are stuck together, push in and pull out the fuel tank return tube connector while squeezing the pipe to release the connection, and then disconnect the fuel tank return tube connector.
Clean away any dirt or foreign matter from the fuel tank return tube connector before performing the operation.
The fuel tank return tube connector and pipe are sealed by O-ring, so be careful to prevent damage to and foreign matter sticking to the contact surfaces.
Do not use any tools.
After disconnecting the fuel tank return tube connector, check that there is no foreign matter on the seal surface of the pipe.
After disconnecting the fuel tank return tube, protect the contact surfaces by covering them with a plastic bag.
Do not bend or twist the tubes.
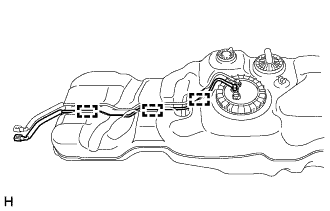
Disengage the 3 clamps and remove the fuel tank return tube from the fuel tank assembly.
21.
REMOVE FUEL TANK MAIN TUBE SUB-ASSEMBLY (for Single Tank Type)
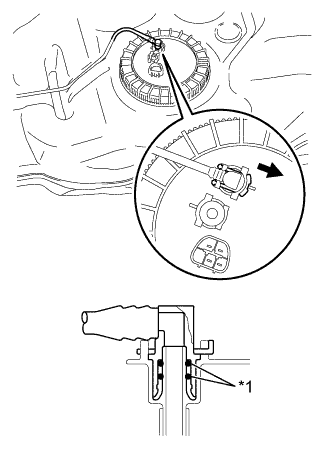
Remove the tube joint clip, and pull out the fuel tank main tube sub-assembly from the fuel suction tube with pump and gauge assembly.
Text in Illustration
*1
O-Ring
Pull
NOTICE:
If the fuel tank main tube sub-assembly connector and pipe are stuck together, push in and pull out the fuel tank main tube sub-assembly connector while squeezing the pipe to release the connection, and then disconnect the fuel tank main tube sub-assembly connector.
Clean away any dirt or foreign matter from the fuel tank main tube sub-assembly connector before performing the operation.
The fuel tank main tube sub-assembly connector and pipe are sealed by O-ring, so be careful to prevent damage to and foreign matter sticking to the contact surfaces.
Do not use any tools.
After disconnecting the fuel tank main tube sub-assembly connector, check that there is no foreign matter on the seal surface of the pipe.
After disconnecting the fuel tank main tube sub-assembly, protect the contact surfaces by covering them with a plastic bag.
Do not bend or twist the tubes.
Disengage the 3 clamps and remove the fuel tank main tube sub-assembly from the fuel tank assembly
22.
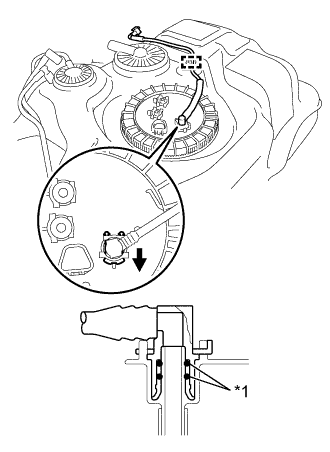
REMOVE FUEL TANK MAIN TUBE SUB-ASSEMBLY (for Double Tank Type)
Remove the tube joint clip, and pull out the fuel tank main tube sub-assembly from the fuel suction tube with pump and gauge assembly.
Text in Illustration
*1
O-Ring
Pull
NOTICE:
If the fuel tank main tube sub-assembly connector and pipe are stuck together, push in and pull out the fuel tank main tube sub-assembly connector while squeezing the pipe to release the connection, and then disconnect the fuel tank main tube sub-assembly connector.
Clean away any dirt or foreign matter from the fuel tank main tube sub-assembly connector before performing the operation.
The fuel tank main tube sub-assembly connector and pipe are sealed by O-ring, so be careful to prevent damage to and foreign matter sticking to the contact surfaces.
Do not use any tools.
After disconnecting the fuel tank main tube sub-assembly connector, check that there is no foreign matter on the seal surface of the pipe.
After disconnecting the fuel tank main tube sub-assembly, protect the contact surfaces by covering them with a plastic bag.
Do not bend or twist the tubes.
Disengage the 3 clamps and remove the fuel tank main tube sub-assembly from the fuel tank assembly
23.
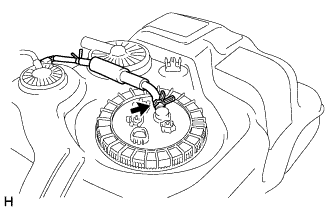
REMOVE NO. 2 FUEL MAIN TUBE SUB-ASSEMBLY (for Double Tank Type)
Remove the tube joint clip, and pull out the No. 2 fuel tank main tube sub-assembly from the fuel suction tube with pump and gauge assembly.
Text in Illustration
*1
O-Ring
Pull
NOTICE:
If the No. 2 fuel tank main tube sub-assembly connector and pipe are stuck together, push in and pull out the No. 2 fuel tank main tube sub-assembly connector while squeezing the pipe to release the connection, and then disconnect the No. 2 fuel tank main tube sub-assembly connector.
Clean away any dirt or foreign matter from the No. 2 fuel tank main tube sub-assembly connector before performing the operation.
The No. 2 fuel tank main tube sub-assembly connector and pipe are sealed by O-ring, so be careful to prevent damage to and foreign matter sticking to the contact surfaces.
Do not use any tools.
After disconnecting the No. 2 fuel tank main tube sub-assembly connector, check that there is no foreign matter on the seal surface of the pipe.
After disconnecting the No. 2 fuel tank main tube sub-assembly, protect the contact surfaces by covering them with a plastic bag.
Do not bend or twist the tubes.
Disengage the clamp and remove the No. 2 fuel tank main tube sub-assembly from the fuel tank assembly.
24.
REMOVE FUEL TANK EVAPORATION VENT TUBE SUB-ASSEMBLY (for Double Tank Type w/ Fuel Tank Evaporation Vent Tube Sub-assembly)
Loosen the hose clip and remove the fuel tank evaporation vent tube sub-assembly from the fuel suction tube with pump and gauge assembly.
25.
REMOVE FUEL SUCTION TUBE WITH PUMP AND GAUGE ASSEMBLY (for Single Tank Type)
NOTICE:
Protect the connector and tube joint with masking tape or equivalent to prevent any foreign matter from sticking to them. Clean any dirt and foreign matter from the fuel suction tube assembly before removing.
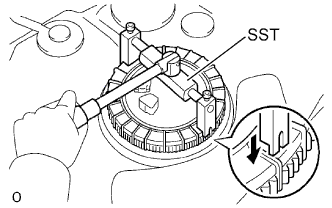
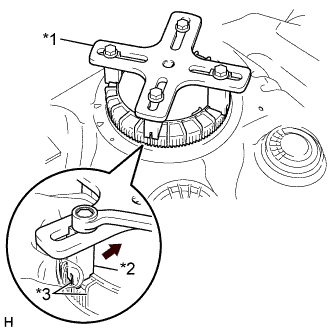
Engage the SST claws securely with the fuel pump gauge retainer ribs to secure SST.
While pressing the claws of SST to the fuel pump gauge retainer ribs securely, tighten the bolts.
HINT:
Install SST while pressing the SST claws toward the fuel pump gauge retainer (towards the center of SST).
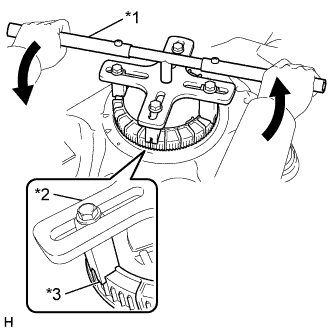
Install the SST handle to the SST plate.
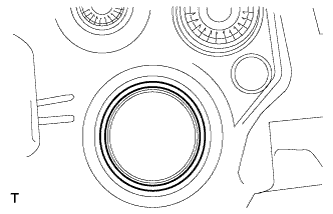
Lightly press down on SST to prevent it from separating from the fuel pump gauge retainer. While pressing SST, rotate the handle slowly to loosen the fuel pump gauge retainer.