INSTALLATION
Removal / installation · Vehicles built Nov 2010 – Jul 2012
Versions by build date: Jul 2007 – Oct 2010 Nov 2010 – Jul 2012 from Aug 2012
| 1. INSTALL IGNITION SWITCH ASSEMBLY (for LHD) |

Connect the connector.
Install the ignition switch with the 2 screws.
| 2. INSTALL IGNITION SWITCH ASSEMBLY (for RHD) |
Install the ignition switch with the 2 screws.
Connect the connector.
Connect the connector clamp to the ignition switch.
| 3. INSTALL LOWER INSTRUMENT PANEL FINISH PANEL (for RHD) |
Connect the connectors.
Engage the 8 clips and 4 guides and install the lower instrument panel finish panel.
Install the 2 <E> bolts.
| 4. INSTALL INSTRUMENT PANEL FINISH PLATE (for RHD) |
Install the instrument panel finish plate.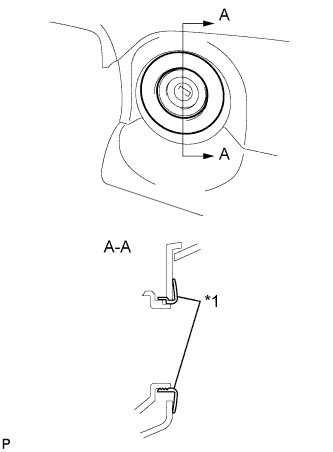

Text in Illustration *1
Instrument Panel Finish Plate
| 5. INSTALL FUEL LID LOCK OPEN LEVER SUB-ASSEMBLY (for RHD) |
Engage the 3 claws and install the fuel lid lock open lever.
| 6. INSTALL HOOD LOCK CONTROL LEVER SUB-ASSEMBLY (for RHD) |
Engage the 3 claws and install the hood lock control lever.
| 7. INSTALL NO.1 INSTRUMENT PANEL REGISTER ASSEMBLY (for RHD) |
Engage the 4 clips and 2 claws and install the instrument panel register.
| 8. INSTALL FRONT DOOR OPENING TRIM WEATHERSTRIP RH (for RHD) |
Install the front door opening trim weatherstrip.
| 9. INSTALL COWL SIDE TRIM BOARD RH (for RHD) |
Engage the 2 claws and install the cowl side trim board.
Install the clip.
| 10. INSTALL FRONT DOOR SCUFF PLATE RH (for RHD) |
Engage the 14 claws and install the door scuff plate.
| 11. CONNECT CABLE TO NEGATIVE BATTERY TERMINAL |
- Torque:
- 3.9 N*m{ 40 kgf*cm , 35 in.*lbf }