REASSEMBLY
Removal / installation · Vehicles built from Jul 2007
| 1. INSTALL PARKING BRAKE SHOE LEVER |

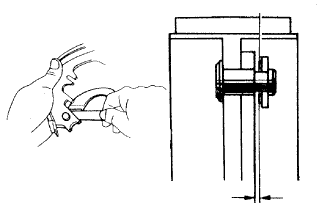  |
Using a feeler gauge, measure the clearance.
- Standard clearance:
- Less than 0.25 mm (0.0098 in.)
Part No.
Shim Thickness
90564-09184
0.3 mm (0.012 in.)
90564-09002
0.4 mm (0.016 in.)
90564-09003
0.5 mm (0.020 in.)
90564-09185
0.6 mm (0.024 in.)
90564-09186
0.9 mm (0.035 in.)
Using pliers, install the parking brake shoe lever and the shim with a new C-washer.
| 2. APPLY HIGH TEMPERATURE GREASE |
Apply high temperature grease to the surface of the backing plate which is in contact with the shoe.
| 3. INSTALL PARKING BRAKE SHOE |
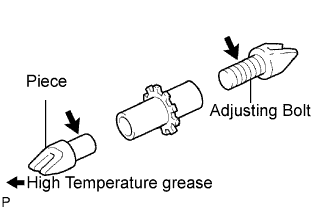 |
Apply high temperature grease to the adjusting bolt and piece.
Using needle-nose pliers, connect the parking brake cable to the parking brake shoe lever.
Install the No. 1 shoe, hold down spring pin, hold down compression spring and 2 hold down spring cups.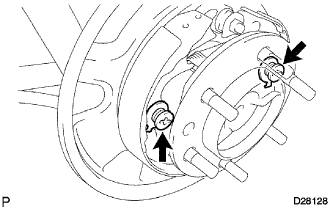
Install the return tension spring and shoe adjusting screw set.
Install the No. 2 shoe, hold down spring pin, hold down compression spring and 2 hold down spring cups.
| 4. INSTALL PARKING BRAKE SHOE STRUT |
Attach the compression spring and parking brake shoe strut to the No. 2 and No. 1 shoes.
| 5. INSTALL PARKING BRAKE SHOE RETURN TENSION SPRING |
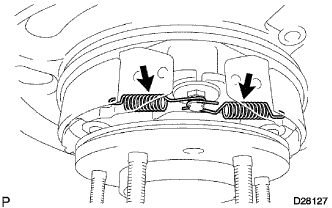 |
Using needle-nose pliers, install the 2 return tension springs.
- HINT:
- First install the front side spring then install the rear side spring.
| 6. CHECK PARKING BRAKE INSTALLATION |
Check that each part is installed properly.
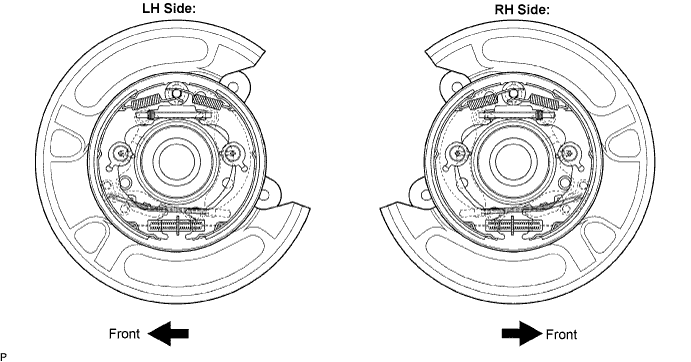
- NOTICE:
- There should be no oil or grease adhering to the friction surfaces of the shoe lining or the disc.